
Summarise this article with:
A merged image prints sharp when it carries about 300 pixels for every inch of finished print, so an 8 by 10 needs 2400 by 3000 pixels. Big posters viewed from a few feet away hold up fine at 150 to 250. Export RGB unless your printer specifically asks for CMYK, and check the bleed before you upload anything.
Merging is where print jobs quietly go wrong. A collage built from four phone photos can look perfect on a laptop and arrive as a soft 12 by 18. Here is the arithmetic that decides which one you get.
Understanding Print Resolution
Start with the pair of words everyone mixes up.
PPI is a property of your file. Pixels per inch describes how many pixels land in each inch of the finished print, and it only means anything once you have chosen a physical size.
DPI is a property of the machine. Dots per inch counts the ink droplets a printer lays down. A 1200 DPI inkjet is not asking you for 1200 pixels per inch; it sprays many dots to build one pixel of colour.
The print trade uses the two words interchangeably anyway, right down to Printful's own glossary defining DPI as "the number of dots or pixels per inch." Read any vendor requirement as pixels per inch of finished size, whichever label they used.
The numbers vendors actually publish:
- Vistaprint: "The most common DPI for posters are 300 DPI for close viewing and 150-250 DPI for larger posters," because as viewing distance grows "the eye can't pick out ultra-fine detail, so a higher DPI stops paying off."
- Bay Photo Lab recommends 250 dpi for photographic prints.
- Printful needs at least 150 DPI for most products, 300 for small items like mugs and phone cases.
One claim to drop entirely: "web standard is 72 DPI." A screen image has no inherent resolution, and the PPI number stored in a file's metadata changes nothing about how it displays in a browser.
Calculating Print Size
Two lines of arithmetic cover the whole topic. Pixels divided by PPI gives inches. Inches multiplied by PPI gives the pixels you need.
A 3000 by 2000 image prints at 10 by 6.67 inches at 300 PPI, or 20 by 13.33 inches at 150 PPI. Same file, different promise about how close someone will stand.
Merging changes that arithmetic in a way people forget. Two 1500 px wide photos joined side by side give a 3000 px panel, which is 10 inches at 300 PPI, so a 20 inch wide print of it is already down to 150. Stack the same two vertically and the width never grows at all.
I learned this the expensive way with an 8 by 10 ordered from a merged panel that was 1400 by 1750 pixels. That is 175 PPI, and it came back soft enough to notice at arm's length. The file I should have sent was 2400 by 3000.
Color Considerations
RGB is additive light, CMYK is subtractive ink, and converting between them shifts saturated colours. What matters is that the right answer depends on who is printing.
Try it hereOpen the AI upscalerUpscale an imageSharpen and enlarge low-resolution images with AI, free to try.
Consumer photo labs and print-on-demand services want RGB. Bay Photo asks that the "embedded color space should be either sRGB or Adobe RGB" and warns that wider gamuts like ProPhoto RGB may not reproduce. Their machines do the separation themselves.
Commercial press vendors want CMYK. Vistaprint tells poster customers to "convert to CMYK" for reliable colour and notes that RGB files can "look dull in print" without it.
Check the vendor's spec page before converting anything. And note the practical constraint: PNG and JPEG are RGB formats, so anything exported from a browser tool, ours included, is RGB. A CMYK PDF means a desktop step.
What to actually do about colour: calibrate the monitor if you print often, soft proof when your software supports it, and order one small test print before a large run. Prints come back darker and flatter than a backlit screen, especially on matte paper, so the test print becomes your reference rather than the display.
File Format Selection
TIFF is lossless, large, and the traditional press format. Use it when a vendor asks for it.
JPEG at quality 90 or above is what most photo labs prefer, and Bay Photo says outright that JPG is its preferred format. The "always export at 100%" habit mostly buys file size.
PNG is lossless and keeps transparency, which matters when a layout has rounded corners or a knocked-out background. It is RGB only.
PDF is what commercial printers want for anything with bleed, trim marks or multiple pages.
Exporting one collage both ways gave me a 14 MB PNG and a 2.1 MB JPEG at quality 90, and the two 8 by 10 prints were indistinguishable. I send the JPEG now unless the layout has transparency in it.
Preparing Merged Images
Work from the largest originals you have, not the copies a messaging app compressed on the way to your phone.
- Decide the finished print size first, then multiply by 300 to get the pixel target.
- Even up the sources before joining them. Our image resizer matches the short side so one photo is not scaled twice.
- Build the layout in the photo collage maker and keep the output at full size.
- Compress only at the very end, with the image compressor.
If one source falls short, our AI upscaler can bridge a modest gap. Be clear about what it does, though: it interpolates and invents plausible pixels, and it cannot recover detail the camera never captured. Printful makes the same point about enlarging a file or raising its DPI, and Bay Photo notes that its printers render every image at the optimum resolution for the size but that "this will not improve the quality of low-resolution files."
Print Service Requirements
Online consumer services accept JPEG, PNG and often TIFF, apply their own colour management, and warn you in the preview when a file is too small for the size you picked. Heed that warning.
Commercial printers are stricter. Vistaprint asks for a 0.125 inch bleed on every side and wants text, logos and QR codes at least 0.25 inches inside the safe zone. Bleed exists because trimming is mechanical and never lands exactly on the line, so the background has to run past the cut.
Home printers scale and sharpen on their own, so run a test page before spending good photo paper.
Common Print Sizes
Pixel targets at the 300 PPI standard and at the 150 PPI floor for large work viewed from a distance:
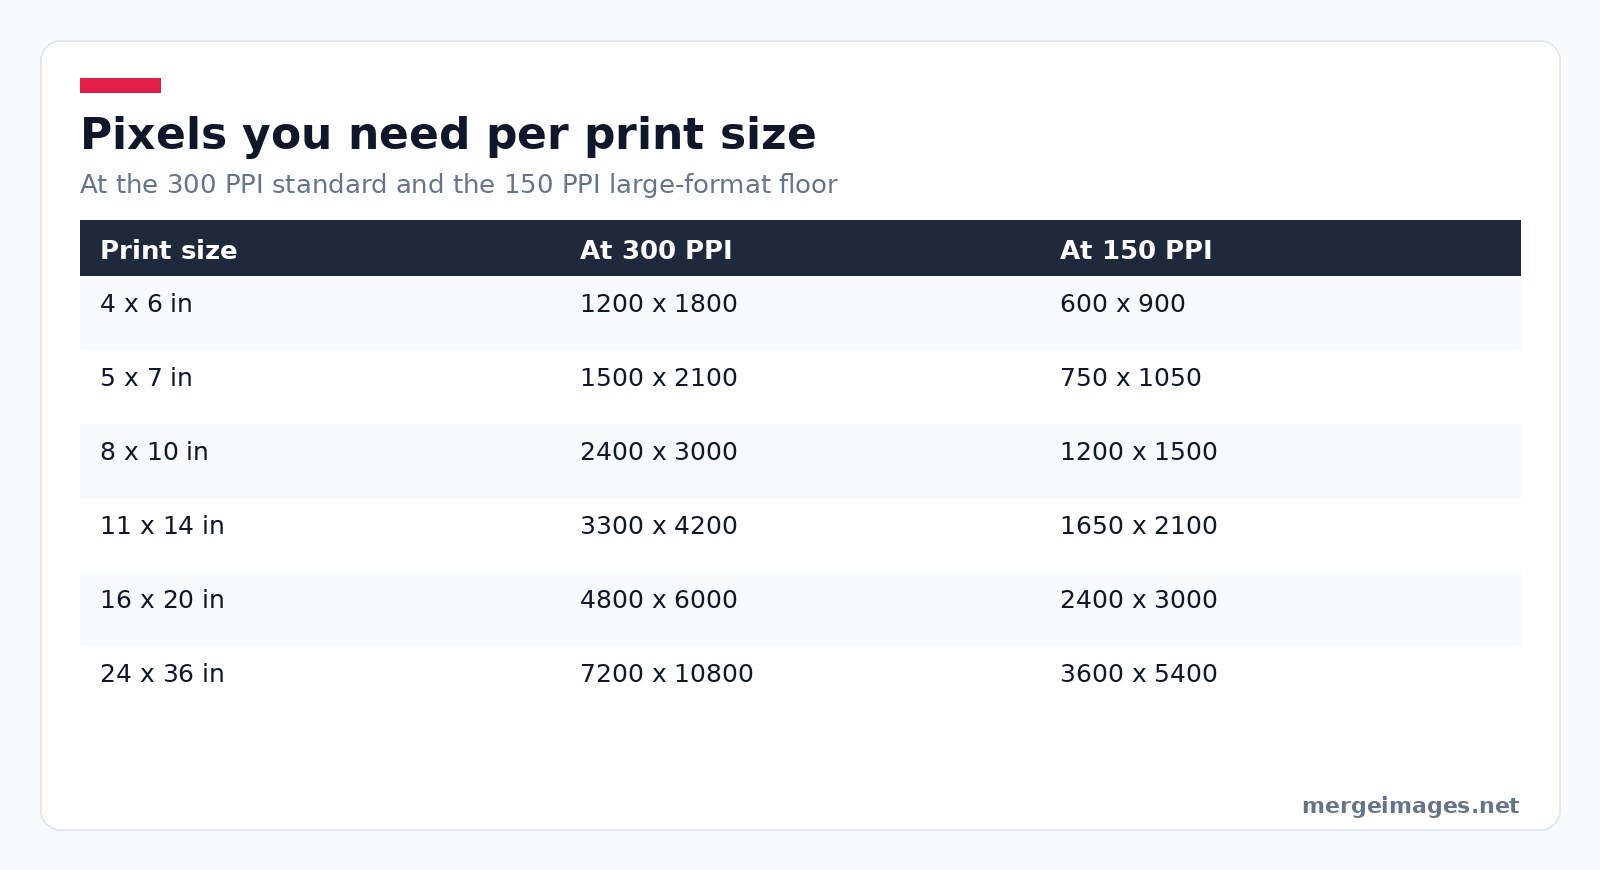
| Print size | Pixels at 300 PPI | Pixels at 150 PPI |
|---|---|---|
| 4 x 6 in | 1200 x 1800 | 600 x 900 |
| 5 x 7 in | 1500 x 2100 | 750 x 1050 |
| 8 x 10 in | 2400 x 3000 | 1200 x 1500 |
| 11 x 14 in | 3300 x 4200 | 1650 x 2100 |
| 16 x 20 in | 4800 x 6000 | 2400 x 3000 |
| 24 x 36 in | 7200 x 10800 | 3600 x 5400 |
The 11 by 14 and 16 by 20 figures match what Shutterfly publishes for its own large-format prints, so they are not just theory.
Troubleshooting Print Issues
Blurry print. Almost always resolution. Divide the pixel width by the print width in inches and see what you actually sent.
Colour looks wrong. Either the monitor is uncalibrated or an RGB file went to a CMYK press without conversion. Saturated blues and oranges shift first.
Banding in skies or gradients. Usually over-compression, or an 8-bit gradient stretched too far.
Visible seams between merged photos. Different exposures, not a printing fault. Match the two images before merging.
Print Product Ideas
The product changes the spec. Canvas wraps eat 1 to 2 inches on each edge, so anything important sits well inside the frame. Metal and acrylic push contrast and make soft focus obvious, which is the wrong surface for a rescued file. Posters are the forgiving option, since nobody stands 10 inches from a 24 by 36.
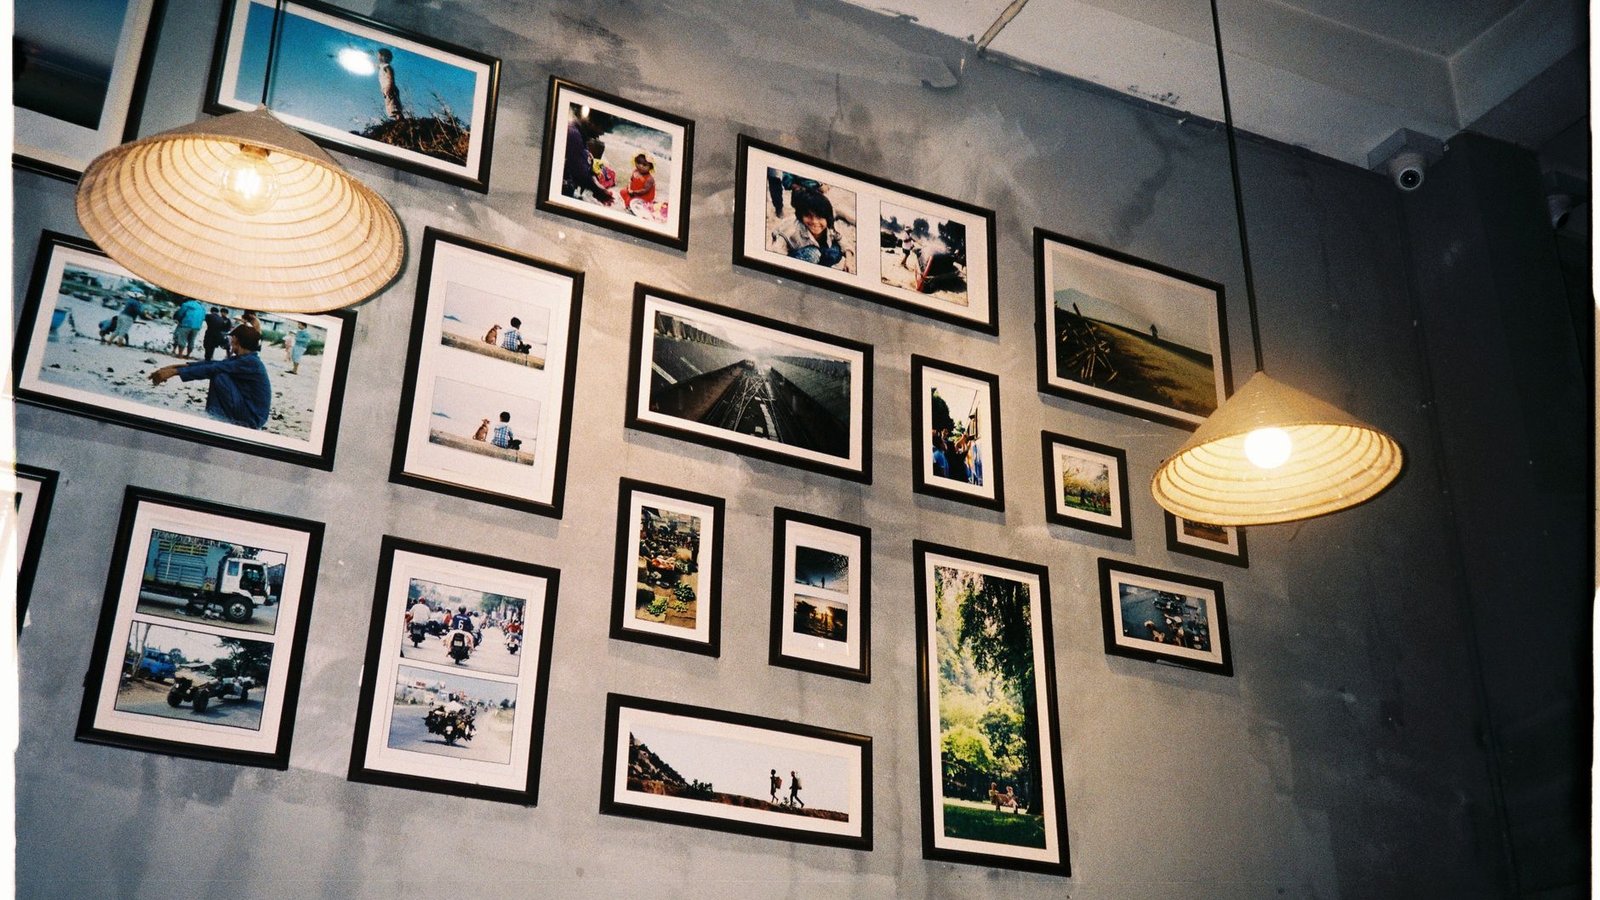
Photo: Anthony Nguyen via Pexels
Frequently Asked Questions
Does changing the DPI number in my file make the print sharper?
No. That number is metadata describing an intended physical size. Setting a 1500 by 2100 file to 300 PPI without resampling tells the printer to lay it down at 5 by 7 inches; setting it to 72 asks for 20 by 29 inches. The pixels are identical either way, and only resampling adds or removes them.
Can I upscale a small photo before merging it?
Sometimes, if the file is 20 or 30% short of the target. It cannot invent detail that was never captured, so a 600 px wide photo blown up for a 16 by 20 will look processed rather than sharp. Printful says the same about its own products: enlarging a file does not fix a low-quality original.
Do I need to convert my merged image to CMYK?
Only if the printer asks. Photo labs and print-on-demand services want sRGB and separate the colours themselves. Commercial press vendors like Vistaprint ask for CMYK. Since PNG and JPEG are both RGB formats, a browser tool cannot hand you a CMYK file, so plan a desktop step if your vendor requires one.
Is 150 PPI ever good enough?
Yes, for anything viewed from more than a couple of feet. Vistaprint puts large posters in the 150 to 250 range for that reason. A 24 by 36 poster at 150 PPI needs 3600 by 5400 pixels, which is reachable, while the same poster at 300 PPI needs 7200 by 10800 and rules out most cameras.
Before You Order
Pick the finished size, multiply each dimension by 300, and check that your merged file actually holds those pixels. That one calculation prevents most bad prints.
The rest is vendor-specific: read their spec page, match their colour space, respect their bleed, and buy a small test print first. Merged layouts deserve the extra care, because a seam nobody notices on screen is the first thing the eye finds on paper.

Bello builds useful software and writes thoughtful content to make sense of it all. He tests the tools himself and checks the facts before any of it goes in a guide.
Try Our Free Image Tools
Ready to Try It?
Put these tips into practice with our free online image merger. No signup required.
Merge Images Now


