
Summarise this article with:
If you stream on Twitch, your channel graphics are both a viewer experience tool and a branding opportunity. Professional overlays, panels, and profile art signal that you take your content seriously, which influences whether new viewers stick around or click away immediately. This guide covers every Twitch graphic type with exact dimensions, design principles, and a preparation workflow for 2026.
Twitch Profile Picture
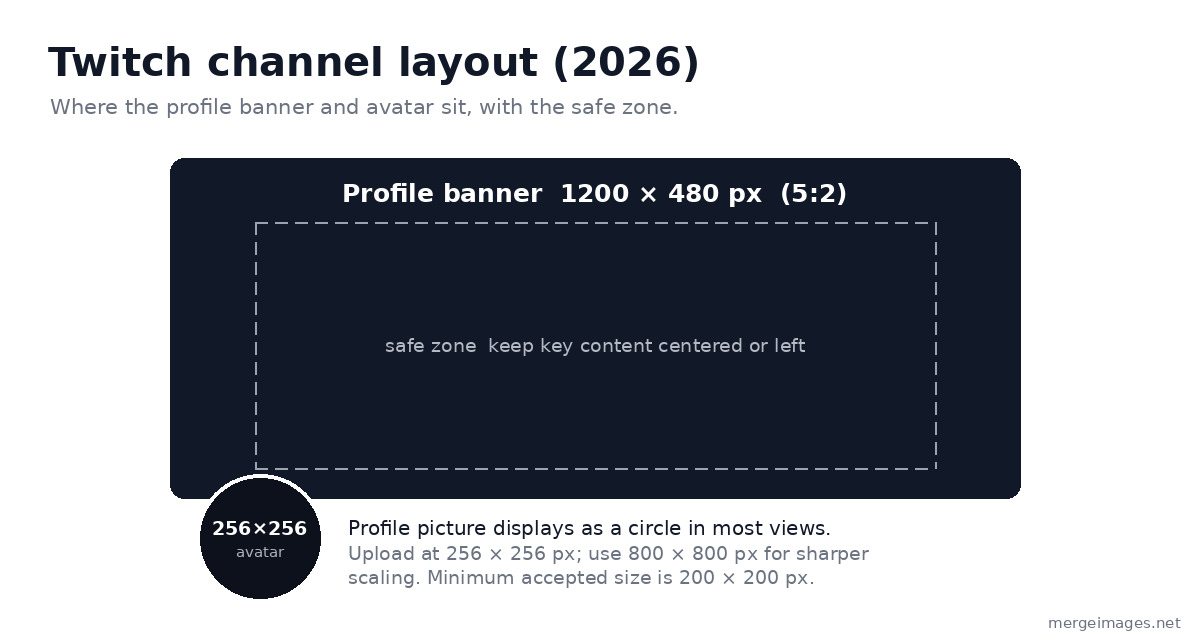
Your Twitch profile picture appears in the channel sidebar, on your channel page, and in directory listings when you're live. It's your most persistent visual identifier across the platform, and Twitch renders it as a circle in most of those surfaces.
Recommended specs:
- Dimensions: 256 × 256 px recommended (upload at 800 × 800 px for sharper scaling)
- Minimum accepted size: 200 × 200 px
- Aspect ratio: 1:1 (square source, displayed as a circle in most views)
- Format: JPG, PNG, or GIF (animated)
- Max file size: 10 MB
Twitch scales anything larger than 256 × 256 px down, so a higher-resolution source like 800 × 800 px stays crisp at every display size. Design for maximum legibility at small sizes. Most viewers encounter your profile picture at under 100 px, and in some chat contexts it drops to roughly 28 px, so your design must read clearly at that scale. Use the profile picture maker to frame and crop any logo or portrait to the exact square format before uploading.
Avoid text in profile pictures unless it's a single bold character or a very short abbreviation. Text that looks fine at 256 px becomes illegible at 28 px in sidebar and chat contexts.
Twitch Channel Banner
The profile banner is the wide image displayed at the top of your Twitch channel page. It's your most prominent piece of static branding.
Recommended specs:
- Dimensions: 1200 × 480 px
- Aspect ratio: 5:2
- Format: JPG or PNG
- Max file size: 10 MB
Twitch scales the banner responsively for different screen sizes. Images shorter or taller than 480 px get scaled to 480 px high, and the image stretches when a browser window is wider than the image, so the far edges can get cropped or distorted. Keep all critical content (logo, text, key visuals) toward the center, and lean slightly left, because Twitch's own guidance is to concentrate graphics on the left side. Avoid placing anything important right at the edges.
Common banner content:
- Channel name and any tagline
- Streaming schedule
- Social media handles
- A visual representation of your content type (game characters, stream aesthetic)
Twitch Offline Screen
When you're not live, Twitch displays an offline screen in the video player area, either a static image or a short looping video. Many streamers treat this as a branding opportunity instead of leaving the default placeholder.
Recommended specs:
- Dimensions: 1920 × 1080 px (16:9)
- Format: JPG or PNG for a static image, or MP4/MOV for an animated offline screen (under 10 MB)
The offline screen is a missed opportunity for many streamers. Use it to:
- Display your streaming schedule prominently
- Show your social media handles and community links
- Communicate your content niche to new visitors discovering you through channel browsing
- Display a "be right back" or "stream starting soon" message during breaks
Because it fills the same 16:9 player as your live video, keep the composition clean and readable at a glance. The image resizer makes hitting an exact 1920 × 1080 px frame straightforward.
Stream Overlay
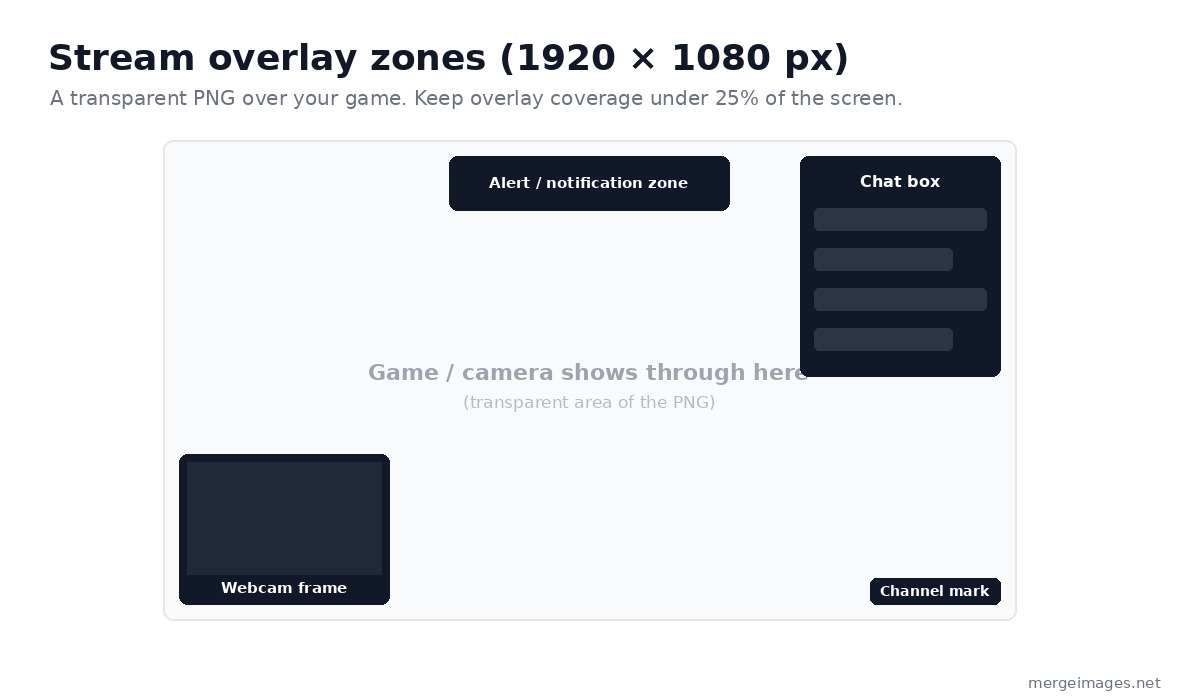
The stream overlay is a transparent PNG layer placed over your live game capture or webcam feed in your broadcasting software (OBS, Streamlabs, and similar). It includes webcam border frames, chat boxes, alert notification areas, and channel branding.
Required specs:
- Dimensions: 1920 × 1080 px
- Format: PNG with a transparent background (essential, because without transparency the overlay covers your stream)
- Key principle: Less is more. The game should be the primary focus.
Overlay design guidance:
- Keep total overlay coverage below 25% of the screen area
- Use semi-transparent elements rather than fully opaque panels where possible
- Size the webcam border to frame your camera feed without dominating the composition
- Match the color palette to all your other channel graphics
Twitch Panels
Panels are the information sections below your stream, visible to every channel visitor. Each panel has a header image and optional text content below it.
Recommended specs:
- Width: 320 px (Twitch scales panels to fit the channel page)
- Height: up to 600 px, though most streamers keep panels between 100 px and 160 px tall for a clean look
- Format: JPG or PNG
- Max file size: 2.9 MB per panel
Common panel types and their content:
- About Me: Brief bio, content niche, streaming setup
- Schedule: Days and times you stream
- Social Links: Twitter/X, Instagram, YouTube, Discord server
- Subscribe Benefits: What channel subscribers receive
- Donations/Support: Preferred support method
- PC Specs: Hardware list for viewer questions
- Rules: Chat conduct expectations
All panels should share the same visual design, meaning a consistent background color, typography, and visual style. A common, clean choice is a 320 × 160 px header image repeated across every panel.
Twitch Emotes
Custom channel emotes are one of Twitch's highest-engagement community features. Subscribers unlock emotes at different tiers, and with Channel Points, non-subscribers can unlock emotes too.
Required upload sizes (all three required):
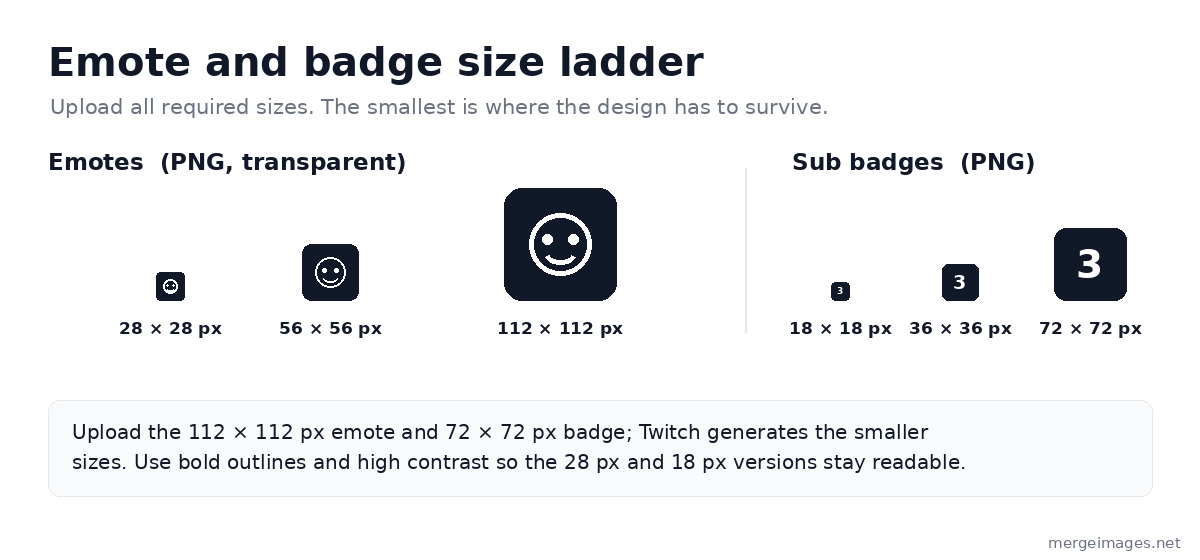
- 28 × 28 px (small chat display)
- 56 × 56 px (medium display)
- 112 × 112 px (full size)
Upload the 112 × 112 px version and Twitch generates the smaller sizes automatically, but creating all three at pixel-perfect quality ensures the best result at each display context. Static emotes are PNG; animated emotes are GIF.
Emote design principles:
- Single, simple concept, such as a face, an object, or a symbol
- Bold outlines (2-3 px at the 112 px canvas size) that define the shape at small sizes
- High-contrast, bright colors
- Transparent PNG background
Subscriber Badges
Subscriber badges appear next to subscriber usernames in chat and alongside the channel name in category pages.
Required sizes (all three required, PNG, under 25 KB each):
- 18 × 18 px
- 36 × 36 px
- 72 × 72 px
At 18 px, complexity disappears. Use simple geometric shapes, single numbers (indicating subscription months or tier), or single characters. The badge should clearly relate to your channel identity but must function as a recognizable mark at tiny sizes.
Complete Twitch Dimensions Reference
| Asset | Dimensions | Format | Key Notes |
|---|---|---|---|
| Profile picture | 256 × 256 px (upload 800 × 800 px) | JPG, PNG, GIF | Min 200 × 200 px; shown as a circle in most views |
| Channel banner | 1200 × 480 px (5:2) | JPG, PNG | Keep key content centered or left (responsive crop); max 10 MB |
| Offline screen | 1920 × 1080 px (16:9) | JPG, PNG, MP4 | Show schedule and socials |
| Stream overlay | 1920 × 1080 px | PNG (transparent) | Cover under 25% of screen area |
| Panels | 320 px wide, up to 600 px tall | JPG, PNG | Max 2.9 MB per panel |
| Emotes | 28 / 56 / 112 px (square) | PNG (transparent), GIF if animated | All 3 sizes required |
| Sub badges | 18 / 36 / 72 px (square) | PNG (transparent) | All 3 sizes required, under 25 KB |
Building a Cohesive Channel Identity
The most professional Twitch channels maintain visual consistency across every touchpoint. Viewers notice when panels look different from the overlay, or when the profile picture shares no visual DNA with the banner.
Building visual consistency:
- Choose 2-3 primary colors and use them across all assets
- Select 1-2 fonts and use them consistently
- Establish an overall aesthetic (dark and dramatic, bright and energetic, minimal and clean) and apply it everywhere
- Create a simple brand mark or logo that appears across the profile picture, overlay watermark, and panels
The background remover helps isolate design elements for compositing into overlays and panels without unwanted backgrounds. For arranging multiple screenshots or screen capture images from your streams, the photo collage maker creates layouts for social media promotion.
For related design guidance, see our gaming screenshot collages guide and YouTube channel art guide. Many visual principles transfer directly between streaming platforms.
Starting vs. Upgrading: A Practical Path
If you're starting from scratch, prioritize in this order:
- Profile picture and channel banner first. These are visible to every visitor whether you're live or not.
- Offline screen. This makes the channel look active and inviting when you're not streaming.
- Panels. These provide essential information to new viewers.
- A basic stream overlay. A simple frame for your webcam is enough to start.
- Emotes and badges. Create these once you have consistent viewers to use them.
As your channel grows, investing in custom emotes and a more elaborate overlay pays off increasingly. Early on, a clean, simple set of graphics beats an elaborate but inconsistent design.
Frequently Asked Questions
What is the best size for a Twitch profile picture?
Upload at 256 × 256 px, the size Twitch recommends, and use an 800 × 800 px source for the sharpest result since Twitch scales larger images down. The minimum accepted size is 200 × 200 px. Twitch displays profile pictures as small as roughly 28 px in some chat contexts, so a high-resolution square source keeps the image crisp at every size.
Do Twitch stream overlays need a transparent background?
Yes. Overlays must be PNG files with transparent backgrounds. Without transparency, the overlay would be a solid rectangle covering your stream content. Only the decorative frame elements, borders, and graphic elements should be visible; everything else must be transparent so your game or camera shows through.
How do I make Twitch emotes that still look good at 28 px?
Design for the smallest size first. If the concept reads clearly at 28 × 28 px, build up detail for the larger sizes. Thick outlines (2-3 px at the 112 px canvas size), high contrast, and bold simple shapes all help emotes remain recognizable at the smallest display sizes.
Can I use the same overlay for both 1080p and 720p streaming?
Yes. Design your overlay at 1920 × 1080 px regardless of your current stream resolution. If you stream at 720p, your broadcasting software (OBS, Streamlabs) scales the overlay to fit. Designing at 1080p future-proofs your assets if you upgrade your stream quality.
How long does it take to create a full set of Twitch graphics?
A basic set (profile picture, banner, offline screen, and basic panels) takes a few hours if you're using a template-based design tool. A fully custom set with original artwork for overlays and emotes might take a weekend or more. Starting with a consistent template and customizing incrementally is a practical approach for new streamers.
Conclusion
Professional Twitch graphics don't require a graphic design background, but they do require attention to dimensions and visual consistency. Start with a profile picture at 256 × 256 px, a channel banner at 1200 × 480 px, an offline screen at 1920 × 1080 px, and panels at 320 px wide, then build out your overlay and emotes as your channel grows. Use the image resizer for exact dimensions, the background remover for transparent overlay and panel elements, and the profile picture maker for a polished channel avatar. Visual professionalism signals content professionalism, and that first impression affects whether new viewers click "Follow."

Bello builds useful software and writes thoughtful content to make sense of it all. He tests the tools himself and checks the facts before any of it goes in a guide.
Try Our Free Image Tools
Ready to Try It?
Put these tips into practice with our free online image merger. No signup required.
Merge Images Now

