
Summarise this article with:
Answer Capsule
A well planned collage turns hundreds of wedding shots into one visual story. Using three free tools Photo Collage Maker, Image Cropper, and Image Resizer you can design timeline strips, heart shaped layouts, or classic grids in an hour. Choose 5 to 9 photos, set a 20 pixel white border, and download a high resolution file.
Why Collages Matter
Weddings move fast. Emotions blur. Details flash by. One single image cannot hold all that breadth. Collages let you place the quiet moment of a dress fitting right next to the loud cheers at the reception. They also give you a tight way to share highlights on Instagram, packing an entire narrative into one post.
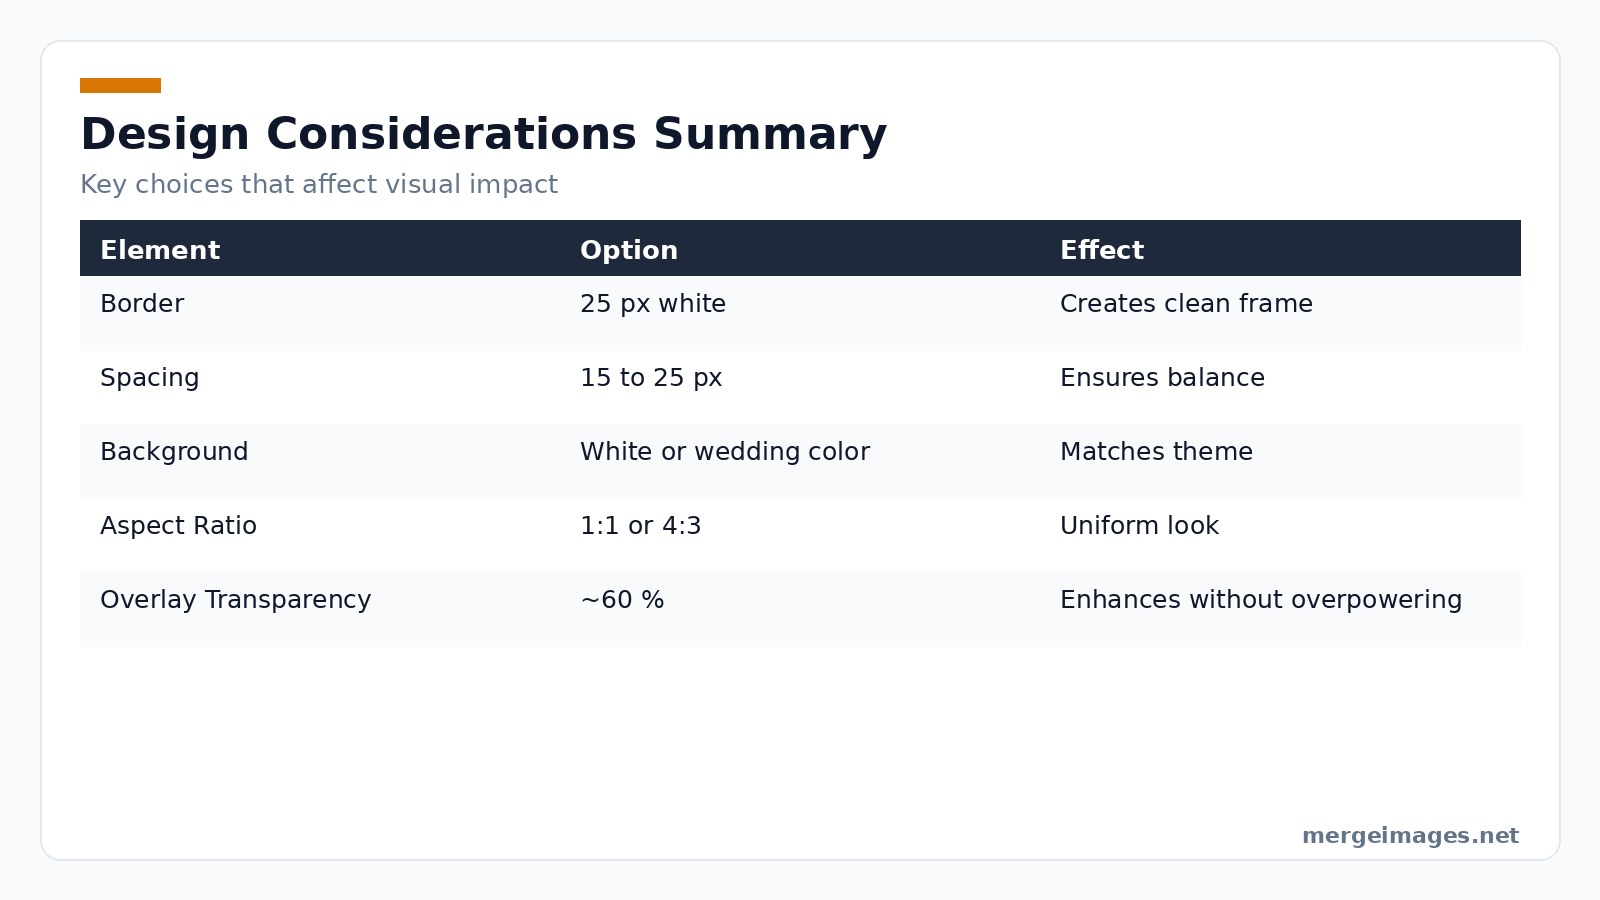
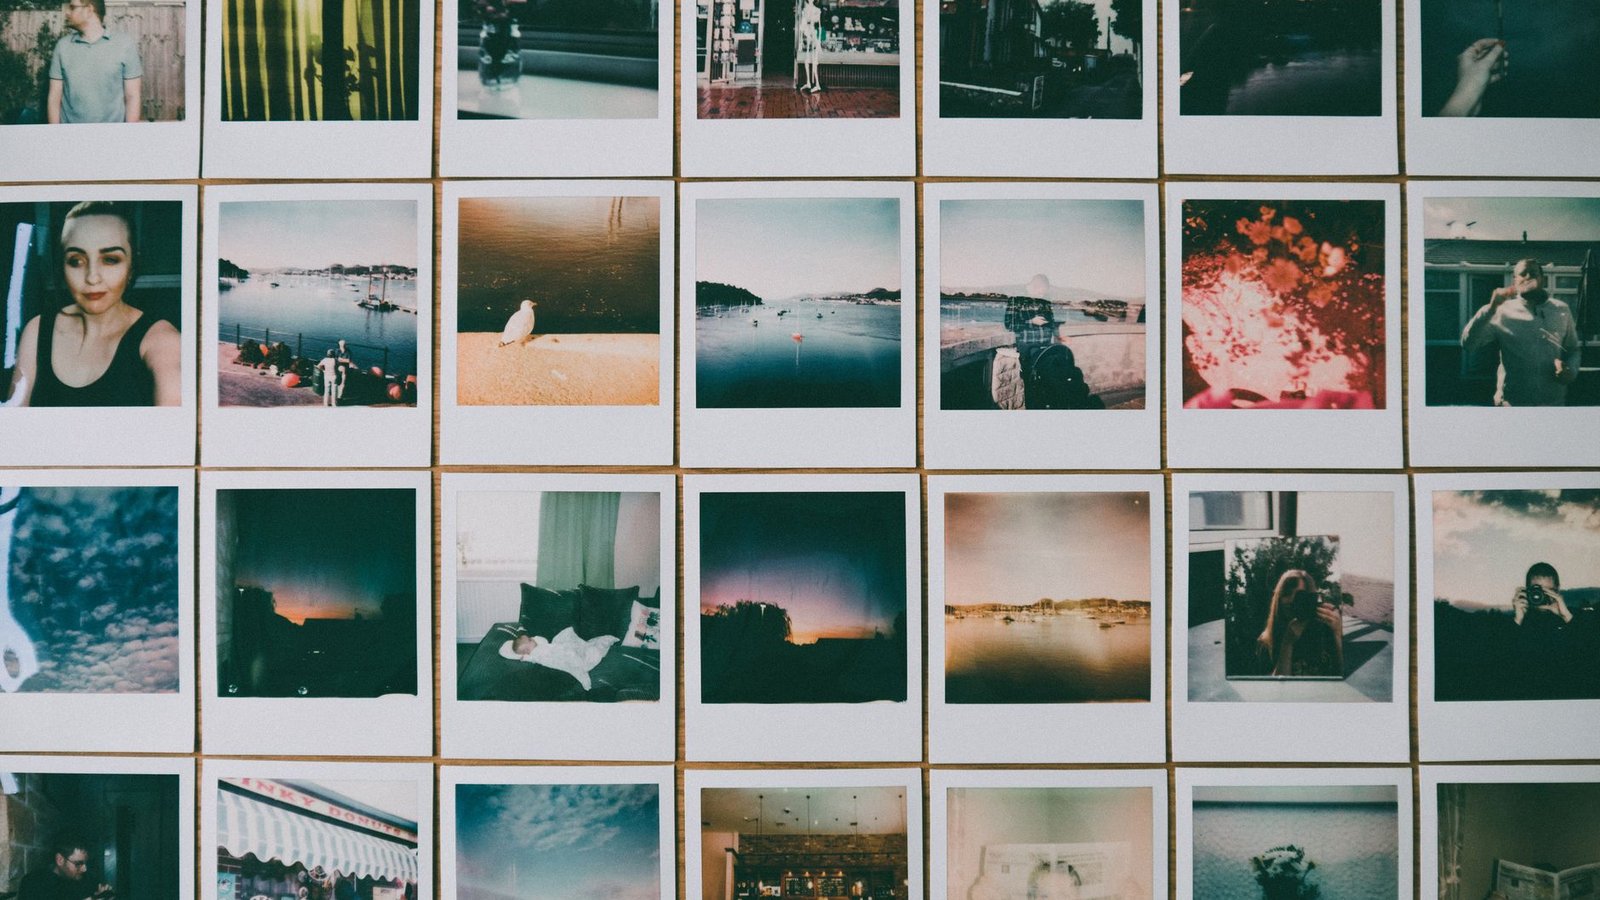
Photo: Lisa from Pexels via Pexels
Wedding Collage Layout Ideas
Chronological Strips
Arrange photos in strict chronological order to map the day. Begin with the dress up. Move through the ceremony. Finish with the send off. Keep each frame the same size. Uniform sizing prevents the eye from jumping erratically across the page.
Grouping by Theme
Group shots by visual theme instead of time. Build a Details block to showcase rings, bouquets, and invitation cards. Build a People block to gather family portraits. This method shines for thank you cards where you want to highlight specific aspects of the celebration.
Side by Side Moments
Place two related moments next to each other. A popular pair is the bride’s makeup before and after the final touch up. Another effective comparison is the groom’s reaction during the vows versus his smile at the reception.
The Workhorse Grid
A 3x3 arrangement is the workhorse of wedding collages. Nine equally sized photos create a clean balanced look that fits most album pages. Use a 25 pixel white border only when the background of each photo contrasts well with white. Otherwise, a softer gray keeps the frame from overwhelming the image.
Hero Shot Focus
Select one hero shot. Perhaps the first kiss. Place it in the centre at double size. Fill the surrounding spaces with smaller supporting images. Animate the border and the hero image together when you later import the collage into a slideshow to ensure a synchronized entrance.
The Film Strip
Lay out 4 to 6 images horizontally to mimic a film strip. This format dominates on social media because it reads naturally on mobile screens. Set the strip’s transition to a 2 second match and move effect in your slideshow app to avoid abrupt jumps.
The Heart Outline
Arrange photos along a heart outline for a romantic touch. Use the Image Cropper to trim each picture to a square. Position them manually in a graphic editor before merging. The result works beautifully on wedding thank you cards and bedroom wall art.
Preparing Your Images
Picking the Right Shots
1 Review all images together with your partner. 2 Sort into folders: preparation, ceremony, reception, details. 3 Pick 5 to 9 pictures per collage, mixing close ups and wide shots.
Sizing for Uniformity
When I resize a 4000x3000 portrait to 1200x900 using the Image Resizer, the file shrinks from 4MB to roughly 250KB. This size is ideal for web sharing while still looking crisp on a 12 inch print.
Locking Aspect Ratios
The Image Cropper lets you lock a 1:1 or 4:3 ratio with a single click. Cropping a landscape to 4:3 instantly shows the new canvas. You can confirm the composition before moving on. Consistent ratios keep the collage grid tidy.
Adding Subtle Borders
A white border of 25px gives a clean frame. Apply it only if the image’s background isn’t already light. Lower the opacity of any overlay such as a lens flare to about 60% in Canva before exporting so the border remains the dominant visual cue.
Compressing for Web
Run the final set of images through the Image Compressor. A high resolution JPEG at 80% quality often drops below 1MB. This keeps the overall collage file manageable for email or cloud upload.
Building the Collage with MergeImages
Step by Step Workflow
1 Crop each selected photo to the same aspect using the Image Cropper. 2 Resize them to the target dimensions (for example 1200x1200 for a square grid) with the Image Resizer. 3 Upload the prepared images to the Photo Collage Maker. 4 Choose a layout template that matches your chosen style grid, strip, or heart. 5 Set spacing to 20px for a balanced look; adjust the background color to match your wedding palette. 6 Preview the collage. If a border looks too harsh, reduce the spacing or switch the background to a soft gray. 7 Download the high resolution PNG or JPEG.
Practitioner Insight
When I placed a 25 pixel white border around each image in a heart shaped collage, the overall file grew by only 12KB. The visual separation was immediate. The border acted like a subtle cue that guided the viewer’s eye from one memory to the next.
Advanced Tricks
Layering Transparent Overlays
If you want a delicate sparkle over the bride’s dress, create a PNG flare in Canva. Set its transparency to 60%. Use the Overlay Images tool to place it on top of the resized photo. The result adds elegance without drowning the original image.
Custom Frames with Free Tools
For a custom frame collage, start with a solid color shape in Canva. Overlay a table grid. Export as PNG. Convert to SVG on picksvg.com, then to PDF in Figma. Import the PDF back into Canva. Delete the placeholder images. You now have a ready made frame where each cell can hold a wedding photo or even a short video. This workflow requires external apps. The final frame can be merged with your other images using MergeImages if you first export each cell as a separate PNG.
Cutting Backgrounds
When a photo includes a distracting background, run it through the Background Remover. The resulting transparent PNG fits neatly into any frame without a halo of unwanted color.
Exporting and Printing
Picking File Formats
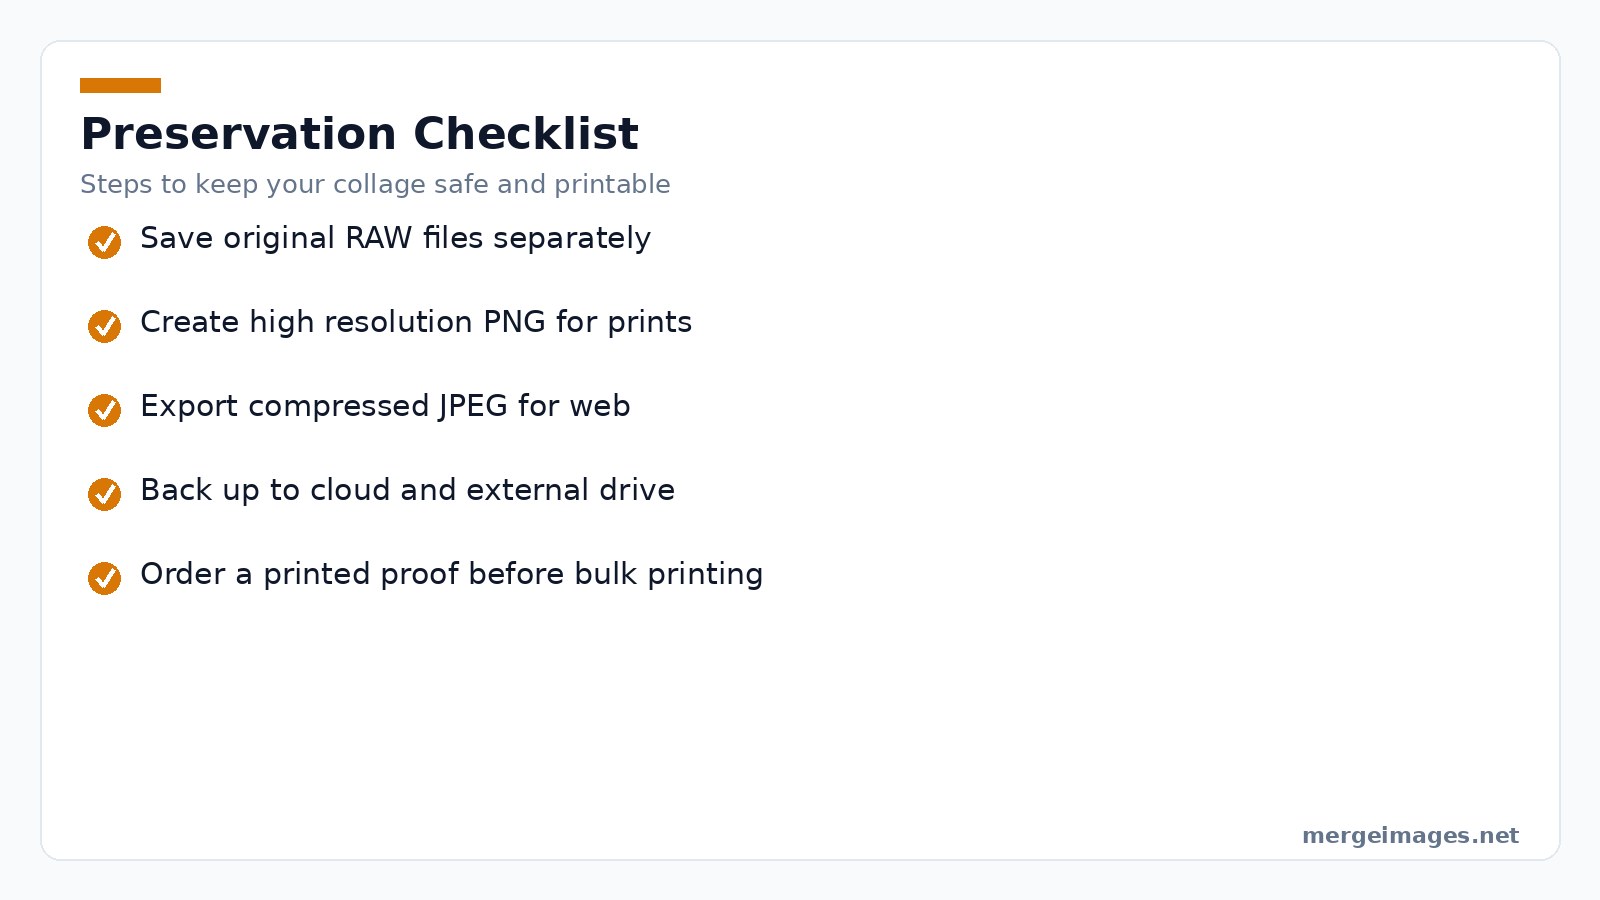
Export as PNG for crisp edges, especially if you added transparent overlays. Use JPEG for large format prints where slight compression won’t be noticeable.
Resolution Targets
For a 24 inch canvas, aim for at least 300dpi. Your final image should be roughly 7200x7200 pixels if you’re using a square layout. The Image Upscaler can give you a preview at that size. Remember the free preview includes a watermark.
Print Ready Checks
1 Verify that all borders are fully visible with no clipping at the edges. 2 Confirm the color profile matches your printer’s requirements as sRGB is safe for most online services. 3 Save a copy of the original high resolution files in cloud storage before compressing for web use.
Preservation Tips
Keep the original RAW files untouched because they are your safety net. Create separate versions for social media, prints, and album pages. Back up to at least two locations like a cloud drive and an external hard drive. When ordering professional prints, request a proof to ensure colors match your digital collage.
Frequently Asked Questions
How many photos should I include in a wedding collage?
Five to nine images strike a good balance between storytelling and visual clarity.
Can I use the collage for both print and online sharing?
Yes, export a high resolution PNG for print and a compressed JPEG for social platforms.
Do I need a paid subscription to use the Photo Collage Maker?
No, all tools on MergeImages are free and work directly in the browser.
What if my photos have different orientations?
Crop them to a common aspect ratio with the Image Cropper before merging.
Is it safe to upload my wedding photos to an online tool?
MergeImages processes images locally in your browser and does not store them on a server.

Bello builds useful software and writes thoughtful content to make sense of it all. He tests the tools himself and checks the facts before any of it goes in a guide.
Try Our Free Image Tools
Ready to Try It?
Put these tips into practice with our free online image merger. No signup required.
Merge Images Now


