
Summarise this article with:
A compliant US passport photo takes under 10 minutes to produce at home if you nail the exact measurements lighting rules and digital checks. The State Department demands a 2in x 2in image 600dpi minimum and a neutral expression. Nothing more. Nothing less.
Official US Passport Photo Specifications
The State Department publishes a single page spec sheet. Zero room for interpretation. Print size holds at 2x2 inches (51x51 mm). Digital files need at least 600x600 pixels. The upper bound sits at 1200x1200 pixels to keep file size manageable without sacrificing detail. JPEG is the only accepted format. Save the image in the sRGB color space with 24 bit depth.
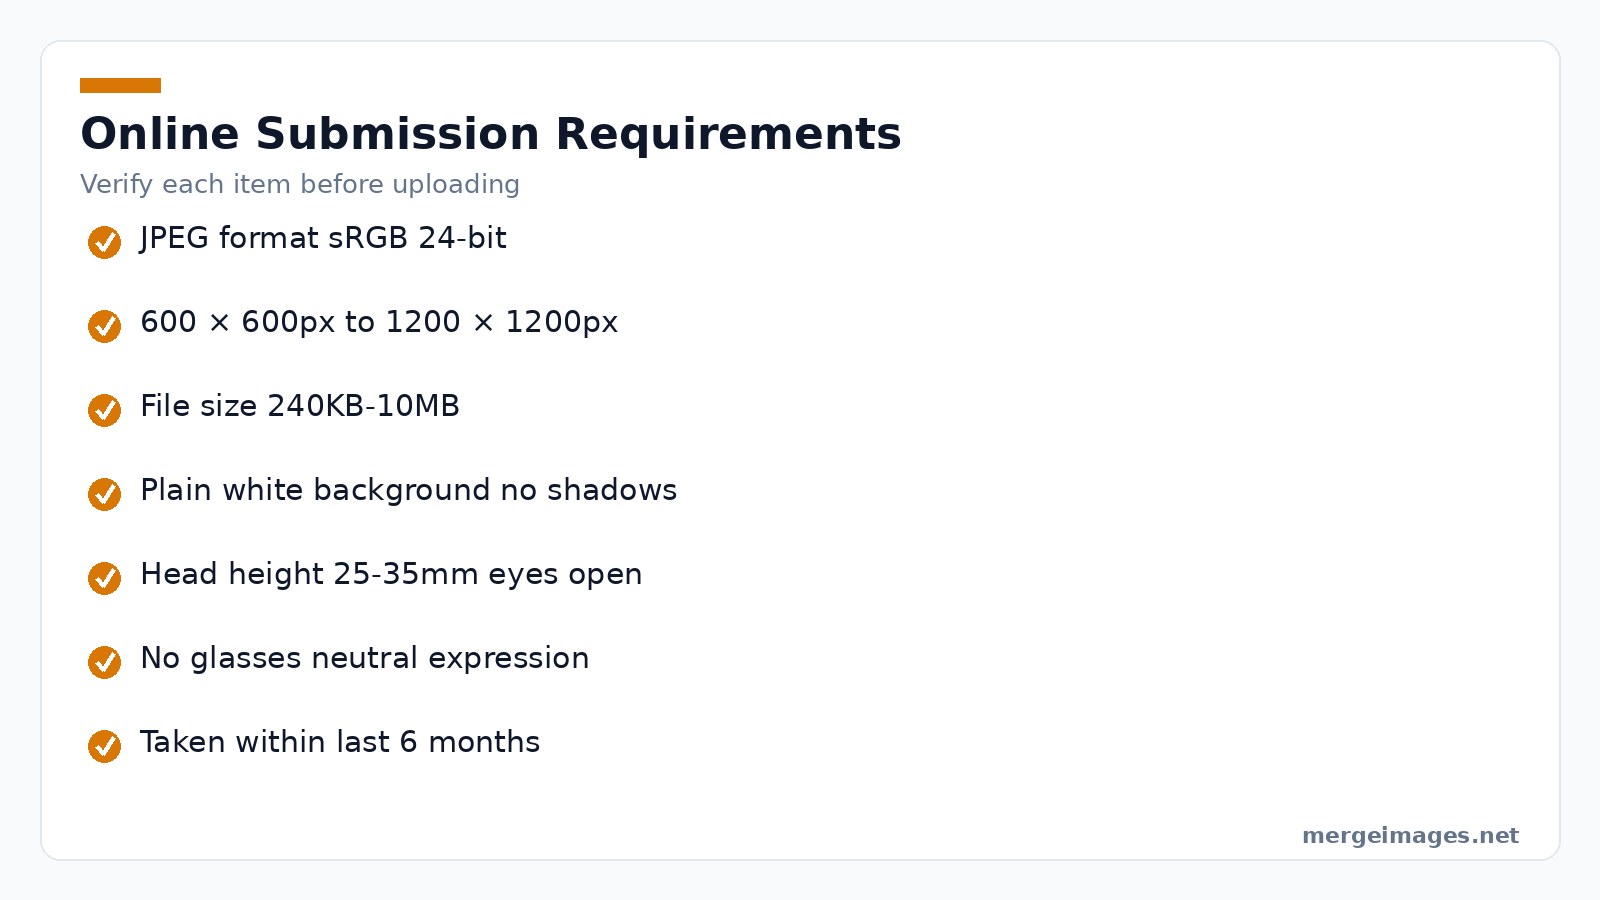
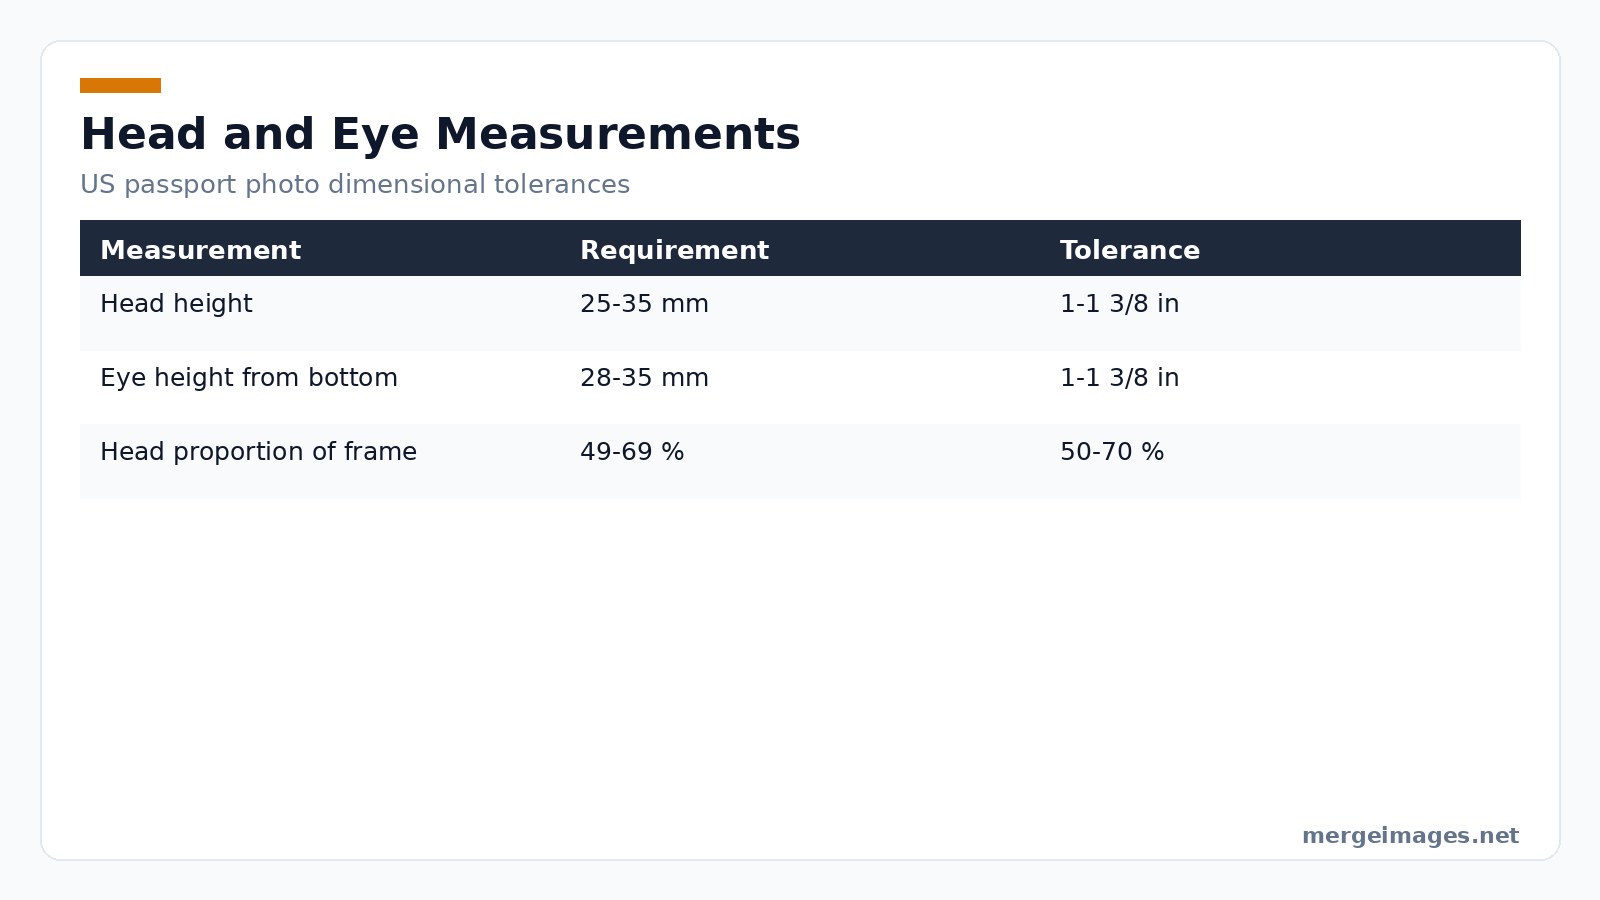
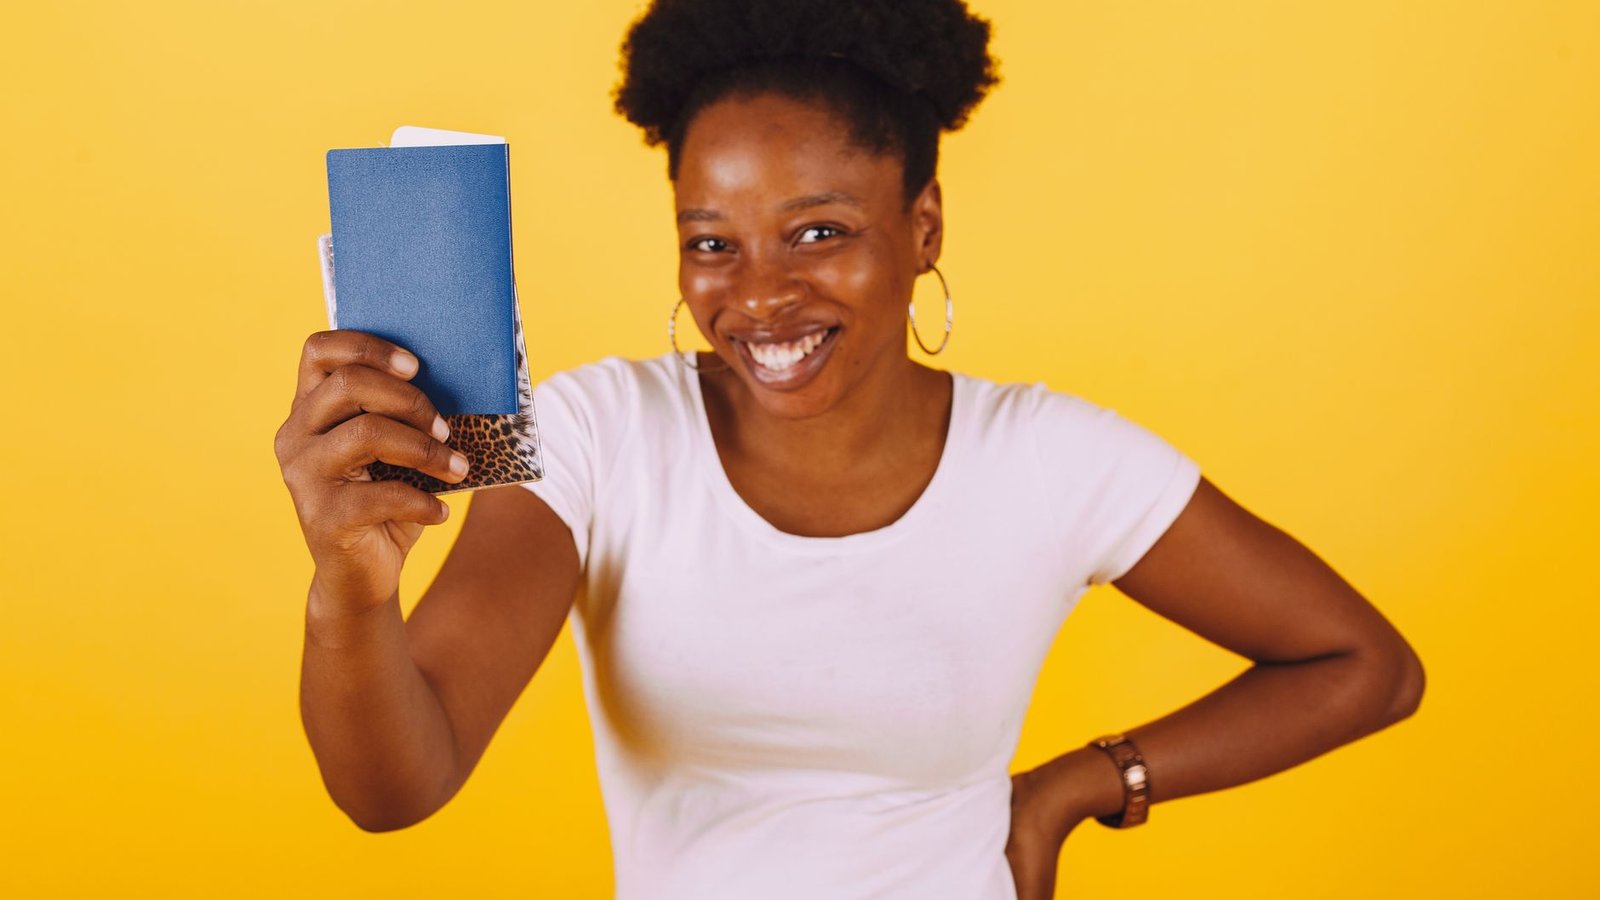
Photo: Gustavo Fring via Pexels
Measure head height from chin to crown. It must fall between 1in and 1 3/8in (25 to 35 mm). Eyes should sit 1 1/8in to 1 3/8in from the bottom of the frame. This ensures the face occupies roughly 50 to 70 % of the total area. The background is strictly plain white or off white. No shadows. No texture.
Recent Rule Changes
The glasses ban took effect in 2016. It remains absolute unless you document a medical exemption. Digital submissions now work for online renewals. Still the automated checker flags issues a human reviewer will eventually catch. Photos older than six months face automatic rejection. Subtle appearance changes do not matter.
Preparing the Perfect Shot
Start with a solid white wall or a large sheet of plain paper. Position two lamps at 45 degree angles to kill shadows. A third light behind the subject fills dark spots. Use the rear facing camera on a smartphone or a point and shoot DSLR. The front camera lacks the sensor size needed for 600dpi output.
Stand about a foot from the background. This avoids casting a silhouette. Keep the head centered. Keep eyes level with the camera. Adopt a neutral expression. No smile. No frown. Mouth closed. Teeth hidden. Remove all eyewear headwear and large jewelry. If you wear a religious covering ensure the face remains fully visible and unshaded.
Using MergeImages Tools for Compliance
I opened the Passport Photo Maker on MergeImages. I dragged my raw portrait onto the upload area and watched the AI instantly outline the facial landmarks. Within seconds the tool reported eye to eye distance nose bridge height and jawline width. It compared each measurement to the State Department tolerance ranges.
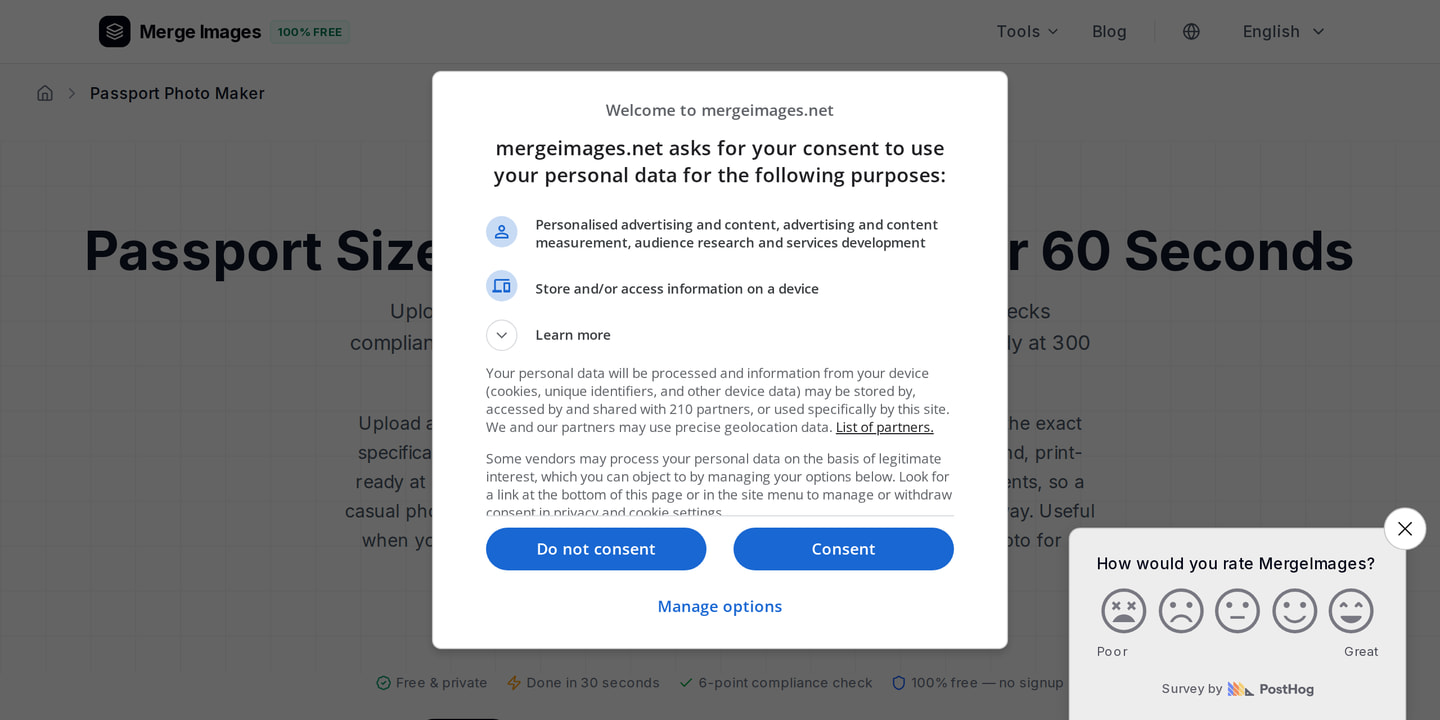
Next I clicked the Crop to 2x2in button. The tool automatically positioned the head so the chin to crown distance fell within the 25 to 35 mm window. It replaced the background with a perfectly uniform white. A compliance checklist appeared. It highlighted two minor issues. The image was 580x580 pixels. That sits slightly below the 600 pixel minimum.
To fix that I launched the Image Upscaler directly from the checklist link. The AI enlarged the picture by 1.1x. It preserved facial detail while reaching the required 640x640 pixel count. I confirmed the new dimensions in the preview bar and downloaded the final JPEG. The file size measured 350KB. That sits comfortably inside the 240KB to 10MB range.
Manual Fine Tuning
Prefer a hands on approach? Start with the Image Cropper. Upload your original shot. Set the aspect ratio to 1:1. Drag the handles until the head occupies roughly 60 % of the square. The pixel readout in the lower right corner lets you verify at least 600 pixels on each side.
After cropping run the Background Remover available on MergeImages. This ensures no stray gray edges remain. The tool isolates the subject and outputs a transparent PNG. Paste it onto a pure white canvas in any image editor. Finally use the Image Compressor to bring file size down. Do this without sacrificing the 24 bit color fidelity required for passport processing.
Common Rejection Triggers and Fixes
Shadows on the face or background cause the most delays. Even a faint halo from a ceiling light can shift the AI landmark detection. You get a head too high error. Fix this by adding a diffuser to each lamp or moving the lights farther apart.
Head size errors stem from improper distance to the camera. Does the head appear larger than 70 % of the frame? Step back a few inches and retake the shot. The Passport Photo Maker recalculates the ratio automatically. A manual check never hurts.
Glasses are a simple no go. Forget to remove them and the AI flags the reflection. It rejects the file. The only legitimate exception is a signed physician statement. That must accompany the paper application.
Expressions that deviate from neutral confuse facial recognition algorithms. A slight grin or a raised eyebrow does it. The AI marks the eyes as partially closed or the mouth as open. You face a non neutral expression rejection. Practice a relaxed natural look in a mirror before you shoot.
Background color mismatches arise when a wall is off white or has a faint pattern. The AI color balance check labels the background non white and suggests a replacement. Use the built in background replacement in the Passport Photo Maker. It resolves the problem instantly.
Red eye from flash creates dark pupils that obscure the iris. Switch off the flash. Rely on ambient lighting. The AI will then detect clear eye openings.
Low resolution is a hidden pitfall. Front facing smartphone cameras typically produce 1080x1920 images. After cropping to a square they fall below 600 pixels on one side. The Image Upscaler safely boosts the pixel count without introducing blur.
Special Cases
Infants under one year follow the same 2x2 inch dimensions. The pose requirements are stricter. The baby must lie on a plain white sheet. Eyes open. Alone in the frame. No toys. No pacifiers. No caregiver hands.
Religious head coverings are allowed if the face remains fully visible. Ensure the covering does not cast shadows. A soft evenly lit fabric works best.
Medical conditions that prevent removal of glasses or cause facial asymmetry require a signed doctor statement. Attach the statement to the paper application. The digital checker will still flag the photo. The human reviewer will accept it with the documentation.
Printing and Digital Submission
Need a physical passport photo? The Passport Photo Maker generates a 4x6 inch layout with eight 2x2 inch thumbnails. Print the sheet on matte or semi gloss photo paper at a pharmacy or office supply store. Cut the individual squares with a paper trimmer for clean edges.
For online renewals upload the same JPEG you downloaded from the tool. Verify your file against this checklist before hitting submit. Ensure JPEG format in sRGB 24 bit. Check that pixel dimensions run 600x600px minimum to 1200x1200px maximum. Keep file size between 240KB and 10MB. Use a plain white background with no shadows. Confirm head height hits 25 to 35mm or 49 to 69 % of the frame. Wear no glasses. Keep a neutral expression with eyes open. Take the photo within the last six months. Apply no filters no retouching and no beauty mode.
Meeting every item guarantees the automated system will pass the image to the human reviewer without a hitch.
Frequently Asked Questions
What is the minimum digital resolution for a US passport photo?
The image must be at least 600 pixels wide and 600 pixels tall. This corresponds to roughly 600dpi when printed at 2x2 inches.
Can I wear glasses if I have a prescription?
No. Glasses are prohibited unless you submit a medical exemption with a signed physician statement.
Do I need to print the photo on glossy paper?
Matte or semi gloss photo paper is recommended. High gloss finishes can cause reflections that interfere with scanning.
How do I ensure the background is plain white?
Use the Passport Photo Maker background replacement feature. Alternatively photograph yourself against a solid white wall with even lighting.
Is the Passport Photo Maker free for unlimited use?
Yes. All MergeImages tools including the Passport Photo Maker are free browser based and require no signup.

Bello builds useful software and writes thoughtful content to make sense of it all. He tests the tools himself and checks the facts before any of it goes in a guide.
Try Our Free Image Tools
Ready to Try It?
Put these tips into practice with our free online image merger. No signup required.
Make your passport photo, free


