
Summarise this article with:
A deliberate Instagram photo grid keeps viewers scrolling and drives follower growth. Arranging 9 to 12 squares in a repeating pattern turns a static profile into a visual story. One 3 × 3 layout fills a 1080 pixel feed exactly. The numbers scale fast.
Building Visual Cohesion
Start with a clear visual language. Pick three to five colors. Repeat them everywhere. Lock key elements like a logo, a recurring shape, or a signature font to the same spot in each square. The eye should read the pattern as intentional. Consistent spacing, even with borders, builds rhythm. You want a single canvas, not a pile of unrelated pictures. When a brand palette is too wide, the grid can look chaotic; trim the palette to the most essential hues before you begin.
Match the Layout to the Brand
Pick a pattern that reflects the personality. Personal influencers thrive on checkerboard or diagonal layouts blending lifestyle shots with text based graphics. Ecommerce brands win with row by row grids showcasing products, testimonials, and behind the scenes moments in tidy groups. Artists and photographers prefer puzzle grids where a large artwork splits across multiple posts. Sketch a quick 3 × 3 mock up on paper or in a notes app. Seeing the shape early prevents mismatched posts later. If the sketch reveals that a row will contain a blank space, consider adding a quote card or a color block to keep the flow uninterrupted.
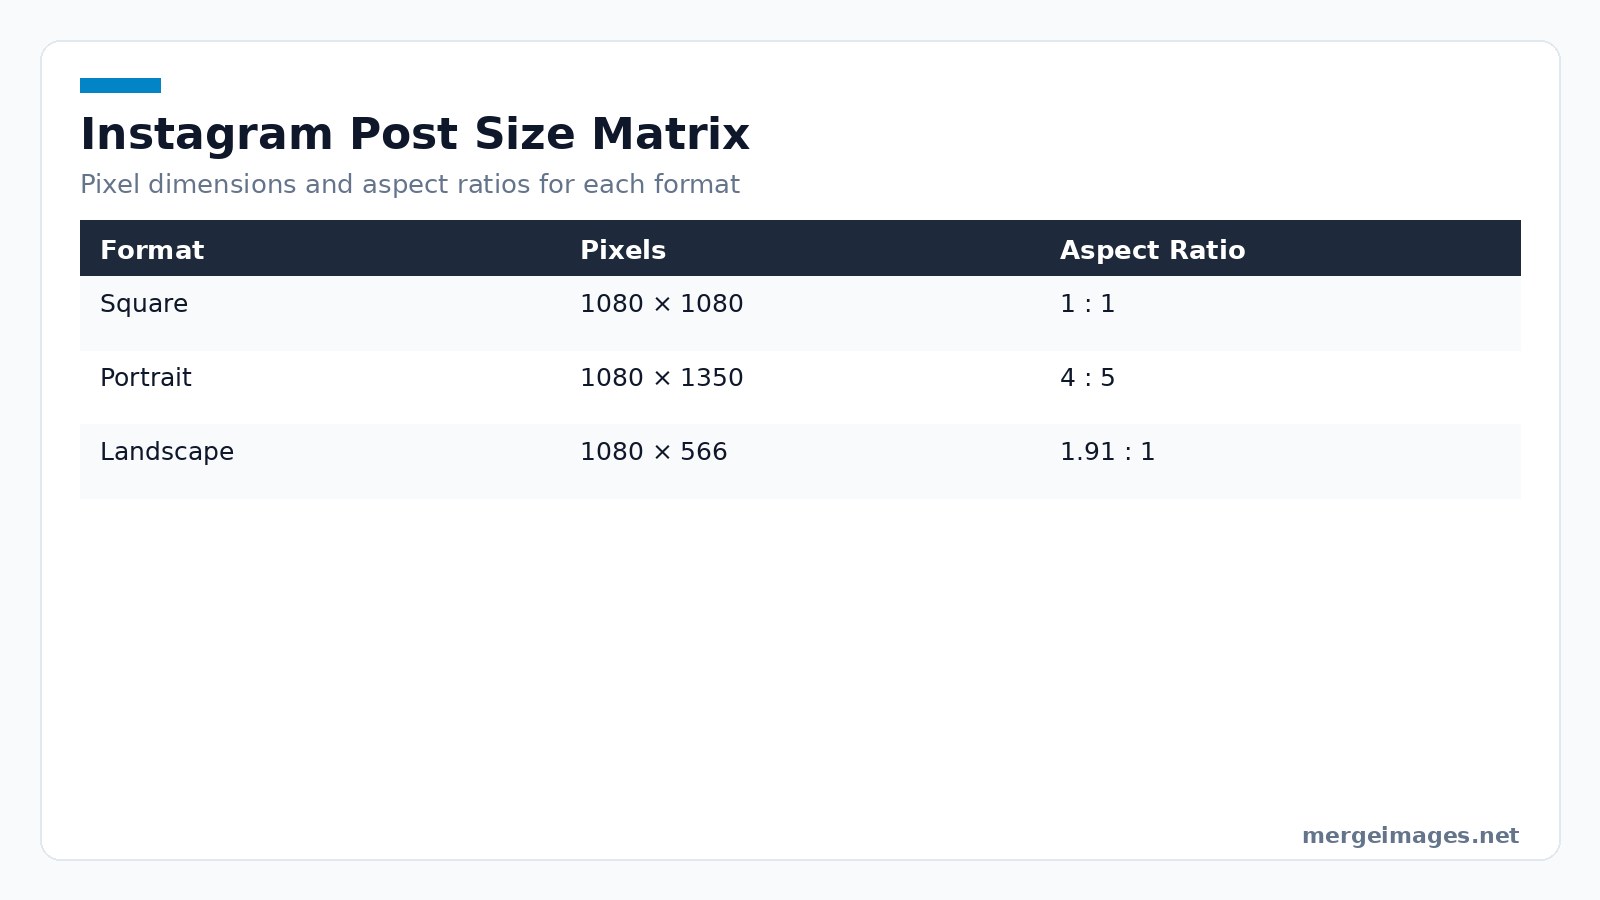
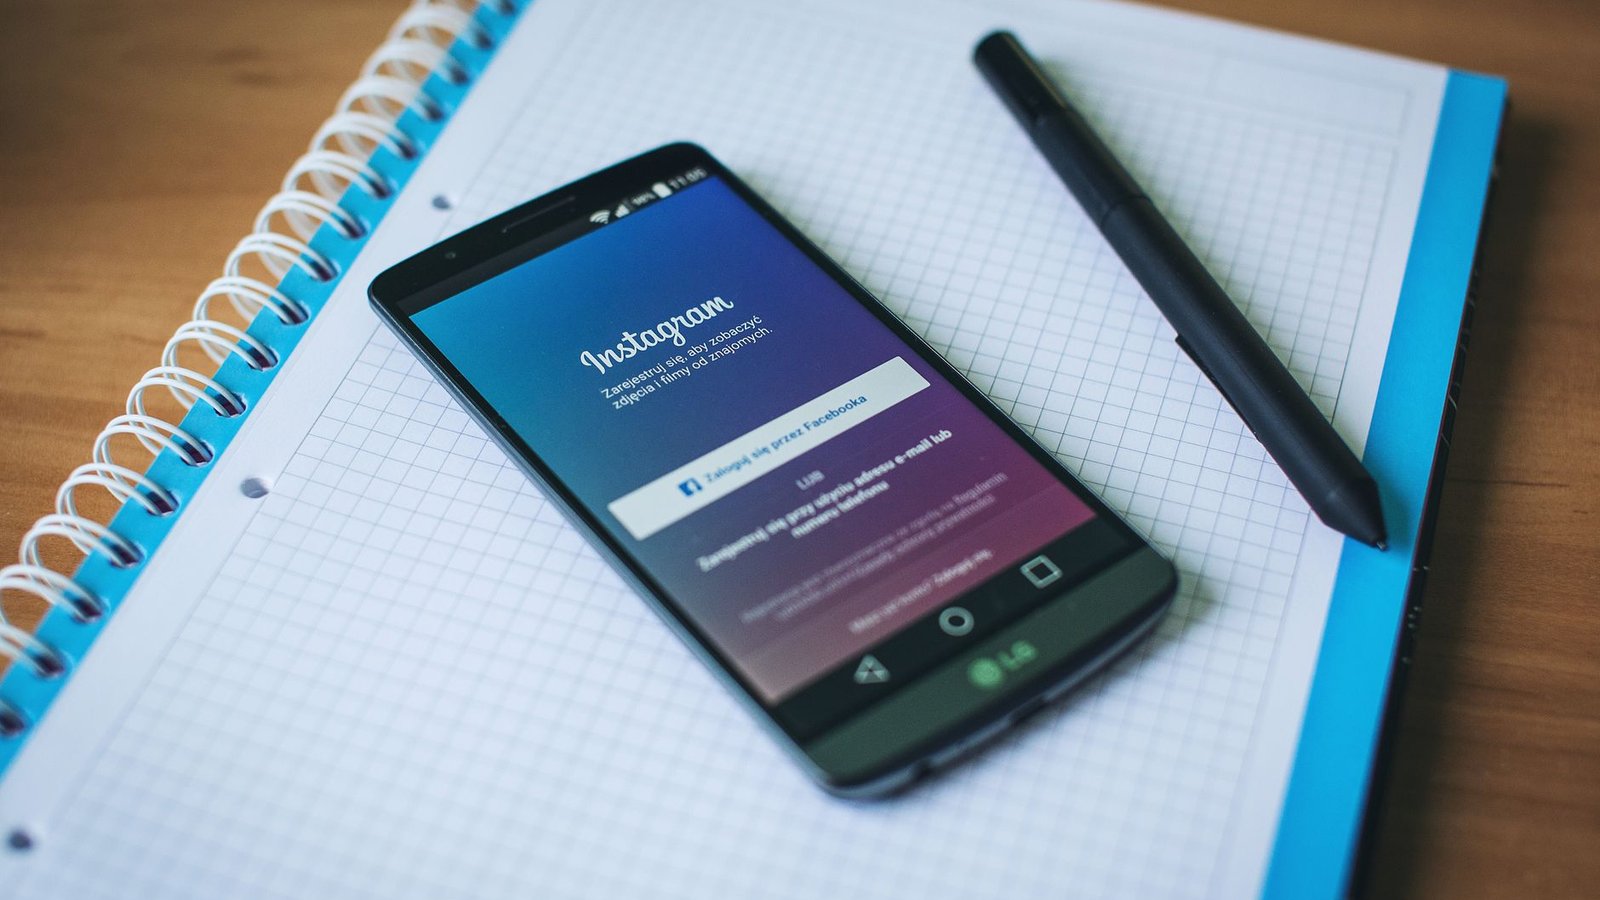
Photo: freestocks.org via Pexels
Prepare Exact Pixel Dimensions
Instagram demands strict sizes. Square posts need 1080 × 1080 pixels. Portrait posts need 1080 × 1350 pixels. Landscape posts work best at 1080 × 566 pixels. When I resized a 2000 × 2000 photo to 1080 × 1080 using the Image Resizer, the output measured exactly 1080 by 1080 pixels and stayed under the limit. If the source image is larger, the Resizer shrinks it without visible loss. Double check the final dimensions in the browser preview before moving on. A common slip is to export a JPEG that Instagram automatically recompresses to a size just under 30 MB but with a hidden watermark; always verify the file size after export.
Assemble Squares with Photo Collage Maker
Drop multiple images onto a canvas. Set uniform gaps. Choose a background color matching the brand palette. For a row by row grid, create a 1080 × 3240 canvas and place three portraits vertically. The tool aligns them automatically. Download the PNG and feed it into the next step. If you need inspiration on how to structure a collage, the sibling guide create photo collage online free walks you through basic layouts. Be aware that the Collage Maker adds a thin anti-alias border around each tile; turn that off if you need pixel-perfect edges.
Split Puzzle Grids with Image Cropper
Puzzle grids need a high resolution master image at least 3240 × 3240 pixels for a 3 × 3 layout. Upload the master to the Image Cropper. Select Freeform mode. I set the crop box to 1080 × 1080 and exported the first tile. The tool cut the exact region without adding extra pixels. Repeat the process for the remaining eight sections. You get nine perfectly aligned squares ready for upload. Name each file with its position like "grid 01 top left" to avoid posting out of order. A frequent mistake is to rename files after they have been uploaded; Instagram assigns the order at publish time, so keep the naming scheme consistent until the last tile is live.
Tune Colors and Compression
Run each file through the Image Compressor to stay under Instagram’s 30 MB limit. Compression reduces file size while preserving visual quality for Retina displays. Apply the same filter or preset to every image. A single Lightroom preset or mobile app filter ensures tonal consistency. If you need a subtle brightness boost, use the Brightness Image slider individually. Keep adjustments modest to avoid a washed out look. Over-compressing below 500 KB can introduce banding in gradients; aim for 1 to 2 MB per image for the best balance of speed and quality.
Timing Matters for the Feed
Posting at regular intervals prevents gaps that break the visual flow. Schedule three to five posts per week. Use a spreadsheet to track the order of puzzle tiles. When you publish a new row, double check that the previous row remains visible on the profile grid. This guarantees the overall pattern stays intact. Engaging captions and relevant hashtags amplify reach. The visual foundation is what convinces a visitor to hit the follow button. If you notice a dip in engagement after a weekend, shift the schedule to weekday evenings when your audience is most active.
Avoid These Errors
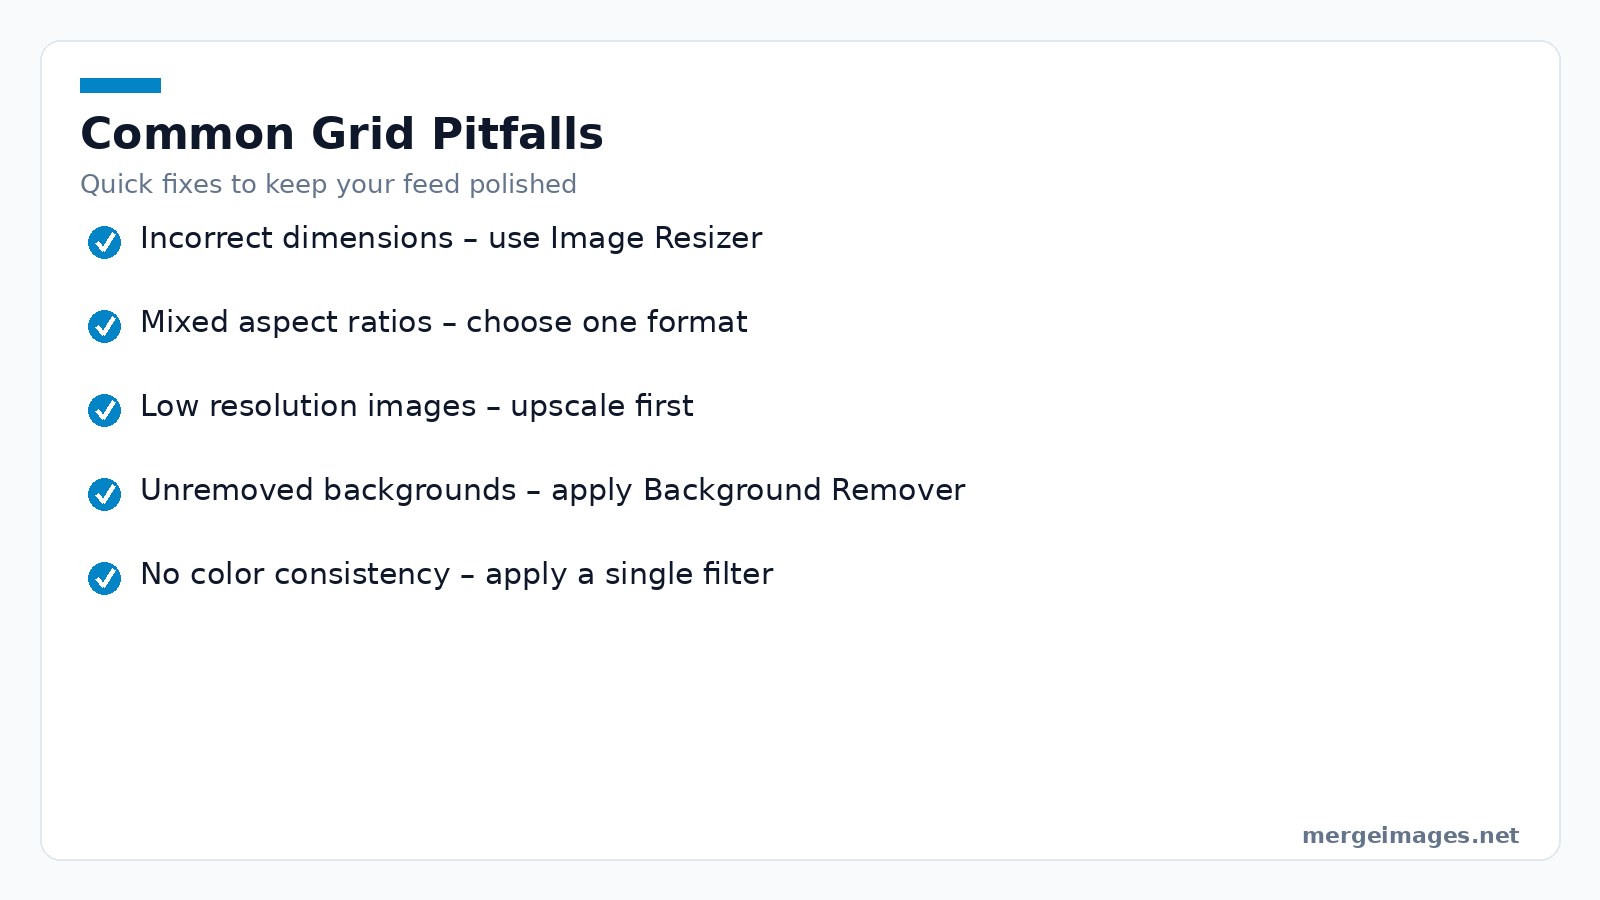
Common missteps include uploading images without proper dimensions, mixing aspect ratios, and neglecting background removal for product shots. Use the Background Remover to isolate items before placing them in a collage. This ensures a clean look. If a photo appears blurry, revisit the Upscaler for a higher resolution version before cropping. Always preview the grid on a mobile device. What looks balanced on a desktop may shift on a smaller screen. Another pitfall is to rely on Instagram’s automatic caption line-breaks; manually insert line breaks to keep text readable across tiles.
Practitioner Tips and Honest Limits
Even the best upscaler cannot create detail that was never captured. If the original file is under 800 × 800 pixels, expect some softness after enlargement. Mobile Instagram applies its own compression shifting hues by up to two points on the hue wheel. Test a single post before committing an entire grid. Instagram’s algorithm may temporarily hide new posts from the main feed for up to 30 minutes. Schedule your grid launch when your audience is most active to minimise this effect. Pushing compression below 500 KB can introduce banding in gradients. Aim for 1 to 2 MB per image for the best balance of speed and quality. Older phones may render the grid with reduced sharpness. View your finished grid on at least two different devices before publishing. If a tile looks off on an Android device but fine on iOS, consider adjusting the contrast slightly to accommodate the lower dynamic range of the Android screen.
Data-Driven Refinement
After the first week, pull insights from Instagram Insights or a third-party analytics tool. Look at reach, saves, and profile visits for each grid post. If a particular tile underperforms, note its visual attributes, color saturation, subject placement, or text density. Run a quick A/B test by swapping that tile with an alternate version that uses a slightly different hue or a tighter crop. Track the change over another 48-hour window. Small adjustments often lift overall engagement by 5-10 %. Also monitor the “saved posts” metric; high saves indicate that the visual storytelling resonates enough for users to reference later, a strong signal for algorithmic favor.
Frequently Asked Questions
How many posts should I plan for a single grid?
A typical Instagram grid works best with 9, 12, or 15 squares, allowing you to maintain a clean 3 column layout while providing enough flexibility for storytelling.
Can I mix portrait and square posts in the same grid?
Mixing formats is possible, but it often creates visual gaps. Stick to one aspect ratio for a unified appearance unless you deliberately design a mixed ratio pattern.
Do I need to use the same filter on every image?
Using a consistent filter helps reinforce brand identity and keeps colors harmonious across the feed.
What if my original photo is smaller than 1080 × 1080?
Run the image through the AI Image Upscaler first; the tool enlarges the picture while preserving details, then resize it to the required dimensions.
Is there a limit to how many images I can upload at once?
MergeImages tools are free and browser based with no signup, so you can process as many images as your device can handle in one session.

Bello builds useful software and writes thoughtful content to make sense of it all. He tests the tools himself and checks the facts before any of it goes in a guide.
Try Our Free Image Tools
Ready to Try It?
Put these tips into practice with our free online image merger. No signup required.
Make your social images, free


