
Summarise this article with:
Answer Capsule
A watermark acts as a semi transparent overlay stamping your photo with a name, logo, or URL to expose unauthorized reuse. A free browser tool applies it in seconds. You adjust opacity, size, and density to protect up to 10 images per session without signing up.
What a Watermark Actually Does
Think of a watermark as a "no trespassing" sign. It sits on top of your image like a subtle stamp. It tells viewers who owns the work and forces anyone who wants to reuse it to acknowledge that ownership. It does not lock the gate. It makes the trespass obvious. The overlay does not stop a determined downloader. It does not replace formal copyright registration. It cannot survive every AI based removal attempt.
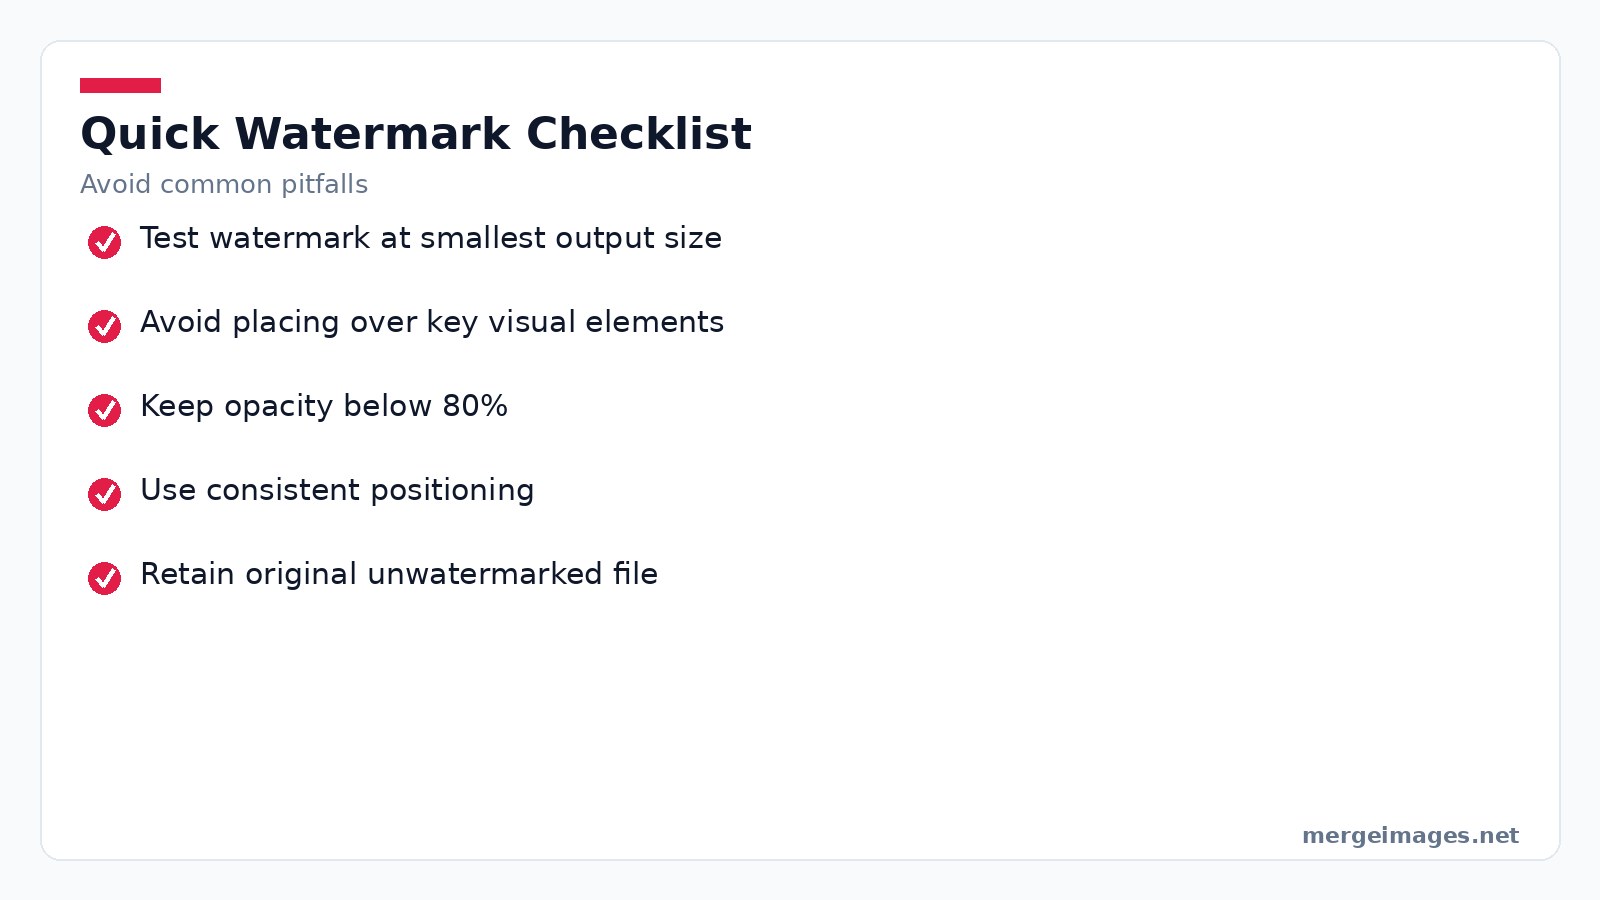
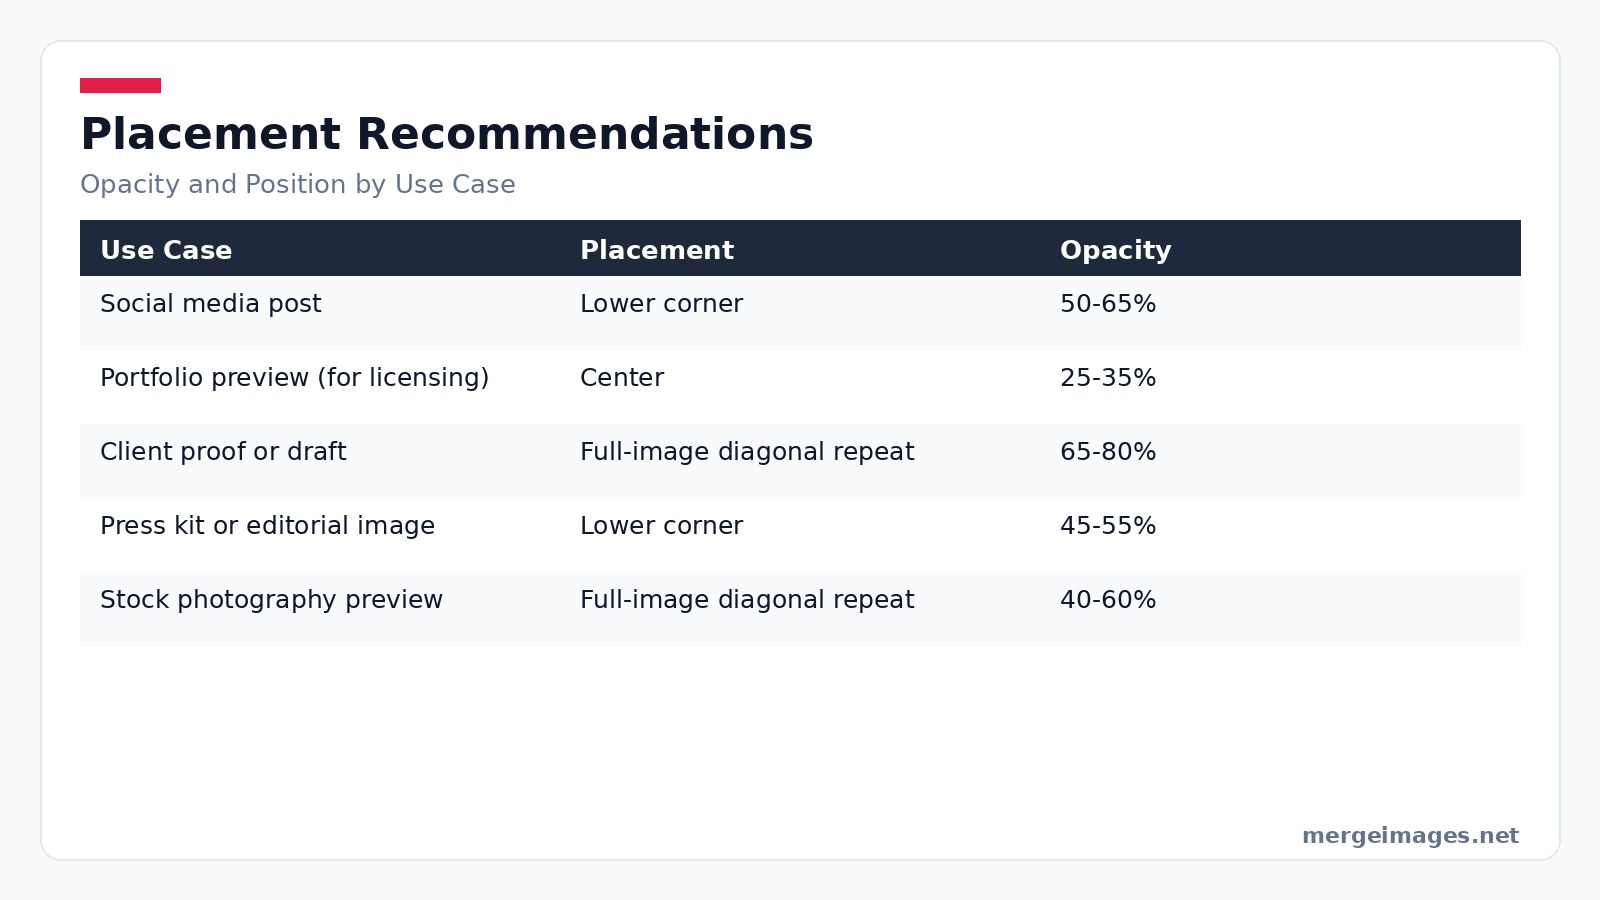

Photo: Elīna Arāja via Pexels
Designing an Effective Watermark
Text or Logo Marks
Text watermarks, your name, website, or handle, are fast to type and stay readable at any size. Logo watermarks look more branded but can become a blurry blob if the original logo is complex. Test both on the smallest output size you plan to share. If the logo loses detail, switch to a clean text version.
Typography Choices
Sans serif fonts like Helvetica, Inter, or Montserrat keep their shape at low pixel counts. All caps or small caps improve legibility for short strings. Script fonts often break apart below 80px height. Avoid them for the main watermark text.
Size Proportions
Treat the watermark as a percentage of the image's shorter side. Text height between 2% and 4% works well across resolutions. A logo should occupy 8% to 15% of that same dimension. Even at the minimum, aim for a height of 60px so the text stays crisp on mobile screens.
Color and Contrast
White on a thin 2 to 4px drop shadow gives good contrast on both light and dark backgrounds. Black works on pale images. Adjust the shadow opacity to about 50% so the watermark remains visible without looking heavy.
Placement Strategies
Corner Placement
The lower right corner is the most familiar spot. Position the watermark a few percent inward from the edge. Most platforms crop 5% to 10% from the border, so this keeps the mark safe from accidental cropping.
Center Placement for High Value Work
When you need the watermark to be hard to erase, place it in the center at 25 to 35% opacity. The overlay sits over the main subject, forcing any removal tool to work on the most important visual area.
Diagonal Repeating Pattern
A tiled diagonal pattern spreads the watermark across the whole canvas. It looks aggressive on casual social posts but is ideal for stock previews, client proofs, or draft deliveries where you want maximum deterrence.
Using MergeImages Tools for Watermarking
MergeImages does not offer a dedicated watermark feature, but you can achieve the same result with the Overlay Images tool. First, create a transparent PNG that contains your text or logo. Then drag your photo and the PNG into the overlay interface. Choose a corner, center, or repeat layout. Fine tune opacity with the slider. The tool updates instantly in the browser. No software install required.
After the overlay, run the result through the Image Compressor. Compression reduces file size while preserving visual quality, making it harder for thieves to obtain a high resolution source. The compressor lets you target a specific kilobyte size or a percentage reduction. You can see a side by side preview before you download.
If you need a lightning fast text watermark and do not want to prepare a PNG, the Meme Generator works as a quick workaround. Type your handle. Pick the white default color. Set opacity to 30%. Hit "Create". The generated image is a ready made overlay you can feed straight into the overlay tool.
Creating Your Watermark File
- Open any image editor and start a new canvas with a transparent background.
- Add your chosen text in white or black for light images. Adjust the font size so the height matches the 2% to 4% rule.
- Export the file as PNG. JPEG will discard transparency and force a solid background.
- Save two versions: one white, one black. Swap them depending on the photo's overall brightness.
Batch Watermarking
The overlay interface accepts multiple files at once. Drag a folder of images. Drop the same PNG watermark. Set the density and opacity. Hit "Apply". All files are processed in parallel. You can download a zip archive when the job finishes. The free tier allows up to ten images per batch. Beyond that you will need to register for a higher limit.
Beyond Watermarks: A Full Protection Stack
A watermark is only the visual front line. Strengthen your overall strategy with these steps.
Camera metadata gives you a baseline. Fill the copyright fields in your camera's settings so every shot carries your name automatically. Editing software presets build on this. Lightroom and Capture One let you embed the same metadata on export, ensuring nothing leaves your workflow unmarked.
Resolution management matters. Publish images at 1500px to 2000px on the long edge. This size looks great on screens but is too small for large format prints. Run the result through the Image Compressor for a lean file.
Copyright registration offers legal teeth. In the U.S., a $65 filing secures statutory damages up to $150,000 per willful infringement. Other countries have similar low cost schemes. Reverse image monitoring acts as your cleanup crew. Upload a copy of each public photo to Google Images or TinEye every few months. Spotting unauthorized uses early gives you a chance to request removal before the image spreads.
Watermarking by Creator Type
Photographers should use corner watermarks for Instagram and portfolio thumbnails. Switch to a centered or tiled version for client proofs and licensing previews. Small business product photographers need to brand every product shot with a logo watermark. Keep the original unwatermarked files as dated proof of creation.
Bloggers and content creators benefit from a consistent handle watermark. It turns every reshared image into a silent credit line. Stock photographers must remember that stock platforms reject watermarked uploads. Keep a private watermarked preview set for your own website and only submit clean files through the agency.
Common Watermark Mistakes
Placing a tiny corner mark on a square image often lands outside the safe crop zone. A watermark that looks fine at 100% zoom disappears in thumbnail view. Inconsistent positioning across a portfolio looks accidental rather than intentional. Forgetting to update a watermark after a rebrand leaves dead URLs in the wild. Finally, deleting the original unwatermarked file removes the strongest evidence of prior creation.
Frequently Asked Questions
Does a watermark legally prove I own a photo?
A watermark shows a claim of ownership. Legal proof comes from the original file's metadata, timestamps, and, if needed, formal registration.
Can AI tools remove watermarks from photos?
Yes. AI inpainting can erase simple corner marks, especially on uniform backgrounds. Over subject or tiled watermarks force the AI to edit the main visual area, often leaving noticeable artifacts.
Should I watermark every photo I share online?
Apply watermarks to any image with commercial value or that you would object to seeing reused. Casual personal snaps usually do not need it.
What's the right opacity for my watermark?
For social feeds aim for 50 to 65% opacity. Client proofs work well at 65 to 80%. Licensing previews benefit from a subtle 25 to 35% center mark or a denser diagonal repeat.
Does watermarking hurt engagement on Instagram?
Heavy watermarks can lower visual appeal. Many creators accept a slight dip in reach for the added brand safety. Subtle corner marks usually keep engagement high while still providing attribution.
Conclusion
Watermarks are the most visible layer of a broader copyright defense. They will not stop a determined thief. They remove the excuse of ignorance and give you a clear claim to point to. Pair the Overlay Images tool, the Image Compressor, and the quick text option in the Meme Generator to protect your photos in minutes. Keep file sizes low. Stay ready for the next reverse image search.

Bello builds useful software and writes thoughtful content to make sense of it all. He tests the tools himself and checks the facts before any of it goes in a guide.
Probieren Sie Unsere Kostenlosen Bildtools
Bereit es Auszuprobieren?
Setzen Sie diese Tipps mit unserem kostenlosen Online-Bildeditor in die Praxis um. Keine Anmeldung erforderlich.
Enhance your photos, free


