
Summarise this article with:
Answer Capsule
A reliable before/after composite demands a repeatable shoot, minimal editing, and a side-by-side layout built in seconds. Fix camera height, lock f/8-f/11 aperture, set 5500K white balance, and use the free MergeImageshorizontal image merge tool. Resize each image to 1200x800px. Adjust brightness once. The workflow takes about 3 minutes per case when the station is set up correctly.
Why Consistency Matters
Patients judge teeth the way they judge any visual proof. If lighting, angle, and crop differ, the result feels deceptive. A bright front light turns a mild whitening case into a miracle. A slight chin tilt exaggerates alignment correction. Every frame must share the same background, color profile, and framing. Then the viewer focuses on the dental change. Camera quirks stay out of the picture. Consistency also trims editing time. You stop chasing shadows or recoloring teeth after the fact.
Photography Setup
A dedicated photo station kills guesswork. Mount the camera on a tripod 12 to 18 inches from the patient's face. Use a ring light or twin LED panels at 5500K. A diffuser softens the harsh reflections that plague enamel shots. Mark the chair headrest with tape. Ask each patient to rest their chin on that line to keep the head level. A solid gray backdrop drops color casts and keeps the smile in focus.
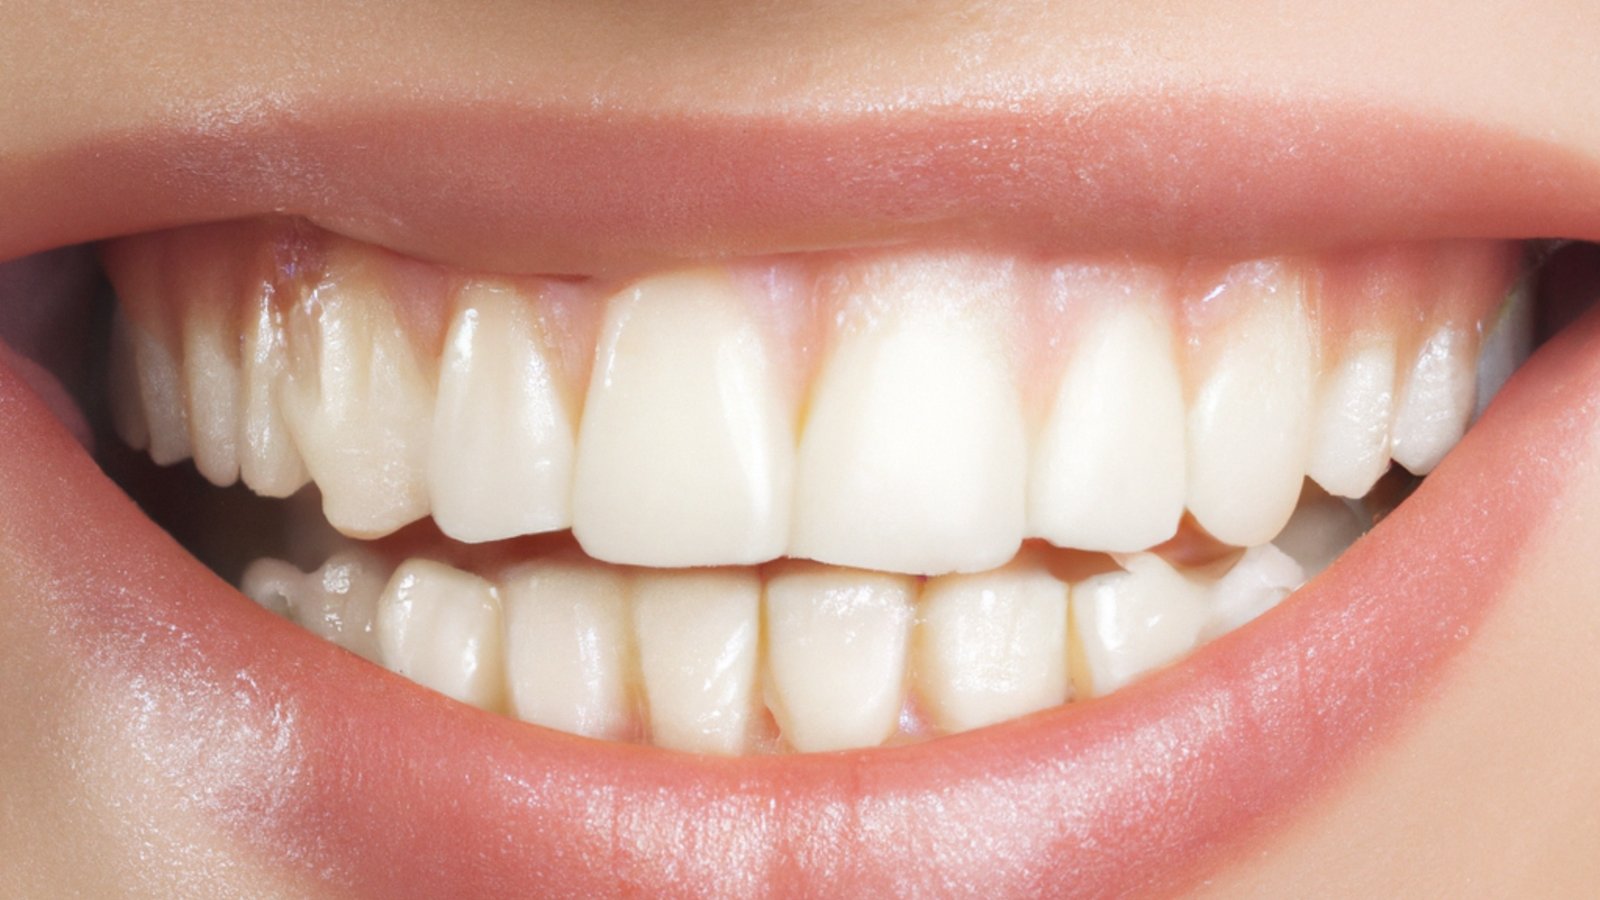
Photo: Kasim H via Pexels
Pose Standardization
Standard poses build a library of interchangeable shots. Capture four views for every procedure: mouth open for full teeth and gum assessment, closed mouth smile for cosmetic comparison, profile to reveal bite and alignment, and 45 degree angle for the relaxed social media smile. For intra oral images, I always work with an assistant. I dial in aperture and focus while the assistant handles retractors, mirrors, and the air water syringe. The patient sits supine, chin up, mouth angled toward me at the 12 o clock chair position. This keeps the mirror handle out of the frame and the assistant's fingers away from the shot.
Lighting Standards
Keep the light source directly in front of the patient, slightly above eye level. Medium intensity stops blown out highlights on glossy enamel. Avoid point lights that carve sharp shadows. Use a softbox or a large diffuser to spread light evenly. Never mix daylight with tungsten. Color temperature shifts will ruin the white balance you set on the camera.
Camera Settings
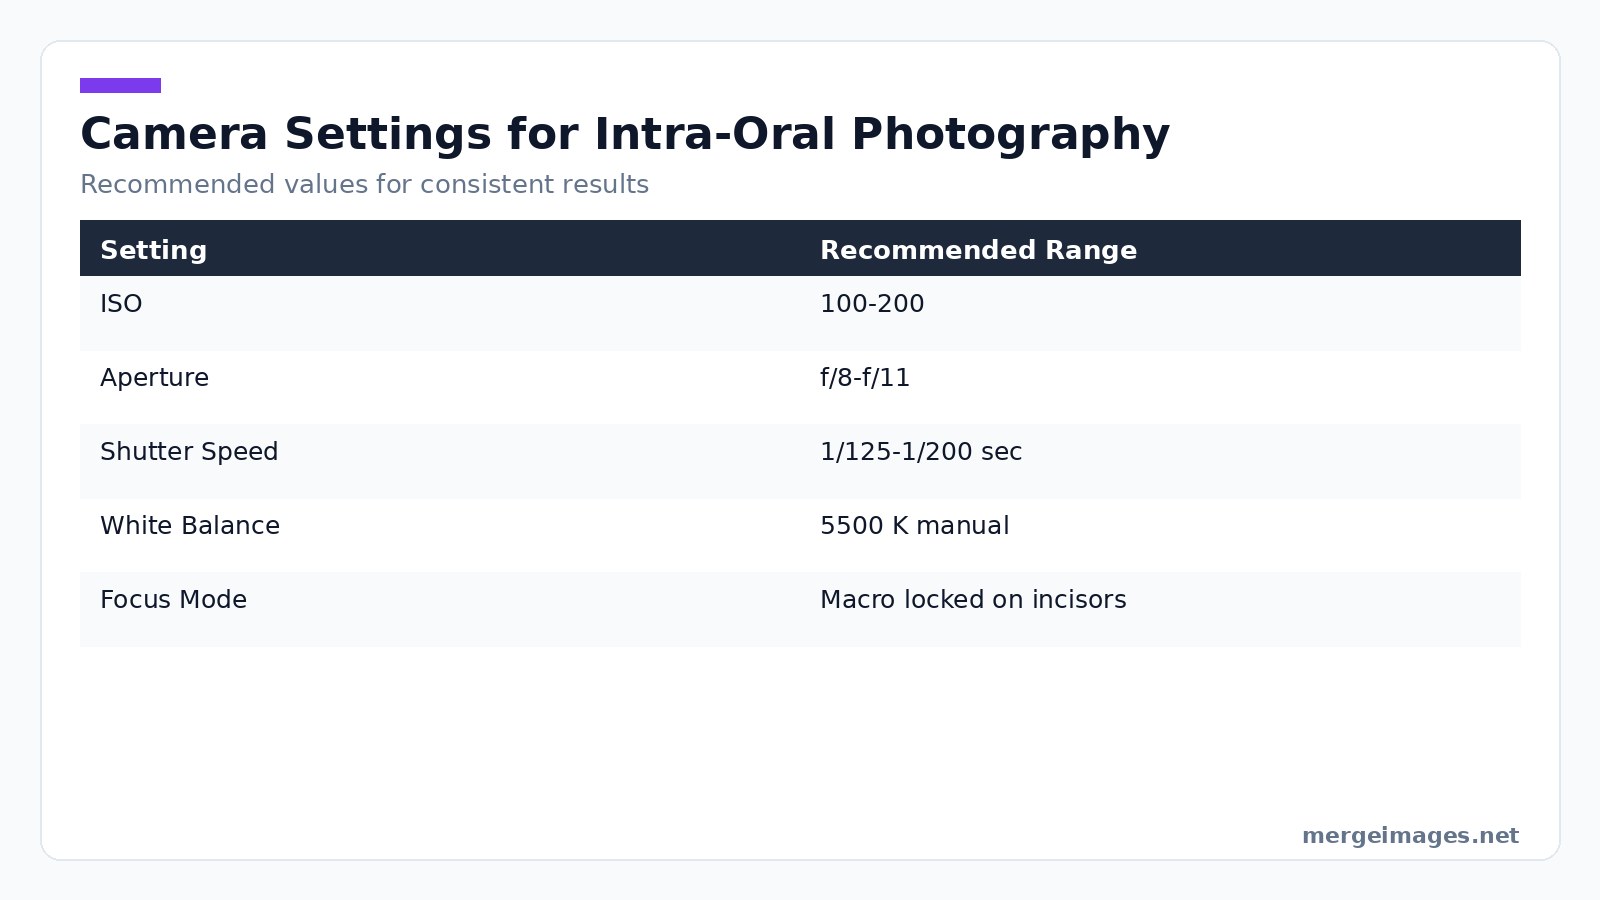
The goal is a sharp, evenly exposed image of every tooth. Below is a quick reference table I keep printed next to my camera.
| Setting | Recommended Range |
|---|---|
| ISO | 100-200 |
| Aperture | f/8-f/11 |
| Shutter Speed | 1/125-1/200 sec |
| White Balance | 5500K manual |
| Focus Mode | Macro, locked on incisors |
When I set the image to 1200x800px using the image resizer, the composition stays balanced across all devices. The fixed dimensions also match the 3:2 ratio that most website templates expect.
Intra-Oral Technique Tips
Intra oral photography demands a different rhythm than facial shots. Blow saliva off the teeth with the air water syringe first. A dry field reveals true tooth texture. For mirror captures, pull the lips outward, forward, and upward for maxillary views. Pull them outward, forward, and downward for mandibular views. Choose the mirror side, wide or narrow, that best fits the arch you need to display. After the shot, flip the image horizontally with the flip image tool. The mirror reflection then reads as a natural view. Visualize the final composition before raising the camera. It saves time and stops tunnel vision.
Common Pitfalls and Honest Limits
Mistakes happen even with a perfect setup. The most frequent error is inconsistent head tilt. A few degrees turn a minor change into a huge one. Relying on post processing to hide this problem leads to ethical breaches. Another issue is flash reflections that glare on ceramic crowns. The only true fix is to reposition the light or use a polarizing filter. Do not edit the glare away. Photographs cannot capture functional improvements like bite comfort. Be clear in captions that the image shows only visual change.
Photo Editing
Edit only what the camera missed. Apply a subtle brightness tweak if one frame appears slightly darker. The brightness tool lets you raise exposure by a single slider without altering hue. Perform a global white balance correction if the lighting was off by a few degrees. Never apply whitening filters or color shifts that change the perceived outcome. Keep the before and after images identical in tone. The patient will notice any discrepancy.
Composite Layout
The most effective format for a dental website is a side by side horizontal composite. Place the before image on the left, the after on the right, and keep the gap minimal. Our free horizontal image merge builds the composite in a single click. It preserves the exact dimensions you set earlier. If you need a stacked vertical view for a printed brochure, the vertical image merge tool works the same way. The horizontal layout remains the web standard.
Adding Labels and Annotations
Clear labels guide the viewer's eye. Use simple Before and After text in a legible sans serif font. Place it in opposite corners to balance the composition. Add a brief procedure description like 6 weeks of at home whitening and the date range if relevant. Small arrows can point out specific changes like a corrected midline. Keep the graphics unobtrusive. Never include unverified claims or exaggerated timelines. Honesty protects your reputation.
Patient Privacy
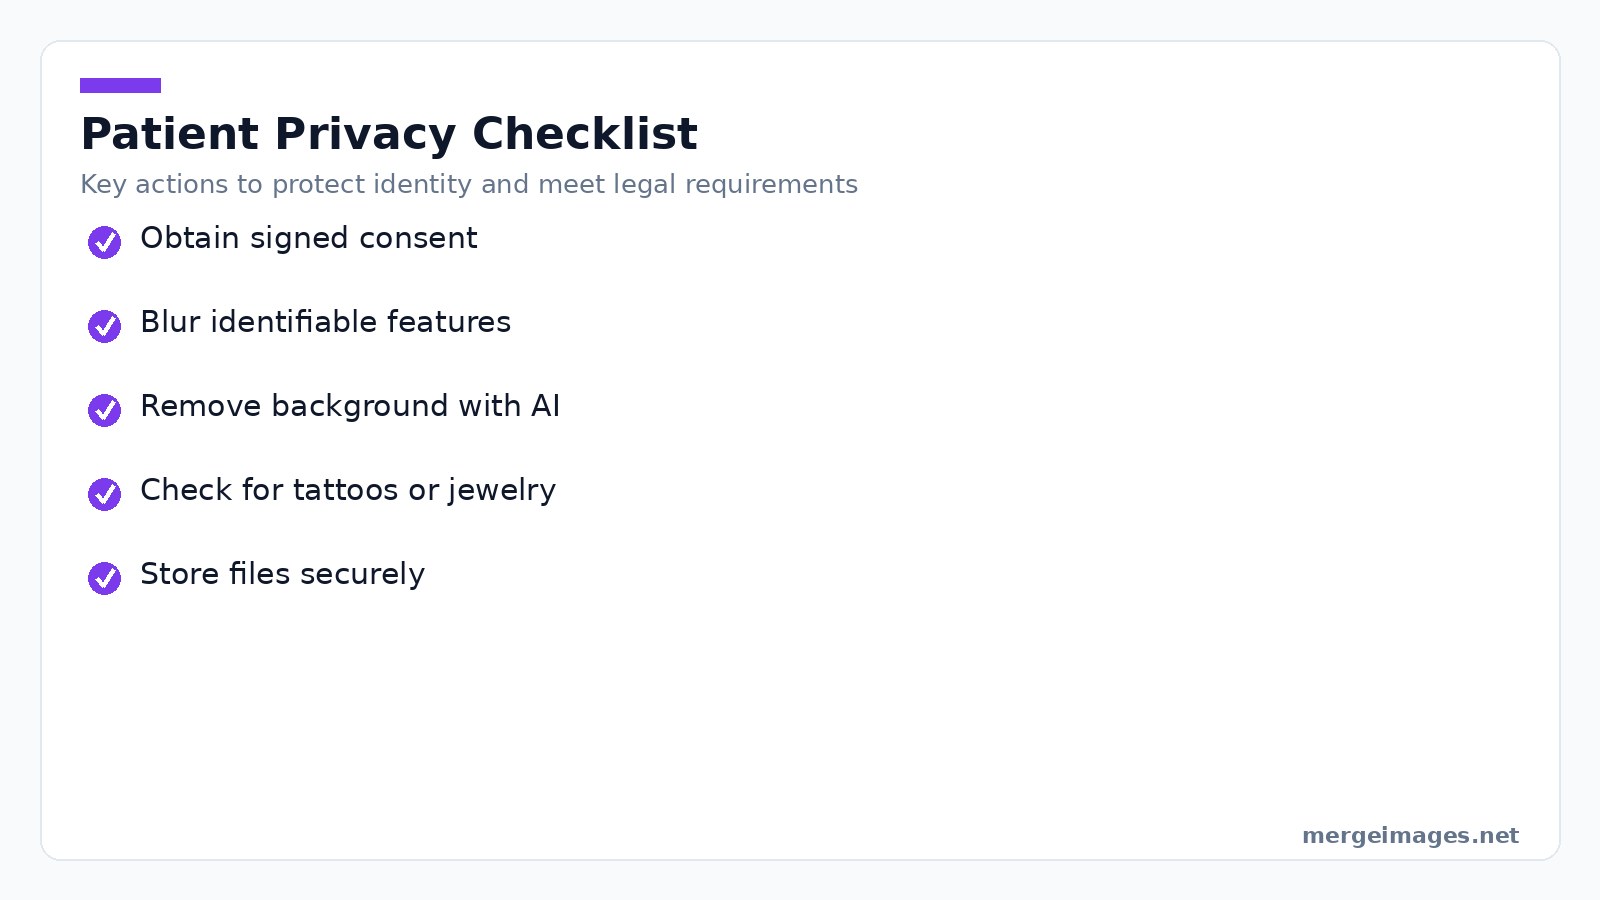
Protecting patient identity is non negotiable. Obtain a signed consent form that specifies intended use before any image leaves the clinic. If a tattoo, jewelry, or distinctive scar appears, blur it with the background remover or the image blur tool. For full face anonymity, remove the background entirely. Leave only the smile on a transparent canvas. Store the final files on a secure, HIPAA compliant server, not on the practice EMR system. It keeps the record fast and safe.
Multi-Procedure Galleries
When a practice offers whitening, veneers, alignment, and crowns, organize the gallery by procedure type. Within each section, group cases by complexity like simple, moderate, or complex. Showcase a diverse patient pool. A consistent grid layout created with the photo collage maker lets visitors scan multiple results without scrolling endlessly.
Website Display
Web performance matters. Export composites as JPEGs with quality set to 90 % or higher. Compress them to stay under 500KB. The image compressor tool reduces file size without noticeable loss. This ensures fast page loads on both desktop and mobile. Test the final image at a viewport width of 375px. The side by side layout should still be readable without horizontal scrolling.
Social Media Adaptation
Social platforms favor square or portrait formats. Resize the same composite to 1080x1080px for Instagram grid posts, or to 1080x1350px for portrait feeds. For Stories and Reels, a vertical 1080x1920px version works best. Keep the same before after order. The audience's brain processes the comparison instantly, regardless of aspect ratio.
Platform Specific Guidance
Each major platform has its own thumbnail rules. Facebook displays the first 600 px of an image in the feed. Place the most striking tooth change within that region. LinkedIn crops images to a 1.91:1 ratio for sponsored content. Design your composite with extra space on the sides to avoid losing the After label. TikTok shows only the central 1080 px of vertical videos. Embed the composite as a static frame for the first three seconds to capture attention.
Compliance and Ethics
Regulatory bodies guard against misleading dental advertising. HIPAA requires explicit consent before any patient image is published. Many state dental boards have rules about before after claims. Check local guidelines. The FTC demands that testimonials be truthful and that any disclaimer be clear. When in doubt, consult a legal professional familiar with healthcare marketing.
Frequently Asked Questions
Should I show extreme cases or typical cases?
Both have value. Extreme cases attract attention on social media, while typical cases set realistic expectations for prospective patients.
What about photoshopped or enhanced photos?
Avoid them entirely. Manipulated images can breach advertising regulations and erode trust if the discrepancy is discovered.
How long should I keep before/after photos?
Retain clinical records for 7 to 10 years. Marketing versions require ongoing consent and must be removed if a patient withdraws permission.
What about competing clinics' photos?
Never use images that are not your own. Presenting another practice's work as yours is fraudulent and can lead to legal action.
Can I use AI-generated before/after images?
No. Advertising must reflect genuine patient outcomes; AI-generated composites are considered deceptive.
The Bottom Line
Standardize every element, from camera and light to pose and post processing, to produce honest, compelling before/after composites. Use the free MergeImages horizontal image merge tool for instant side by side layouts, adjust brightness with the brightness tool for uniform exposure, and protect privacy with the background remover. Consistent, ethical visuals attract new patients and reinforce the trust essential to a thriving dental practice.

Bello builds useful software and writes thoughtful content to make sense of it all. He tests the tools himself and checks the facts before any of it goes in a guide.
Probieren Sie Unsere Kostenlosen Bildtools
Bereit es Auszuprobieren?
Setzen Sie diese Tipps mit unserem kostenlosen Online-Bildeditor in die Praxis um. Keine Anmeldung erforderlich.
Design your visuals, free


