
Summarise this article with:
Building a sharp annual report demands 50 to 110 high-resolution photos, rigid color treatment, and tight file sizes to win over investors in print and digital formats. By 2026 the average report includes dozens of images that must look flawless on a 300 DPI page and load fast in an online PDF.
Shooting for Authenticity
Aim for a journalistic tone. Skip the staged setups. Real workspaces, candid interactions, and diverse staff communicate actual momentum. Capture moments that tell a story about where the business is heading. Highlight strategic focus areas like new factories, sustainability projects, or breakthrough labs to add narrative depth. Leave sterile boardroom shots to the generic stock catalogs.
Matching Visuals to Chapters
Treat every major chapter as a distinct visual problem. Give the CEO letter a warm portrait paired with a subtle brand backdrop. Build the year-in-review spreads with a grid of milestone moments. For business segment reviews, you need action shots that illustrate actual processes. People and culture sections thrive on candid employee collages. Sustainability pages demand environmental impact imagery. Future strategy sections call for forward-looking, optimistic visuals.
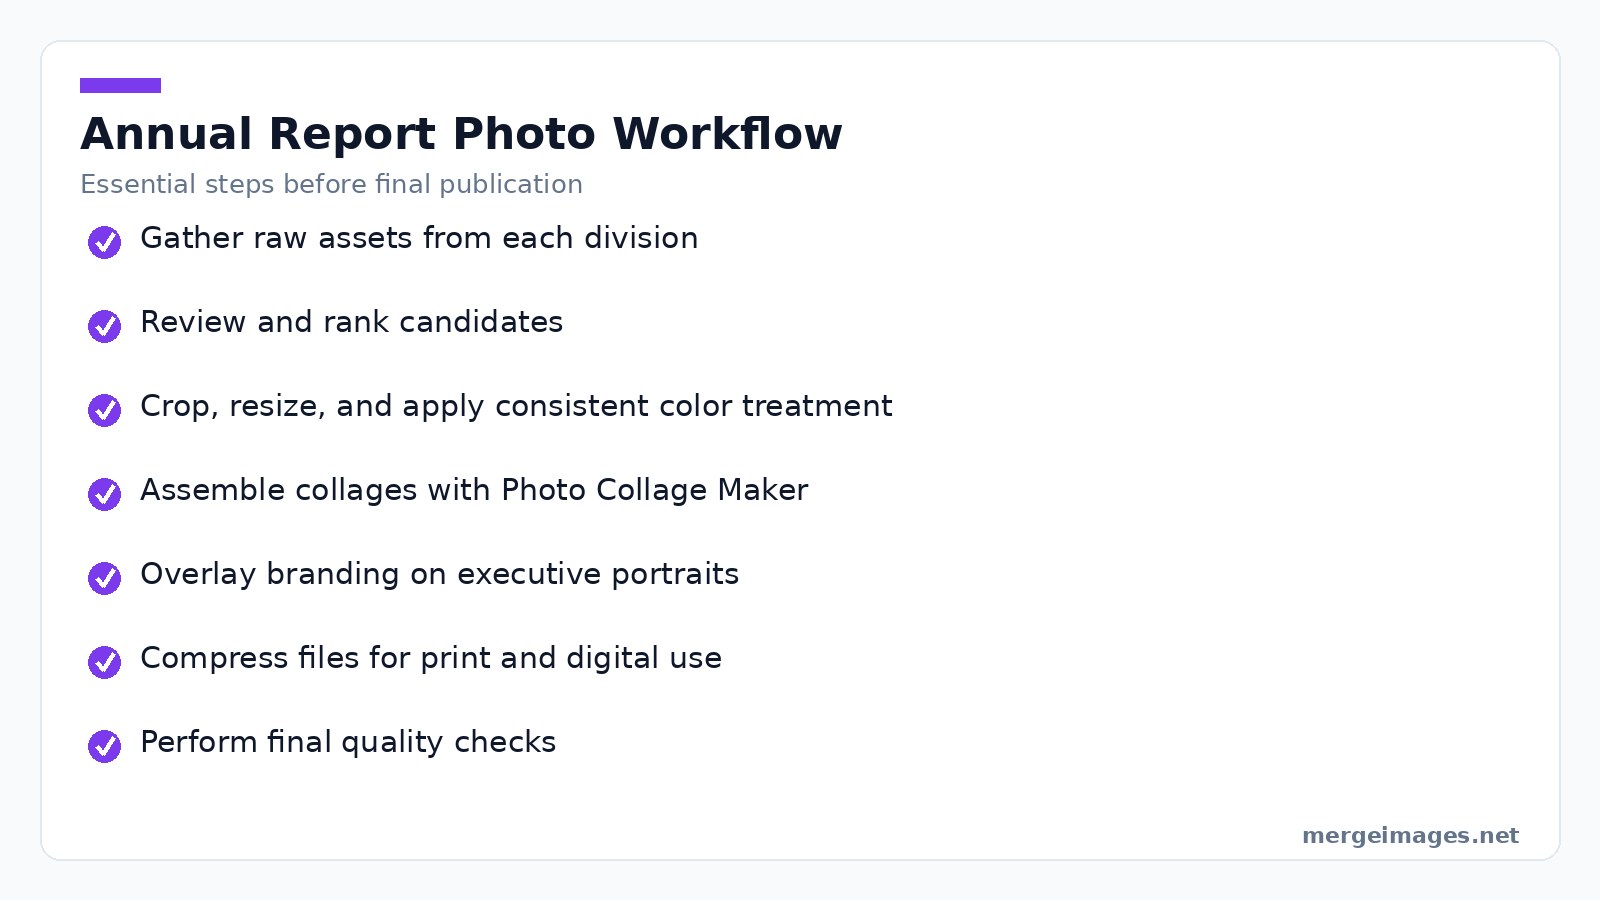

Photo: MART PRODUCTION via Pexels
Asset Selection and Prep
Gather raw assets from each business unit first. Demand a minimum of 4000 px on the short side so the image stays crisp after scaling. When I dropped a 4500 x 3000 px portrait into the Photo Collage Maker, I picked a 3-by-1 grid. The tool kept the original dimensions and aligned the edges automatically. Once selected, strip out excess background with the free Cropper tool. Apply a uniform color grade to match corporate brand tones. Watch your crop aggression. Removing too much background strips away the contextual clues readers need to understand the scene. Keep at least 10 % of surrounding space whenever possible.
Assembling the Grids
The Photo Collage Maker is the go-to browser utility for assembling year-in-review grids. Pick a layout template of four, six, or nine slots. Drag each image into its cell. The tool enforces equal spacing so the final collage feels balanced without manual math. Export the assembled grid as a PNG. The file retains the exact pixel dimensions you set to fit the page layout without distortion. If a grid cell contains an image with a different aspect ratio, the tool adds a subtle matte border to preserve alignment. This prevents the stretching that ruins image quality.
File Optimization Realities
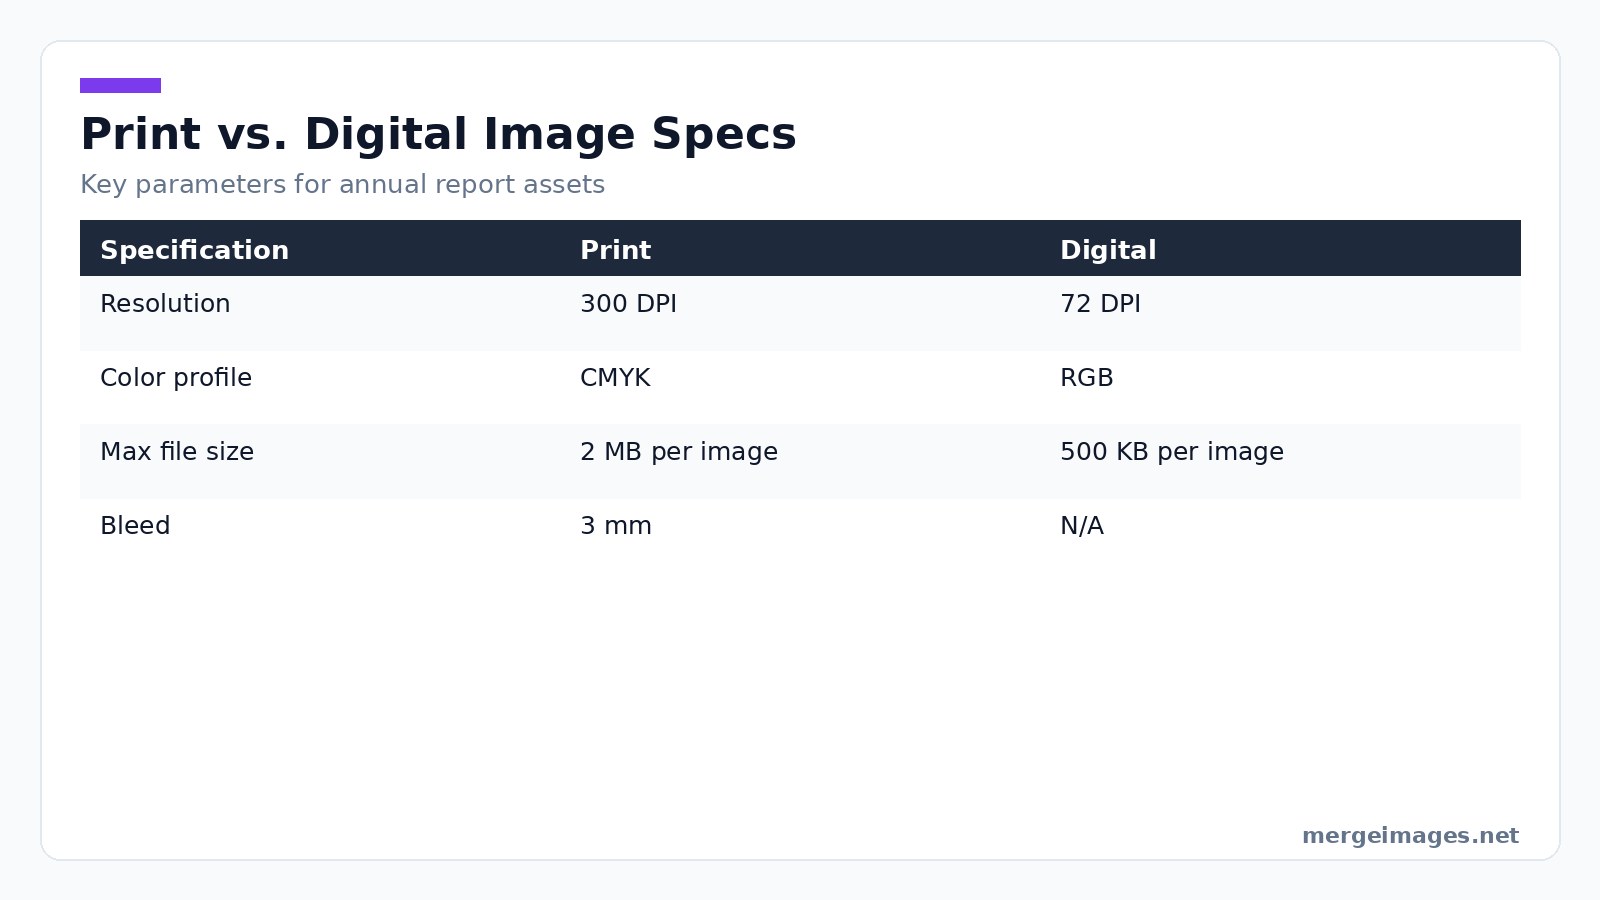
Print demands 300 DPI, CMYK color, and a 3 mm bleed. Digital editions thrive on 72 DPI, RGB, and modest file sizes. I uploaded a 12 MB PNG of a full-bleed factory photo to the Image Compressor and set the target size to 500 KB. The service returned a 487 KB file that still looked sharp on screen. This keeps the report under typical PDF size limits without sacrificing visual quality. Compressing below 300 KB for print introduces banding in gradient areas. Test a single page before applying the setting to the entire batch.
The Production Workflow
- Gather raw assets by requesting photos from each division, aiming for 50 to 110 candidates.
- Review and rank by having the editorial team narrow the pool to 20 to 30 strong images.
- Crop, resize, and treat using the Cropper and the free Color Treatment guidelines to apply a consistent look.
- Assemble collages by feeding selected images into the Photo Collage Maker, choosing grid sizes that match the page dimensions.
- Overlay branding by using the Overlay Images tool to add a semi-transparent brand color block behind the subject for executive portraits.
- Compress for final output by running each exported PNG through the Image Compressor, targeting 300 DPI for print assets and 500 KB for digital assets.
- Export and integrate by placing the finished files into the layout software, verifying bleed and trim marks, then generating the final PDF.
Nailing Color Treatment
Apply the same subtle desaturation and contrast lift to every image. This creates a premium feel and unifies the visual language across chapters. Use brand-approved hue shifts to reinforce corporate identity without overwhelming the viewer. Warm amber works for people stories. Cool teal fits sustainability. Limit the total shift to no more than 15 % of the original hue. Larger adjustments make the image look artificial and reduce credibility.
Print vs. Digital Specs
| Specification | Digital | |
|---|---|---|
| Resolution | 300 DPI | 72 DPI |
| Color profile | CMYK | RGB |
| Max file size | 2 MB per image | 500 KB per image |
| Bleed | 3 mm | N/A |
The table above outlines the hard limits you must honor when preparing assets for each medium. Ignore these parameters and you will print blurry pages or serve a sluggish PDF.
Avoiding Production Traps
Watch for insufficient resolution. An image captured at 2000 px on the short side will pixelate when scaled to a full-page spread, so verify dimensions before import. Mismatched color profiles cause trouble too. Converting a CMYK image to RGB without proper profiling shifts brand colors, so use a trusted conversion tool or let the Image Compressor handle the profile change. Beware over-compression. Reducing a PNG below 250 KB for print introduces artifacts in textured areas, meaning you must run a visual check on a representative page. Watch your margins. Grids placed too close to the trim line risk losing the bleed, so keep at least 5 mm of safe zone inside the page edge. Finally, do not skip alt text. Accessibility reviewers frequently flag missing descriptions, so provide concise, descriptive alt text for every image to meet accessibility standards.
The Final Pre-Press Audit
Before the report goes to press, run a strict audit. Verify every image meets the resolution and color profile requirements. Confirm all collages align with the chosen grid dimensions. Ensure compressed files retain visual fidelity. Run a final pass with the Image Compressor to catch any oversized assets that slipped through earlier stages. Conduct a proof print of at least one full-color spread to confirm bleed and color accuracy.
Frequently Asked Questions
How many photos should a typical annual report contain?
A standard 50-page report includes 50 to 110 photos, with larger reports scaling up proportionally.
Are charts considered photos for the purpose of image optimization?
Charts and graphs are visualizations, not photographs, and they follow separate design guidelines.
Can I reuse historic company photos in the report?
Use them sparingly for a dedicated history section. Most pages benefit from current, work-focused imagery.
Is it acceptable to use stock photos for corporate sections?
Stock images work for generic background elements, but primary representation should come from authentic company photography.
What timeline should I allocate for photo procurement?
New shoots require 8 to 12 weeks. Curating existing assets typically takes 4 to 6 weeks.
The Bottom Line
Authentic, diverse, and high-resolution photos paired with consistent color treatment elevate an annual report from a static document into an engaging narrative. Use the free Photo Collage Maker to build uniform grids. Run the Image Compressor to meet print and digital size limits. Apply the Overlay Images tool to blend branding with executive portraits. Stick to this disciplined workflow and you will deliver a polished report that resonates with investors and reinforces corporate credibility.

Bello builds useful software and writes thoughtful content to make sense of it all. He tests the tools himself and checks the facts before any of it goes in a guide.


