
Summarise this article with:
Travel collages win every time. One picture captures a moment. A well crafted collage tells the whole journey, showing landmarks, meals, and sunsets in a single frame. With 7 photos and a 1080 × 1080 canvas you fit a week-long European tour into one Instagram post that earns two to three times more engagement than isolated shots.
Pick the Right Grid Shape
Shape dictates how viewers read your story. A 2 × 2 grid works like a mini gallery for a short city hop. Need more room? Try a 3 × 3 grid to highlight each stop on a nine-day trek. For longer trips, a strip layout strings photos in travel order, mimicking a map route. The photo collage maker supplies these templates instantly. Select a layout. Drop your images. The tool snaps them into place without any manual alignment.
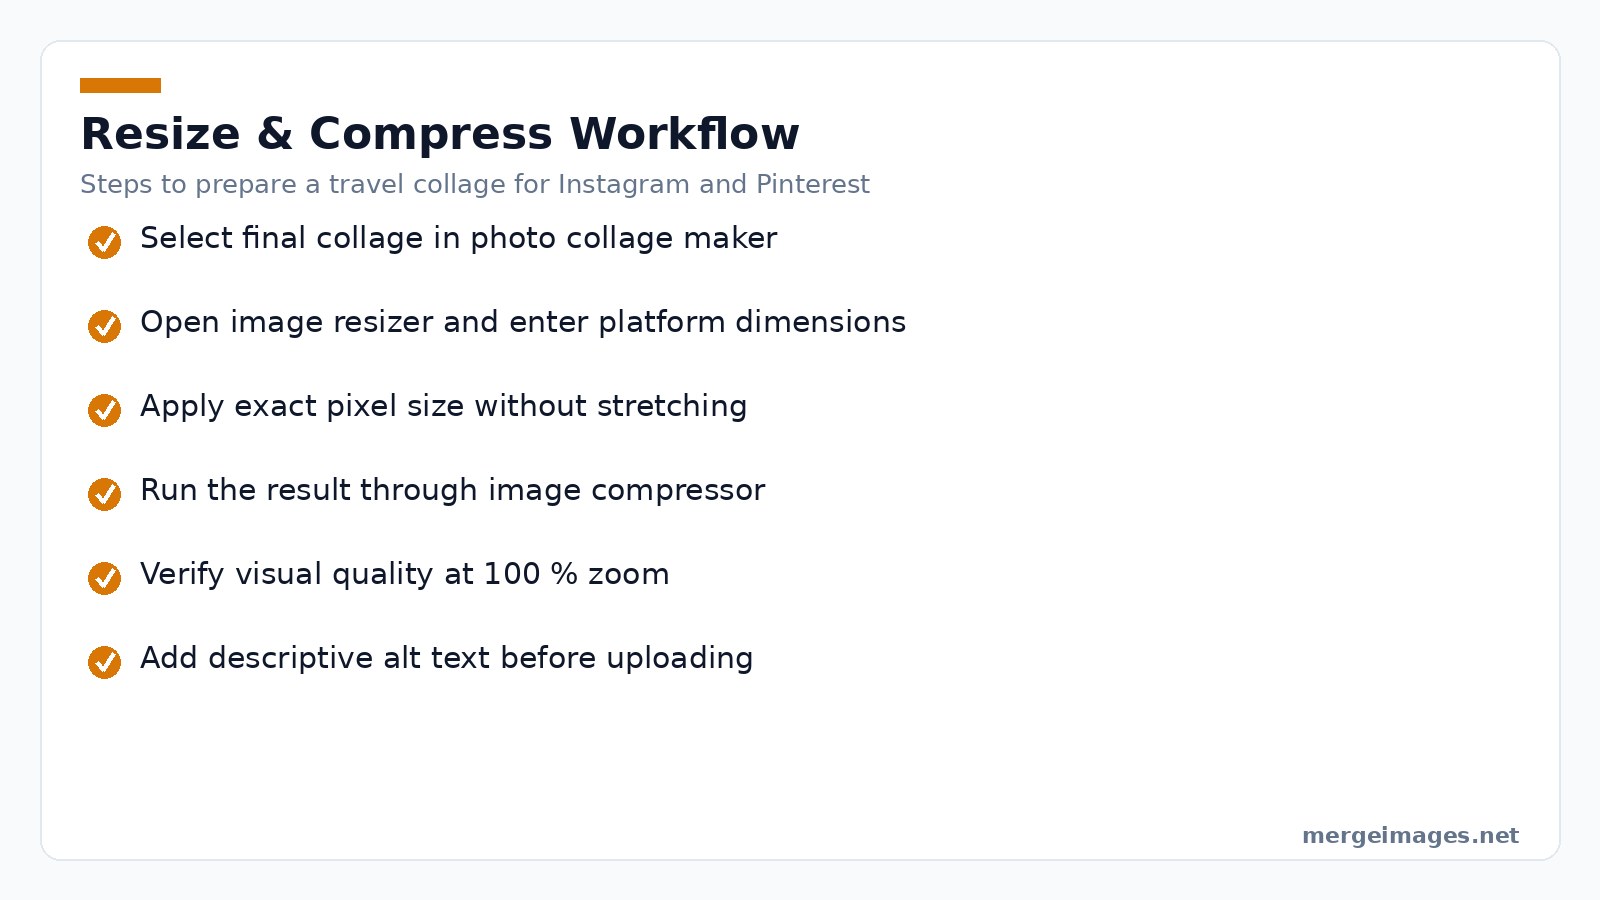
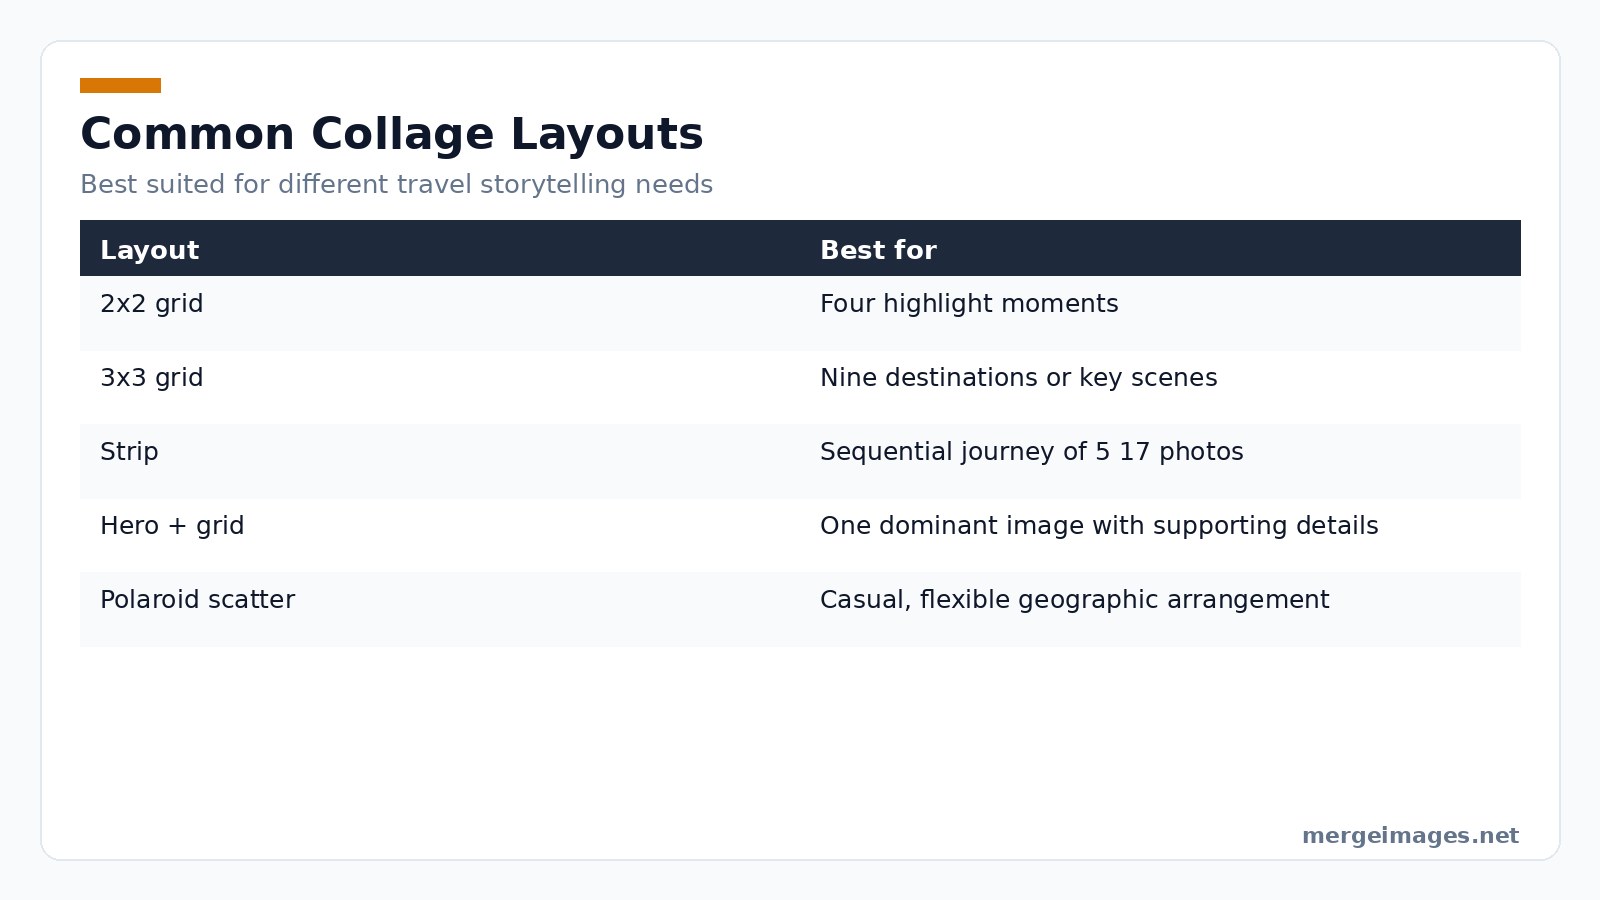
Photo: Harper Sunday via Pexels
What can go wrong with grid choice?
If you pick a 3 × 3 layout for a ten-photo set, the tool will automatically shrink each tile, making details hard to see on a phone screen. Conversely, a 2 × 2 grid for a ten-photo story forces you to drop images, which can break the narrative flow. The safe approach is to match the number of tiles to the number of strong images you have, then use the strip layout for overflow. When you exceed the canvas size, the tool may start rasterizing layers, which reduces editability.
Select Photos That Hit Hard
Start by narrowing the pool to four to twelve images. Each one must add something new. Include a landmark. Grab a local dish. Shoot a candid street scene. Add a landscape shot. Throw out any photo that is blurry, over-exposed, or shows the same angle twice. When you resize a 4000 × 3000 JPEG to 1080 × 1080 using the image resizer, lock the aspect ratio. Crop the excess. You get a crisp square that fits Instagram perfectly with zero distortion.
Pitfalls to watch
- Duplicate lighting: Two sunrise shots from the same city can feel repetitive. Swap one for a night-time street view.
- File-size bloat: Starting with RAW files and converting directly to JPEG at 1080 × 1080 can leave hidden metadata that inflates size. Run the image through a metadata stripper before compression.
- Colour mismatch: If one photo is shot in a different white-balance mode, it will clash with the rest. Re-balance in a raw editor before importing.
Control the Color Palette
Different regions bring different hues. Mediterranean blues. Tropical oranges. Desert browns. Let that variety illustrate the route. Or apply a unifying filter so the collage feels like a single piece. A quick one-click auto-enhance in the collage maker balances brightness across all frames. A manual adjustment in a photo editor can add a warm overlay. Heavy filters mask the authenticity of a place. Limit adjustments to a few stops on the slider.
Honest limits
Filters are great for cohesion but they also erase subtle colour cues that tell a story, like the teal of a Venetian canal or the rust of a Moroccan kasbah. Over-filtering can lead to a "Instagram-generic" look that reduces the unique character of each destination. If you notice the collage looking flat, turn off the filter for one tile and compare.
Place Maps Without Clutter
A tiny map in a corner adds geographic context. It does so without crowding the design. Capture a screenshot of your route. Use a transparent PNG so the map sits lightly over the collage background. Position it in a free corner. Leave space for the main photos. Avoid covering any key visual element. If the map interferes with a landmark photo, reduce its opacity or move it to the opposite side.
Common mistakes
- Oversized map: A map that occupies more than 15 % of the canvas can dominate the visual hierarchy, pushing the photos into the background.
- Low-resolution PNG: When the map is scaled up to fit a 1080 × 1080 canvas, pixelation becomes obvious. Always start with a map export of at least 300 dpi.
Match Platform Dimensions
Each social channel prefers its own dimensions. Instagram loves 1080 × 1080 squares or 1080 × 1350 portrait. Pinterest thrives on 1000 × 1500 vertical pins. After arranging the collage, run the final image through the image resizer. Set the exact pixel size required. Type the width and height. Produce the correctly sized file instantly. When the output matches the platform spec, the upload preserves sharpness. If the dimensions are off, the site will stretch or compress, blurring details.
Edge cases
- Stories vs. Feed: Instagram Stories use a 1080 × 1920 canvas. Feeding a 1080 × 1080 collage into a story will add black bars on top and bottom, which looks unprofessional. Export a dedicated story version instead of relying on automatic cropping.
- LinkedIn: The platform favours a 1200 × 627 ratio for shared images. A square collage will appear with large empty space on the sides, reducing impact.
Avoid Browser and File Limits
The browser-based tools operate on client-side memory. Very large source files can cause the browser to stall. If you notice lag, pre-scale your originals to a maximum of 3000 × 3000 before importing. The image compressor reduces file size but cannot recover detail lost in earlier aggressive cropping. Test the compressed file on a mobile device before publishing. A 500 KB collage loads instantly. A 2 MB file may appear pixelated after the platform recompresses it.
What to do when the browser crashes
- Clear the cache and reload the tool.
- Close other tabs that are using memory.
- Split the collage creation into two steps: first build a low-resolution draft, then replace each tile with the high-resolution version after the layout is locked.
Use Free Browser Tools Efficiently
- Batch Upload, Drag all selected photos onto the collage maker at once. The tool creates a temporary album, letting you swap images without re-uploading.
- Live Preview, Toggle the “preview” mode to see how the collage will look on a phone screen versus a desktop feed. Adjust spacing while you watch the change in real time.
- Keyboard Shortcuts, Press
Ctrl+Zto undo a misplaced photo,Ctrl+Yto redo, andArrowkeys to nudge images pixel-by-pixel for precise alignment. - Export Options, Choose PNG for lossless quality when you need crisp text overlays, or JPEG with a quality slider (70-80 % is usually ideal) for faster loading on slower connections.
These tricks shave minutes off the editing process and keep you within the memory limits of most browsers.
Advanced Tips for Power Users
- Layer Masks for Overlays, If you want a semi-transparent map that only covers part of a photo, add a layer mask in the collage maker and paint black where the map should disappear. This keeps the underlying scenery visible.
- Color Grading Across Frames, Use the “global color lookup” feature to apply the same LUT (look-up table) to every tile, ensuring a cohesive mood from sunrise in Morocco to sunset in Kyoto.
- Dynamic Text Boxes, Add a small caption under each image with the city name and date. Keep the font size under 12 pt so it doesn’t dominate the visual hierarchy.
- Export for Stories, For Instagram Stories, export a 1080 × 1920 version, then split the collage into three vertical slices using the image cutter tool. Each slice becomes a consecutive story slide, creating a smooth scrolling narrative.
Limits of these advanced features
Layer masks are raster-based in most free tools, meaning you cannot edit the mask after export without re-opening the project. LUTs can introduce banding if the original photos are low-bit depth; always work from 16-bit files when possible. Text boxes that are too small become illegible on low-resolution screens, so always preview on a smartphone before finalizing.
Finish Strong Before Posting
Run the file through the image compressor before you hit share. It reduces file size while keeping visual quality. This speeds up loading on mobile feeds. Add alt text that describes each location. Accessibility matters. Search engines love detailed captions. A short line like "Sunset over Santorini Greece; street food market in Bangkok; Alpine lake in Switzerland" covers the essentials.
Key Takeaways
Pick four to twelve varied photos that each tell a piece of the story. Use the photo collage maker to lock in a grid or strip layout. Resize with the image resizer to meet platform dimensions. Compress with the image compressor for fast mobile delivery. Add a tiny map for geographic context and alt text for accessibility.
Frequently Asked Questions
How many photos should be in the collage?
Typical collages contain four to twelve images. Fewer looks sparse. More makes each picture too small to notice.
Should I include myself in the photos?
A couple of personal shots add connection. Over-populating the collage with selfies can feel self-centered.
What about photos with strangers?
Candid locals add authenticity. Just respect cultural privacy norms before posting.
Can I AI generate scenes I missed?
No. Travel content should stay truthful. Fabricated images erode trust.
How do I share large collages without quality loss?
Upload at the exact resolution the platform expects. Let the site handle its own compression.
Bottom line: A travel itinerary collage combines the best moments of a multi-destination adventure into one shareable image. Use free browser-based tools to edit, resize, and compress. Watch your engagement soar.

Bello builds useful software and writes thoughtful content to make sense of it all. He tests the tools himself and checks the facts before any of it goes in a guide.
Probieren Sie Unsere Kostenlosen Bildtools
Bereit es Auszuprobieren?
Setzen Sie diese Tipps mit unserem kostenlosen Online-Bildeditor in die Praxis um. Keine Anmeldung erforderlich.
Bilder Jetzt Zusammenfügen

