
Summarise this article with:
You can build a finished photo collage in a browser tab in about five minutes, with no download and no account. Match the layout to how many photos you have (a 2x2 grid for four, a 3x3 for nine), leave a 10 to 20 pixel gutter between them, and export at 300 PPI if the collage is going to be printed rather than posted.
You do not need Photoshop, Canva, or any installed software to make a collage that looks deliberate rather than assembled. What follows is the order I work in: let the photo count pick the layout, set the spacing, handle photos that are different sizes, then export once for wherever it is going.
Why Browser-Based Collage Makers Win
Installed collage software has three problems unrelated to how good it is. It takes disk space and wants updating, for a job you might do four times a year. It assumes you know layers and masks. And it is usually a subscription that runs in the months you never open it, tied to one operating system.
The Photo Collage Maker sidesteps all three: it runs on anything with a browser and there is nothing to sign up for. Your images are processed on our own servers, deleted automatically within 7 days, and never shared or used to train models.
Choosing a Layout for the Number of Photos You Have
Most bad collages are a layout problem, not a photo problem, and the layout falls out of the count. Our collage tool asks how many photos you have before anything else: it carries 128 layouts across counts of 2, 3, 4, 5, 6, 7, 8, 9, 10 and 12, and those counts are not served equally. There are 24 four-photo layouts and 16 two-photo ones, but only 4 for ten photos and 3 for twelve. The more images you cram in, the fewer arrangements still read as a design instead of a contact sheet.
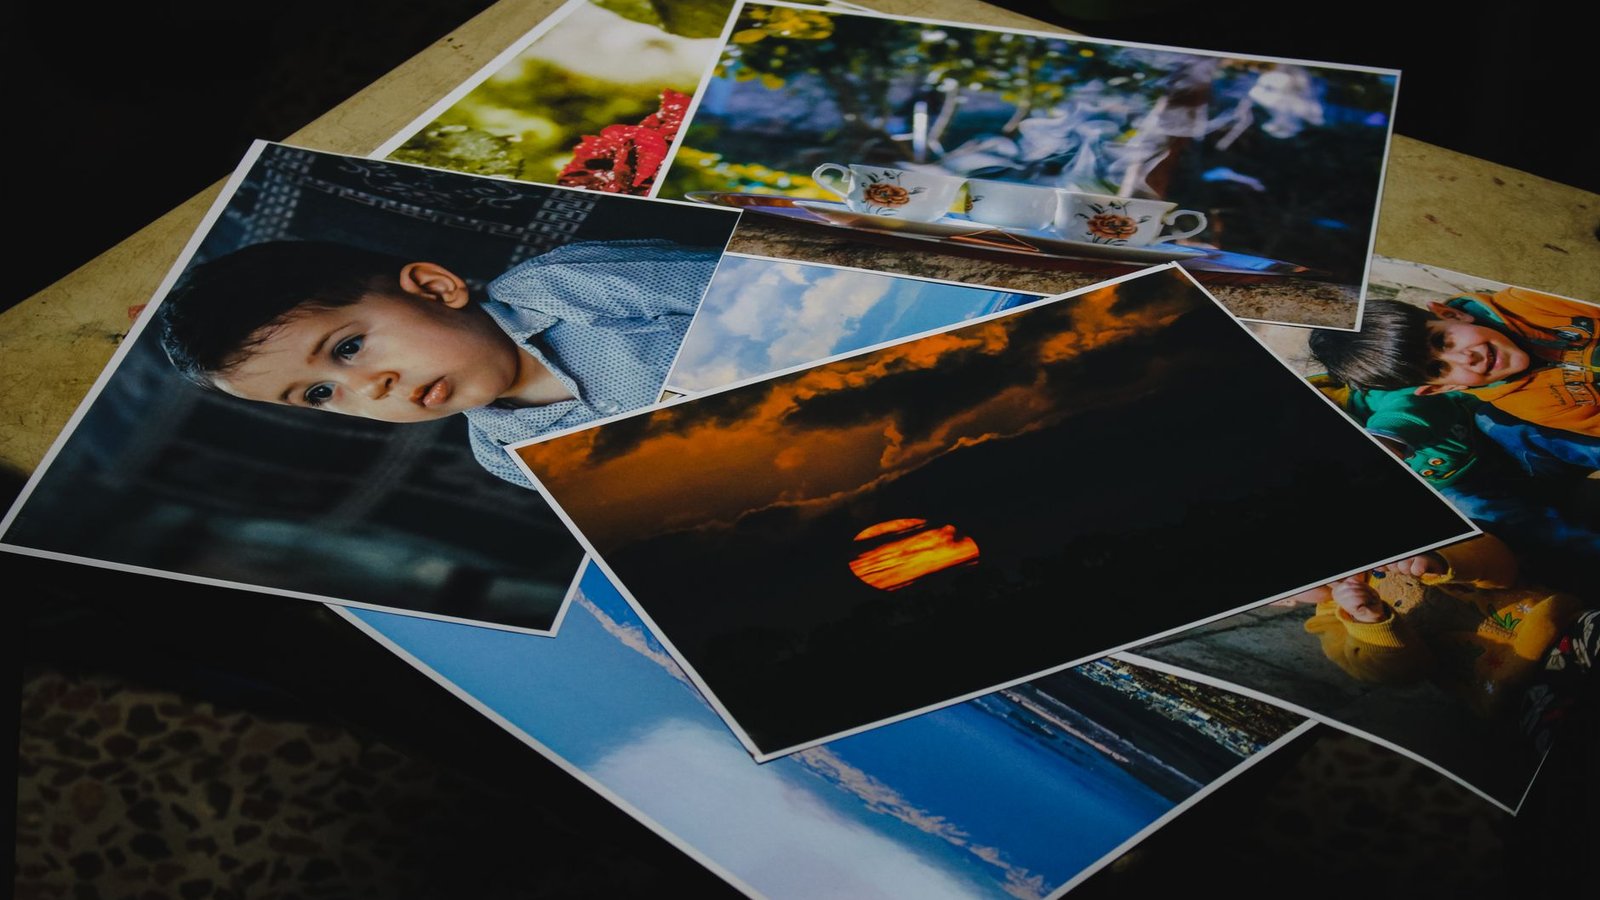
Photo: Samer Daboul via Pexels
- Two photos. Side by side or stacked. A two-photo grid reads as a broken grid.
- Three photos. One large with two stacked beside it, unless all three are portrait.
- Four photos. The 2x2 square, the most forgiving layout there is.
- Five to seven. A feature layout with one hero at double size. An even grid of seven leaves a hole.
- Eight or nine. A 3x3. With eight, give one photo a double-width cell.
- Ten or twelve. That is a poster or a yearbook page, not a social post.
Step-by-Step: Create Your First Collage
Step 1: Choose Your Photos
Try it hereOpen the collage makerBuild a photo collageArrange your images into one clean layout, free.
Pick shots taken in similar light. Beach photos hold together because the colour temperature runs the same across all of them, while a beach shot beside an indoor party shot fights itself however you arrange it. Mix one wide frame in with the close-ups.
Step 2: Pick a Layout
Grid for clean and formal, feature layout when there is one obvious subject, side by side for before and after, vertical stack for anything read on a phone. Choose before you drag anything in, because changing layout later means re-cropping.
Step 3: Arrange Your Photos
Nudge and zoom inside each cell so no face sits on a crop line. People skip this and wonder why the result looks careless.
Step 4: Fine-Tune the Details
Spacing, background colour and corner radius, covered next. The defaults are fine for a first pass.
Step 5: Export and Share
Pick width and format for one destination, not for everywhere at once.
Gutters, Borders and Background Colour
The gutter is the gap between photos, and it changes the finished look more than any other setting. Our collage maker opens at 12 px of spacing on a white background with square corners, sane at the default 1920 px output width.
Thin gutters of 8 to 15 px read as modern: the photos feel like one object. Fat gutters of 25 to 40 px read as a printed album page. Zero gutter is a specific choice, not a default; it works for panoramas and for two halves of one scene, and looks like a mistake everywhere else.
White is the safe background. Black adds weight and makes bright photos pop, but shows every dust speck on a scanned print. The corner radius slider runs 0 to 50 px; I use about 12 px for anything going to family and 0 for a report.
When Your Source Photos Are Different Sizes
This ruins more collages than bad taste does. If one photo is 4032 px wide off a recent phone and another is a 640 px screenshot from 2011, the collage puts that gap on display, because the two sit at the same size.
Our tools flag it. When two images differ by more than 15 percent (in height for a horizontal merge, in width for a vertical one), a size mismatch hint appears with a Match sizes button. Behind it: Keep original sizes fills the difference with your background colour, Match largest scales the smaller photo up, Match smallest scales the bigger one down, Crop to match trims from the centre.
Match smallest is usually the honest choice. Scaling up does not create detail, it enlarges what is there, and past roughly 2x the softness shows. I hit this on a nine-photo family set: at the 3000 px output width a 3x3 cell is about 980 px across, so Match largest blew that 640 px screenshot up by 1.5x, and it looked like it.
If a photo is too small and you still need it, run it through the AI Image Upscaler first. If the mismatch is aspect ratio rather than pixel count, fix it in the Image Cropper. Cropping every photo to one ratio is most of what makes a grid look intentional.
Exporting for Print Versus Screen
For screen, width is the only number that matters. Export JPEG or WebP at the width the destination displays; anything beyond that gets recompressed. The presets are 1080, 1920, 2400 and 3000 px, with a slider from 800 to 4000.
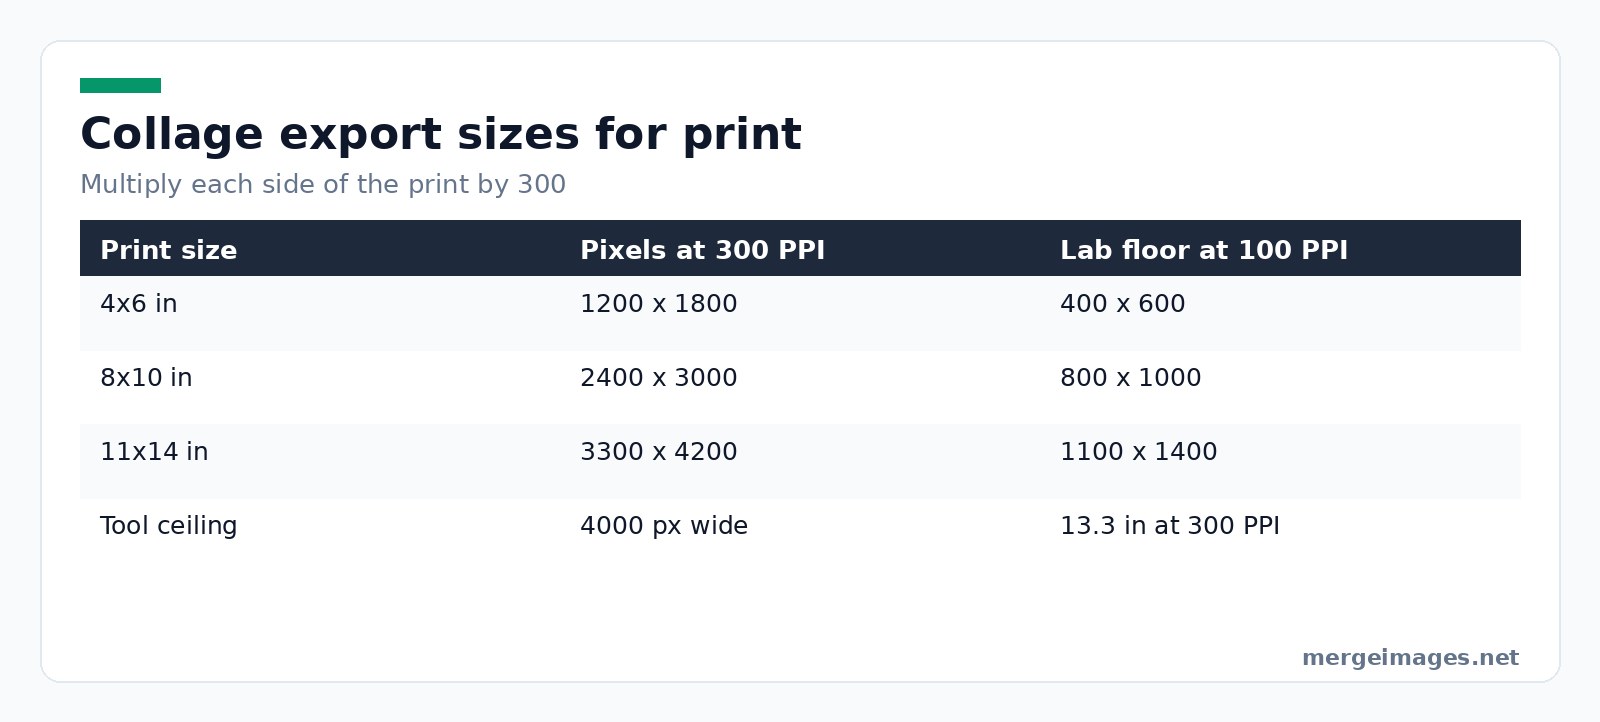
For print, the number is pixels per inch. Labs work at 300 PPI. Social Print Studio says on its own help page that it prints at 300 dpi and will not accept a file below the 100 ppi size, which for an 8x10 means 800 x 1000 pixels. Multiply each side by 300:
| Print size | Pixels at 300 PPI | Lab floor at 100 PPI |
|---|---|---|
| 4x6 in | 1200 x 1800 | 400 x 600 |
| 8x10 in | 2400 x 3000 | 800 x 1000 |
| 11x14 in | 3300 x 4200 | 1100 x 1400 |
Two traps live in that table. The default 1920 px is only 6.4 inches at 300 PPI, so a collage printed as an 8x10 arrives soft. And output tops out at 4000 px, or 13.3 inches, so a 16x20 poster needs 4800 x 6000 pixels and is past what this tool will produce. Export PNG for print so the gutters stay clean.
Collage Ideas by Purpose
Social. A 3x3 grid previewing your next nine posts, story-highlight covers from one template, or a carousel folded into one image.
Business. Product angles in one listing image. Before and after side by side, which Horizontal Image Merge handles in two uploads, or Vertical Image Merge when it will be read on a phone.
Personal. Trip recaps, family composites, and the pet collage that is the real reason many people land here.
Pro Tips for Better Collages
Colour harmony. Photos that share a palette look composed. If yours do not, black and white forces unity and usually looks better than it sounds.
Visual weight. Dark, saturated images feel heavier than pale ones. Put them opposite each other or the collage tips to one side.
Hierarchy. Largest photo equals most important photo. If everything is one size you have made a grid, not a composition.
One orientation. Mixing portrait and landscape in one grid leaves holes.
The Complete Free Workflow
- Sort the photos and pick the hero.
- Upscale anything too small first, as above.
- Cut out subjects with the Background Remover when backgrounds clash.
- Crop everything to one aspect ratio.
- Build it in the collage maker, or merge a simple pair with Combine Photos Online.
- Squeeze the export with the Image Compressor.
I ran that on the nine-photo set above. The first export, PNG at the 3000 px preset, came out 11.4 MB, a lot to push through a group chat. Rebuilt at 1080 px as JPEG at quality 92 it landed at 486 KB, and on a phone nobody could tell them apart.
Frequently Asked Questions
How many photos should go in one collage?
Four is the sweet spot for a social post, because a 2x2 gives every photo room to be read at phone size. Nine is the practical ceiling on screen. Past that each photo shrinks below the size where a face stays recognisable, so ten and twelve photo layouts belong on paper.
What size should I export a photo collage at?
For screen, match the width to the destination. For print, multiply the print size in inches by 300: a 4x6 needs 1200 x 1800 pixels, an 8x10 needs 2400 x 3000. Use PNG for print, JPEG or WebP for screen. One giant file reused everywhere buys slow pages and no quality.
Can I make a photo collage without downloading an app?
Yes. The job runs in a browser tab on a laptop, tablet or phone, with no install and no account. Your images go to our servers to be composited, are deleted automatically within 7 days, and are never shared or used to train models. No watermark and nothing to pay.
What is the best gap between photos in a collage?
Between 8 and 15 pixels at a 1920 px output width for a modern look, and 25 to 40 pixels when the collage is heading to print, where the wider gutter reads as an album page. Set it to zero only when the photos run continuously, as in a panorama.
Why do my photos look blurry in the collage?
Almost always because one source was much smaller than the rest and got scaled up to fit. Check the size mismatch hint before exporting and prefer Match smallest over Match largest, so the tool shrinks the big photo rather than stretching the small one.
Conclusion
Collages are mostly decisions, not skills. Count your photos and let that pick the layout, keep the gutter consistent, get every source to one ratio before you build, and export for the one place it is going. Start with a 2x2 grid before trying anything with twelve cells in it.

Bello builds useful software and writes thoughtful content to make sense of it all. He tests the tools himself and checks the facts before any of it goes in a guide.
Probieren Sie Unsere Kostenlosen Bildtools
Bereit es Auszuprobieren?
Setzen Sie diese Tipps mit unserem kostenlosen Online-Bildeditor in die Praxis um. Keine Anmeldung erforderlich.
Bilder Jetzt Zusammenfügen


