
Summarise this article with:
A construction progress photo timeline built on fixed vantage points, monthly cadence, and consistent organization gives every project stakeholder a defensible visual record. Shoot 20-50 photos per visit, repeat exact camera positions each month, and compile them into grids or side-by-side strips for reports. Done right, photos serve seven stakeholder groups from one shoot.
Why Monthly Photos Are Worth the Workflow
Construction photos serve a wider audience than most people plan for before a dispute arrives:
- Owner: project visualization, decision support
- General Contractor: schedule proof, billing support
- Subcontractors: scope definition, change-order evidence
- Architect: design-intent verification
- Lender: draw progress confirmation
- Insurance: pre-existing condition documentation
- Legal: dispute-resolution evidence
One organized photo set covers all seven. The habit costs an extra 30-60 minutes per site visit; unraveling a dispute without photos costs far more.
The Monthly Cadence (By Phase)
Not every phase needs the same intensity. Here is a practical cadence checked against common site documentation standards (verified July 2026):
| Phase | Recommended Frequency |
|---|---|
| Pre-construction | One full baseline shoot before any work starts |
| Site work / demolition | Weekly |
| Foundation | Weekly through pour and cure |
| Framing | Bi-weekly |
| Mechanical / electrical rough-in | Monthly + every major rough-in before cover-up |
| Finishes | Monthly |
| Punch list | Pre-walkthrough and after each correction |
| Substantial completion | Final full shoot |
Monthly is the minimum across all active phases. Rough-in is the one area where waiting until month-end loses the record permanently: drywall covers MEP within days.
Building a Fixed Vantage Point System
The most powerful technique in construction photography is shooting from the exact same spot every single visit. When photo positions drift month to month, side-by-side comparisons lose their impact and evidentiary weight.
Establish your vantage points on the first pre-construction visit:
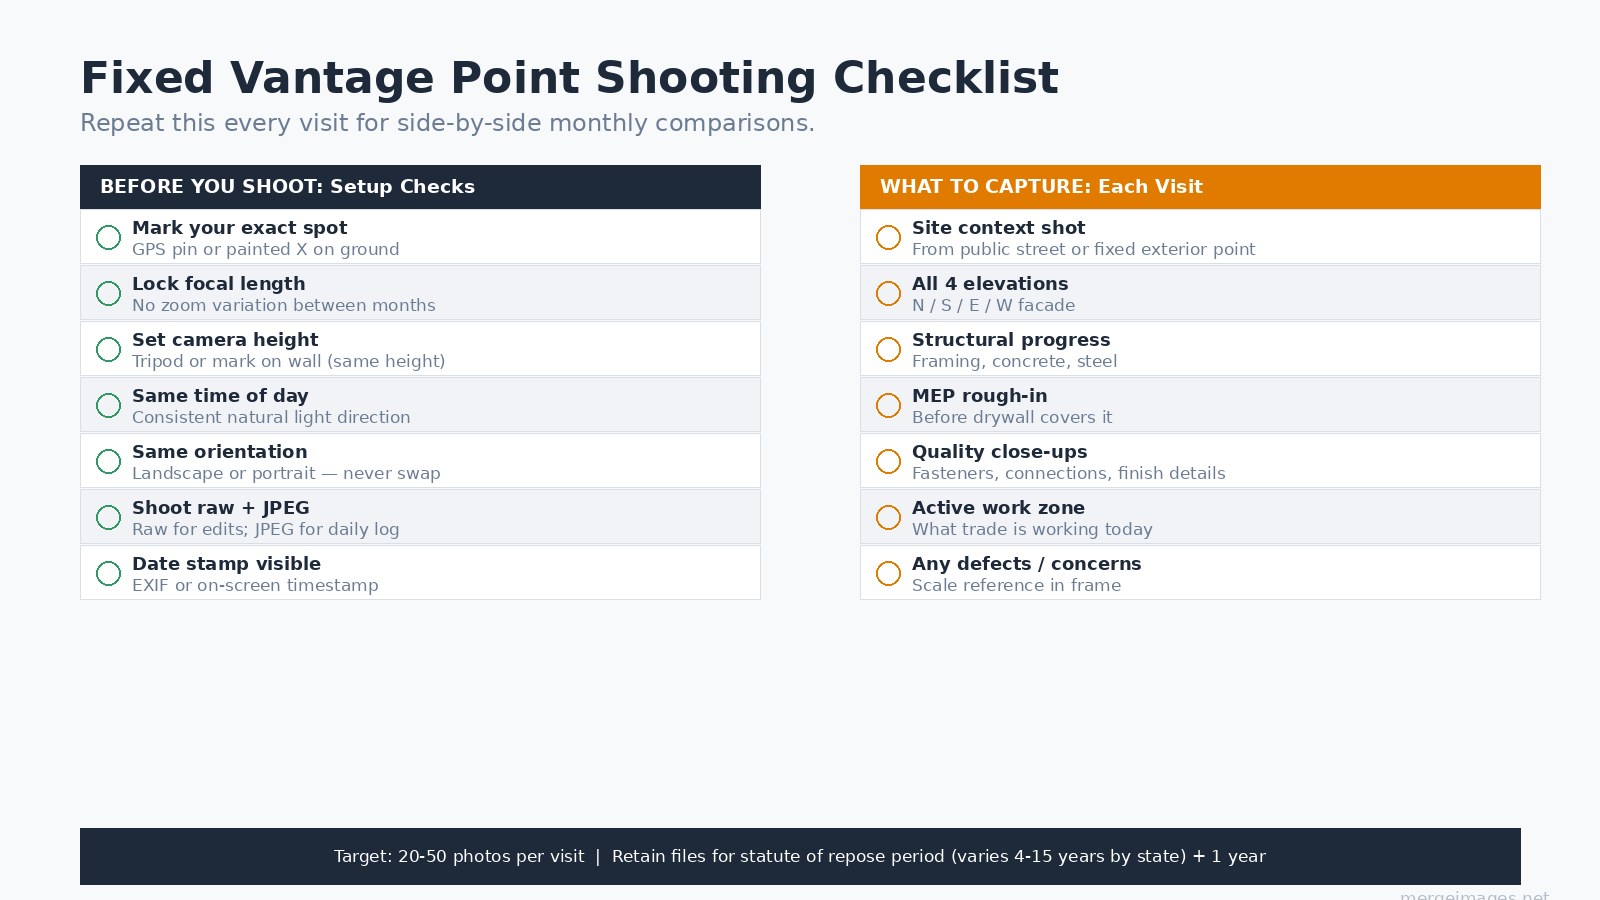
- Mark each position physically with a painted X, a pin flag, or a stake (indoors: a piece of tape on the floor with position number).
- Log the GPS coordinates of each position in your project file.
- Note the tripod or shoulder height for each shot.
- Record the focal length you used. Never adjust zoom between months on the same vantage point.
- Shoot at the same time of day for consistent natural light direction.
I keep a printed vantage-point card tucked in my camera bag for each project: position number, GPS, height, focal length, and a thumbnail of the first shot from that point. When a different person does the monthly shoot, the card keeps it consistent.
What to Capture Every Visit
A complete monthly set covers six categories:
- Site context from the public-facing direction (establishes date and phase)
- All four elevations, north, south, east, west facades
- Structural progress, framing, concrete, steel, connections
- MEP rough-in before cover-up, the one category where timing is irreversible
- Quality close-ups, fasteners, flashing, finish alignment, anything questioned in RFIs
- Active work zone, what trade is working and on what scope
Shoot 20-50 photos per visit organized in that order. Fewer than 20 and you will have gaps; more than 50 per visit without a system and photos become unfindable.
Pre-Construction Baseline: Do Not Skip This
The pre-construction baseline is the most frequently skipped and most frequently regretted photo set:
- Adjacent property conditions (cracks, grades, landscaping)
- Existing structures on site before demolition
- Site grades and drainage patterns
- Utility locations and markings
- Any pre-existing damage or defects
This set is your protection for neighbor disputes, insurance claims, and any scope-creep argument about what condition the site was in when you arrived. Shoot it before a single shovel turns.
Organizing and Naming Files
Photos only serve their purpose if they are findable years later. A folder structure that scales:
project-name/
  2026-07/
    visit-03/
      20260702_v03_site-context.jpg
      20260702_v03_north-elevation.jpg
      20260702_v03_mep-rough-in.jpg
Filename convention: YYYYMMDD_visit-number_subject.jpg
Enable GPS embedding in your camera or phone. EXIF metadata that records latitude, longitude, and timestamp is far harder to dispute than a handwritten note.
Building the Monthly Report Layout
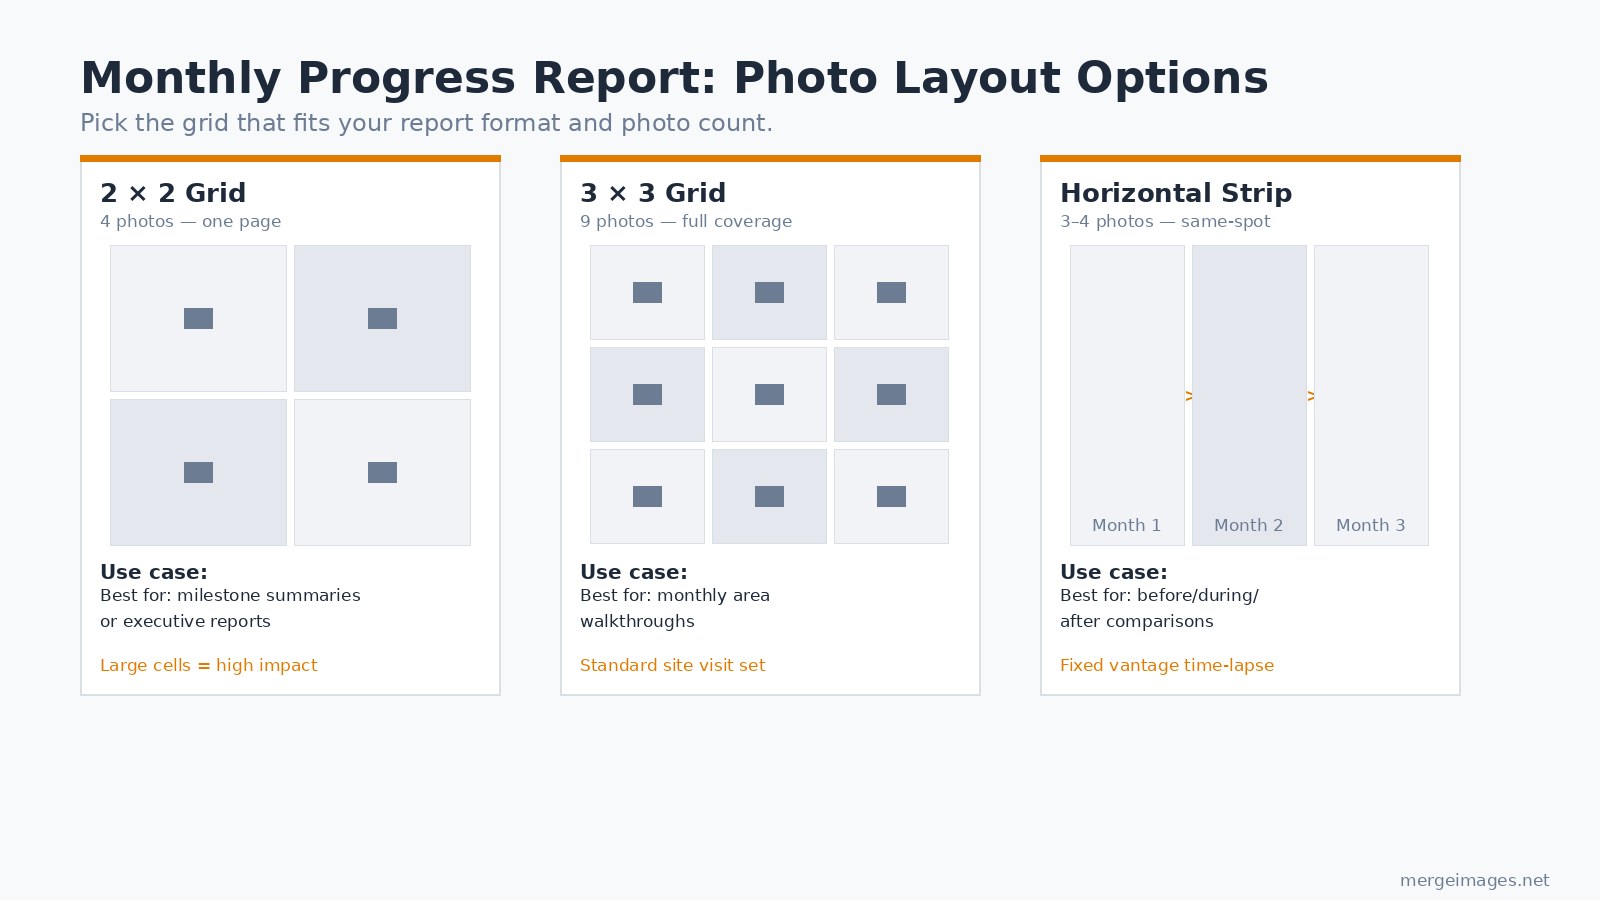
The format of the monthly photo report matters as much as the photos themselves. Three layouts cover most use cases:
2x2 grid (4 photos): Best for executive summaries or single-milestone reports. Large cells make high-impact images. Use photo collage maker to assemble these quickly from your monthly export.
3x3 grid (9 photos): The standard monthly area walkthrough. Nine cells let you cover the full six-category set with extras for any open issues. Also works well for the RFI and defect section of a report.
Horizontal strip (3-4 photos, same vantage point): The most powerful layout for showing progress over time from the exact same camera position. Month 1, Month 2, Month 3 side by side makes schedule narrative obvious at a glance. Use horizontal image merge to line up the same-spot shots into one document-ready strip.
For a broader look at building before/after comparisons across any project type, see the guide on how to create before and after photos.
Equipment: What You Actually Need
For most commercial documentation work, a modern smartphone suffices. For dispute-grade evidence on complex or luxury projects, step up:
- Smartphone: adequate for most documentation; GPS built in
- Point-and-shoot with optical zoom: better resolution for elevation shots
- DSLR or mirrorless: best for detail, depth, and low-light rough-in
- Drone (FAA Part 107 certified operator required for commercial use): monthly aerial site overviews, roof inspections, and neighbor-context shots. Part 107 certification requires an FAA knowledge test and recurrent online training every 24 calendar months.
- 360-degree camera: useful for immersive MEP rough-in walkthroughs before drywall
Drone use for commercial construction photography requires FAA Part 107 certification. Check local municipality and HOA rules as well, some impose additional restrictions beyond the federal baseline.
Defect and Dispute Documentation
When a defect or issue needs to go on record, the standard photo package for each item is:
- Wide shot establishing context (where is this defect in the larger scope)
- Medium shot (defect in isolation)
- Close-up with a scale reference in frame (ruler, tape measure, or known-size object)
- Photo from at least three different angles
- One photo with an on-screen date/time stamp visible
Assemble each multi-angle defect set into a documentation grid using the photo collage maker. A grid keeps related angles together in a report instead of scattering them across pages.
Software and Storage
Three platforms dominate field-to-report construction photo workflows as of mid-2026:
CompanyCam (photo-focused, 100,000+ contractor users): automatically GPS-tags and timestamps every photo, organizes by project, supports annotations and before/after tools, integrates with Procore.
Procore (full PM platform with photo module): photos tie directly to drawings, RFIs, and inspections. Best when the project is already running on Procore.
Buildertrend (residential GC-focused): daily log integration, client-facing sharing options.
Cloud backup alone is not enough. Run a local backup to an external drive monthly. Photo loss is permanent.
How Long to Keep the Files
Retention requirements vary by state. Statutes of repose for construction defect claims range from 4 years (some states) to 15 years (Florida) after substantial completion, with Maryland at 20 years. The practical standard used by most construction attorneys: retain project photos for the full statute of repose period in your state, plus at least one additional year.
Ten years is a reasonable default if you do not want to track jurisdiction-by-jurisdiction, most states fall within that window. Storage for a decade of JPEG progress photos costs almost nothing compared to what a missing photo can cost in a dispute.
Frequently Asked Questions
How many photos should I take per site visit?
20-50 photos is the practical range for a standard monthly visit. Below 20 and you will have documentation gaps when disputes arise. Above 50, organize them into categories (elevation, structural, MEP, detail, defect) or they become unsearchable.
Do I need special equipment for construction progress photos?
A modern smartphone with GPS enabled covers most documentation needs. Upgrade to a DSLR for complex or luxury projects where disputes are more likely. For drone photography on commercial projects, an FAA Part 107 certified pilot is required.
What is the most common mistake in construction photography?
Letting vantage points drift between visits. When the camera position shifts even a few feet, month-to-month comparisons lose their persuasive value in reports and dispute documentation. Mark positions physically and log GPS coordinates on the first visit.
Should subcontractor work be photographed separately?
Yes. Photograph subcontractor work specifically, safety conditions, quality checkpoints, and scope progress. Subcontractors frequently dispute GC accounts of their work; photos of their scope on a dated record resolve those disputes quickly.
How should people be handled in progress photos?
Exclude people from documentation photos when possible. People in dispute photos can introduce privacy complications. For marketing or PR use after completion, people add life to the shots, but keep documentation and marketing sets separate.
Can I use phone auto-backup for construction photo storage?
As a supplement, not a primary system. Auto-backup to Google Photos or iCloud does not organize by project, does not preserve file naming conventions, and has no guarantee of retention. Use a dedicated construction platform or structured cloud folder, with a local external drive as a second copy.

Bello builds useful software and writes thoughtful content to make sense of it all. He tests the tools himself and checks the facts before any of it goes in a guide.
Essayez Nos Outils d'Image Gratuits
Prêt à Essayer ?
Mettez ces conseils en pratique avec notre outil de fusion d'images en ligne gratuit. Sans inscription.
Clean up your images, free


