
Summarise this article with:
A CVS passport photo set costs $17.99 and Walgreens charges $16.99 for two prints, while the Post Office photo fee is $15.00. One 4x6 print at a photo counter starts at $0.29 and holds four US 2 x 2 inch photos, so a compliant set costs under 15 cents. Here is the process, with the real specs and the layout arithmetic.
What You Need
- A smartphone camera (8MP or higher) or any modern digital camera
- A plain white or off-white wall, or a white sheet hung flat
- A photo printer with 4x6 glossy paper, or access to a print kiosk (Walgreens, Walmart, CVS)
- About 10 minutes
No software to install and no account to make. Our Passport Photo Maker handles the cropping and head sizing, and the Image Merger lays the copies onto a 4x6 sheet. Whatever you upload is processed on our own servers, deleted automatically within 7 days, and never shared or used to train models.
Step 1: Take the Photo
- Stand 4 to 6 feet from a plain white wall so you do not cast a shadow on it
- Face a window for soft daylight, no harsh overhead light
- Eyes open, mouth closed, head straight, looking at the lens. A closed-mouth smile is allowed
- Glasses off. The State Department requires it, and a signed doctor's note if you cannot remove them
- Have someone hold the camera at your eye level, or use a tripod and timer. Shoot 8 to 10 frames
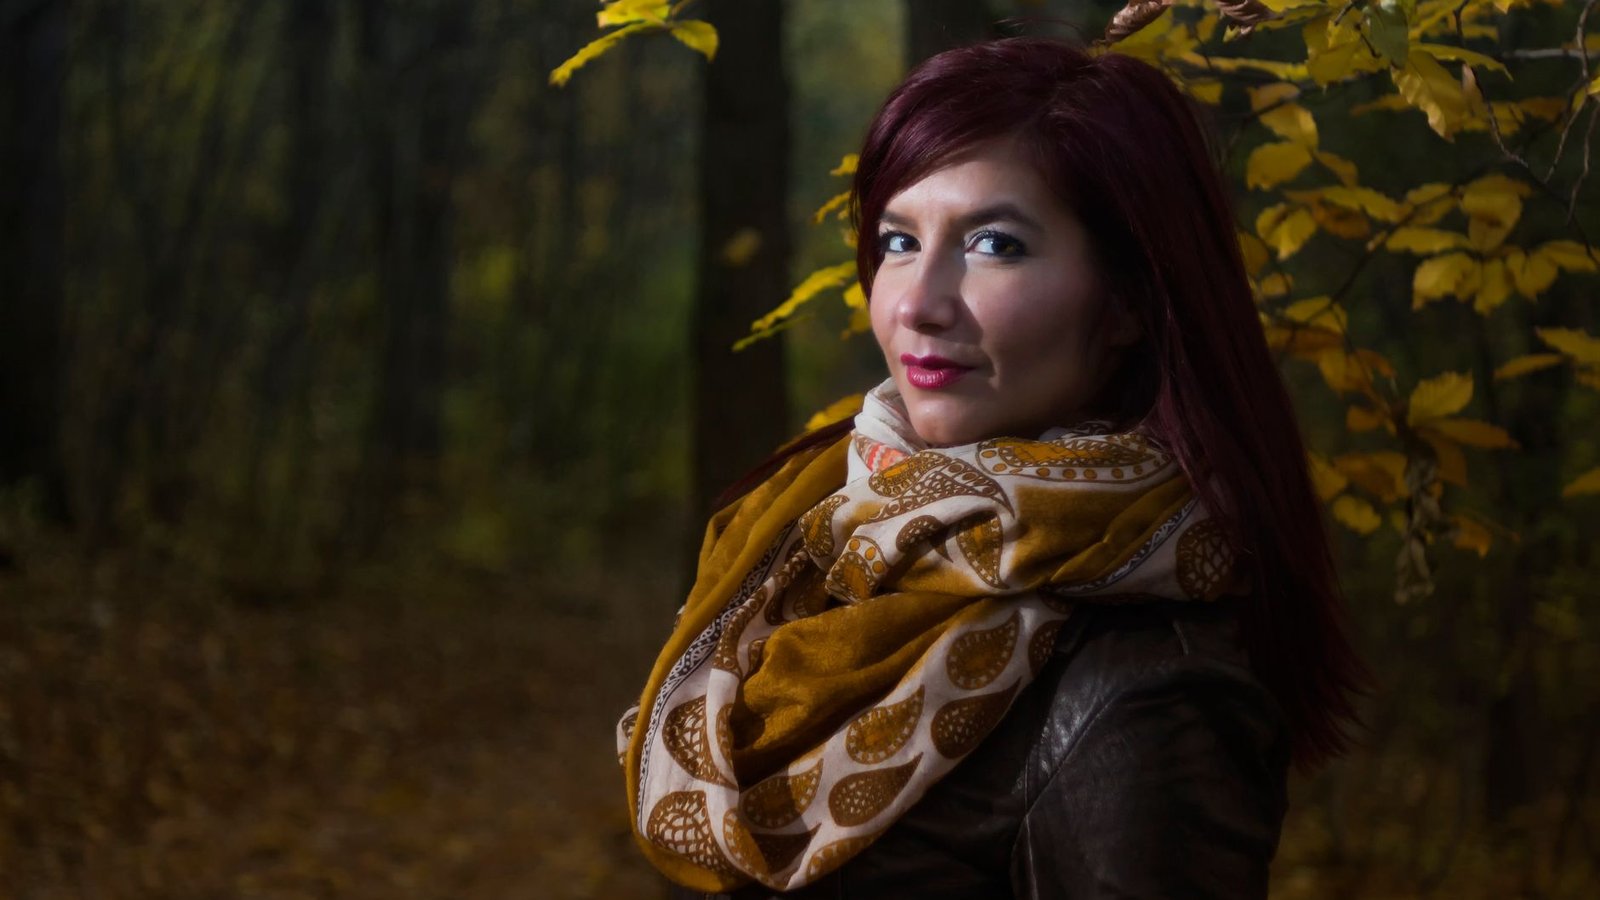
Photo: musicFactory lehmannsound via Pexels
Shadows on the background, a tilted head and uneven lighting are what get home photos rejected, and all three are cheaper to fix at capture time. On my first attempt I shot 11 frames against a living-room wall at about two in the afternoon, and 7 had a soft grey shadow behind my left shoulder because I was standing a foot from the plaster. Moving back five feet fixed it in one take.
Step 2: Size and Crop to Your Country's Spec
Upload your best frame to the Passport Photo Maker and pick your country. The tool finds your face, then crops and resizes to the official dimensions with the head positioned correctly:
- US passport: 2 x 2 inches (51 x 51 mm), white or off-white background
- UK passport: 45 mm high by 35 mm wide, plain cream or light grey background
- Canadian passport: 50 mm wide by 70 mm high
- Everywhere else: pick the country, India and the Schengen states included, and the tool applies that country's current frame
Pick the exact document, not just the country. Visa and ID photos often use a different frame from that country's passport.
The formats are easy to mix up, so here are the three common sizes drawn to scale.
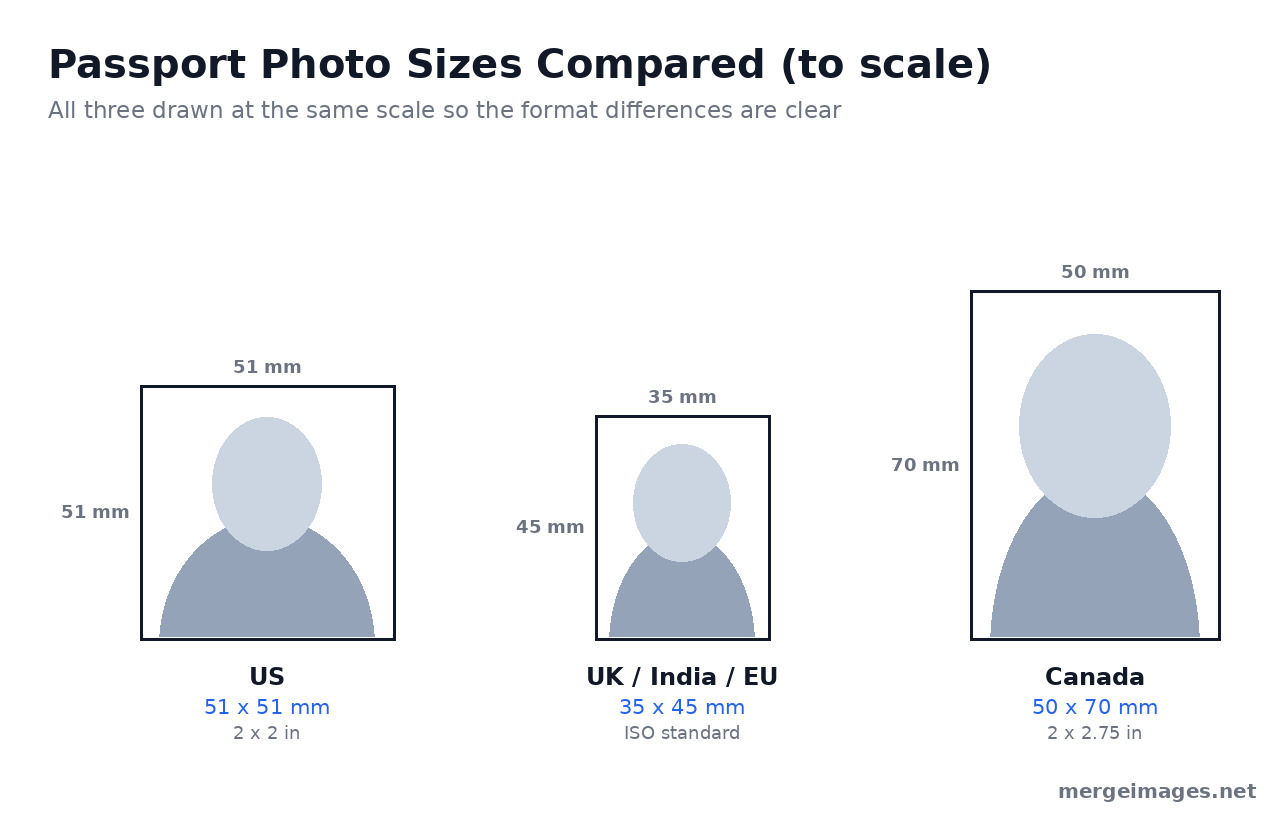
Head size is the spec people get wrong most often, and it is a different number in every country. The State Department wants 1 to 1 3/8 inches (25 to 35 mm) from chin to crown inside the 2 x 2 inch frame. The UK asks for 29 to 34 mm, Canada for 31 to 36 mm. The tool handles it, but know the target.
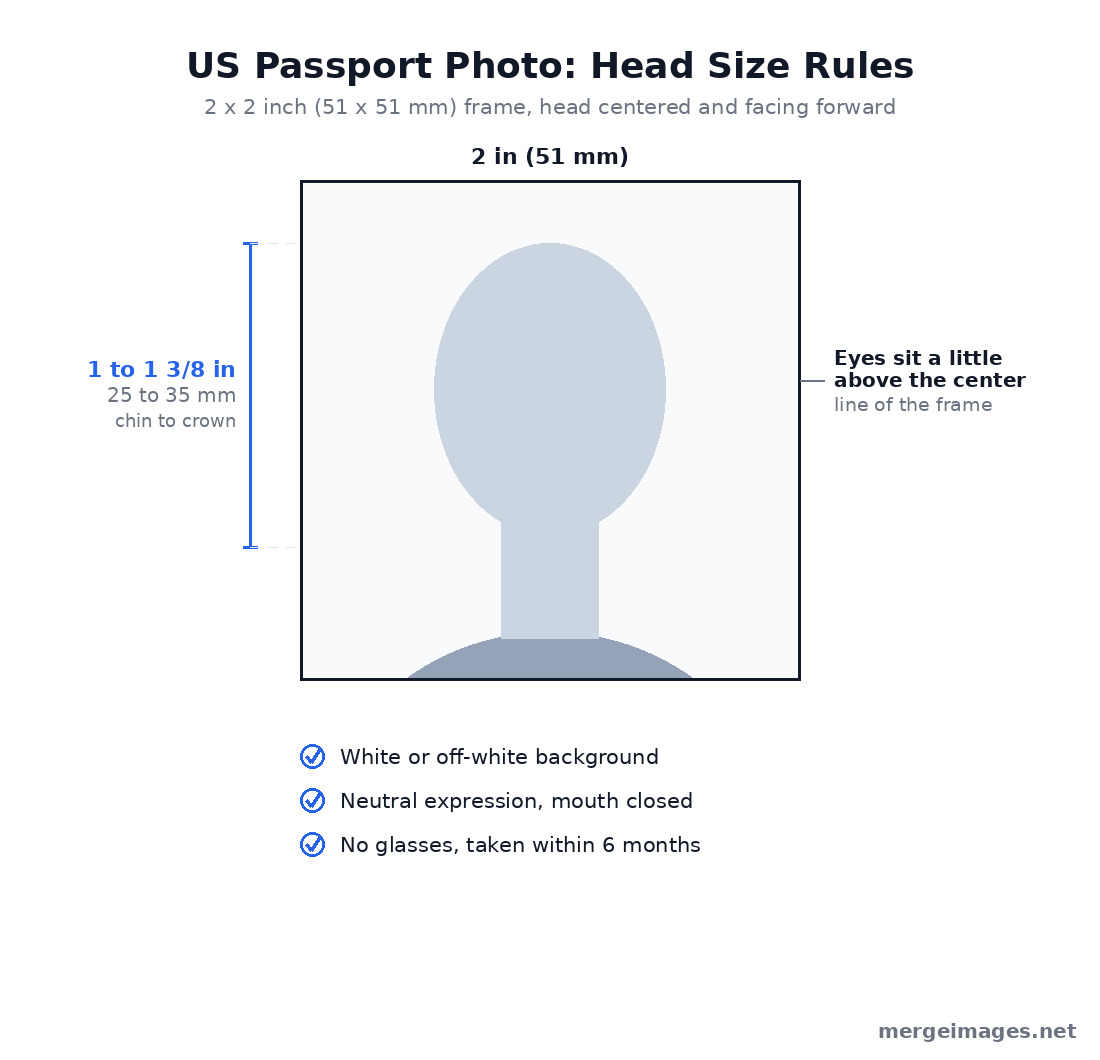
One background note before you print. The UK asks for plain cream or light grey rather than pure white, so do not over-brighten your wall for a British application. US photos want white or off-white, no shadows or texture.
What You Must Not Edit
Most home-printing guides skip this, and it is why plenty of decent photos come back rejected. The State Department's photo page says it plainly: do not change your photo using computer software, phone apps or filters, or artificial intelligence. Cropping and resizing to the official frame is fine, and State publishes its own tool that crops to exactly 600 x 600 pixels for online renewals. Swapping in a clean background, smoothing skin or erasing a shadow is not.
Use our tools for the geometry and leave the pixels alone. Canada is stricter again: its photo requirements count cropping around the head, changing the background and removing shadows as alterations that get an application refused, and Canada accepts no home-printed photo on any paper. For a Canadian passport, book a commercial photographer and skip this guide.
Step 3: Arrange Multiple Copies on a 4x6 Sheet
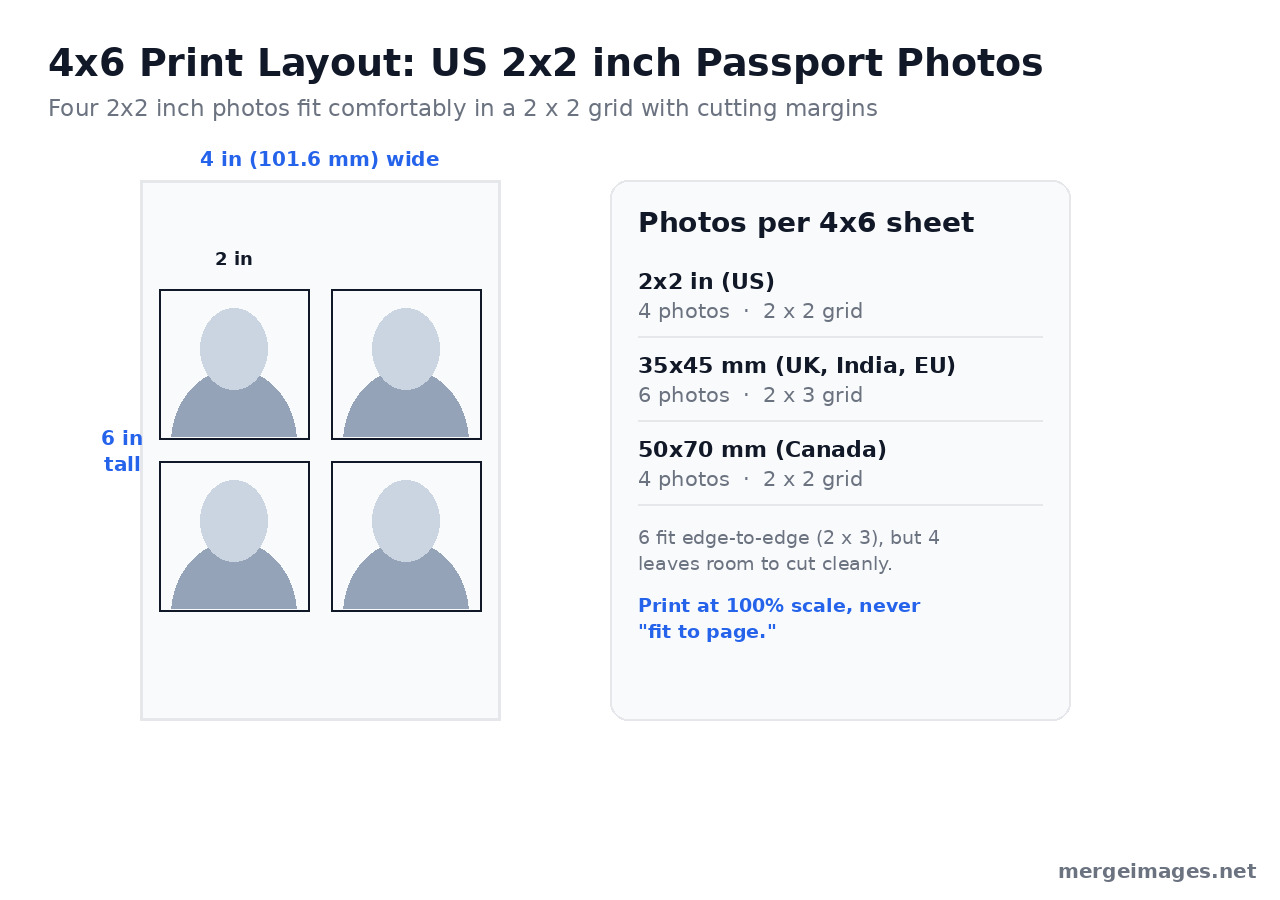
This is the trick that turns a $17.99 set into a 7 cent one. A 4x6 print holds several passport photos, so you print one sheet and cut out the copies.
| Photo Size | Photos per 4x6 | Arrangement |
|---|---|---|
| 2 x 2 inch (US) | 4 (6 if edge to edge) | 2 x 2 grid |
| 35 x 45 mm (UK, India, Schengen) | 6 | 2 x 3 grid |
| 50 x 70 mm (Canada) | 4 | 2 x 2 grid |
The math behind the table: a 4x6 sheet is 101.6 x 152.4 mm, and four 2 x 2 inch photos occupy exactly 4 x 4 inches, leaving two inches for cutting lines. Six fit edge to edge, but that uses the whole sheet and a millimetre of printer drift ruins one, so 4 is safer.
How to Build the Grid
- Download your correctly sized photo from the Passport Photo Maker
- Open the Image Merger and upload it as many times as you need (4 copies for a US sheet)
- Merge two copies horizontally for the top row, then two more for the bottom row
- Stack the two rows vertically to finish the 2 x 2 grid
- Set spacing to 2 or 3 pixels, which gives you a thin cutting guide
If you would rather drag copies into place, the Photo Collage Maker does the same job with a template picked by photo count. Either way you get one 4x6 image ready to print.
Step 4: Print at the Right Size
The setting that makes or breaks a home print is scale. Print at 100 percent, actual size. Never let the printer or kiosk "fit to page" or "scale to fill," which resizes your careful crop and throws the head measurement out of spec.
At Home
- Glossy or matte photo paper. State accepts both, and explicitly not plain office paper
- Highest quality setting, 300 DPI or better
- Choose 4x6 paper and turn off auto-fit or borderless scaling
- Print one sheet and check it with a ruler before printing more
At a Print Kiosk
- Save the merged 4x6 image to your phone, a USB drive, or an SD card
- Pick "4x6 print" and decline auto-crop, auto-enhance and red-eye, which all count as altering the photo
- Walgreens lists prints from $0.29, and one 4x6 carries four US photos
Online Print Services
- Any consumer photo lab will do 4x6 glossy prints, usually cheaper per print than a kiosk
- Shipping wipes out the saving on a single sheet, and turnaround is days rather than minutes
Step 5: Cut Out Each Photo
A guillotine trimmer, or a craft knife against a metal ruler, gives clean straight edges. Scissors work but are harder to keep square. Cut along the guide lines so each piece measures exactly 2 x 2 inches. Angled edges are a common rejection reason.
Cost Comparison
| Method | Cost | Time |
|---|---|---|
| CVS, two 2 x 2 prints | $17.99 | About 1 hour with travel |
| Walgreens, two 2 x 2 prints | $16.99 | About 1 hour with travel |
| Post Office photo fee | $15.00 | 30 to 60 min |
| One 4x6 at a counter (4 US photos) | From $0.29 | 15 min |
| Home printer | Paper and ink only | 10 min |
Savings: about $17 a set against CVS prices, and reprints cost you nothing if a shot fails.
Tips for Acceptance
- Photo paper only. Matte or glossy is fine, plain office paper is not
- Check colors first. A yellow tint from old ink is an easy rejection, so run a test print
- Use a photo taken within the last 6 months
- If your frame is small or soft, reshoot rather than upscale. An upscaler invents detail that was never captured, which is the kind of alteration these applications reject
- Get the background even and shadow free at capture time, because you are not allowed to clean it up later
- Cut precisely. Wobbly edges and the wrong size are the two most common reasons home photos get bounced
Frequently Asked Questions
Can I really print my own US passport photo at home?
Yes. The State Department lists three ways to get the photo taken: an acceptance facility, any company offering photo services, or a friend or family member who prints it on matte or glossy photo paper. Plain office paper is not accepted, and photocopies and scans are rejected outright. Canada is the exception and refuses home-printed photos entirely.
Will my photo be rejected if I edited the background?
Very likely. State says not to change your photo with computer software, phone apps, filters or artificial intelligence, and Canada explicitly names background changes and shadow removal as alterations that get an application refused. Crop and resize to the official frame, then leave the pixels alone. Shoot against a real white wall instead of manufacturing one.
How many passport photos fit on one 4x6 print?
Four US 2 x 2 inch photos fit in a 2 x 2 grid on a 101.6 x 152.4 mm sheet, with two inches of margin for cutting lines. Six fit if you butt them edge to edge, but one slip of the trimmer then ruins a photo. At 35 x 45 mm you get six in a 2 x 3 grid.
Can I smile in a US passport photo?
Yes. The State Department answers this one directly: smiling is fine as long as both eyes are open and your mouth stays closed. What gets photos bounced is a tilted head, a shadow on the background, or a head measuring outside the 1 to 1 3/8 inch range from chin to crown.
The Bottom Line
Between the Passport Photo Maker for the crop and the Image Merger for the 4x6 layout, a compliant US set costs a few cents. The money is the obvious part. The quieter advantage is control: you shoot in light you chose, you check against the published spec before you commit, and you reprint until you have a face you are happy to carry for ten years.

Bello builds useful software and writes thoughtful content to make sense of it all. He tests the tools himself and checks the facts before any of it goes in a guide.
Prueba Nuestras Herramientas de Imagen Gratuitas
¿Listo para Probarlo?
Pon estos consejos en práctica con nuestro editor de imágenes online gratuito. Sin registro.
Unir Imágenes Ahora


