
Summarise this article with:
Creating a photo book online in 2026 starts by choosing a clear story, then uploading your images to a trusted platform, arranging them chronologically, adding captions, selecting layout templates, customizing margins, previewing each page, ordering a printed copy, and finally receiving a bound album at your doorstep.
A clear story beats a photo dump every time. Write a one sentence description of your book's purpose before touching an editor. “Emma's first year 12 images, one per month” or “Italy road trip 30 defining moments” acts as a strict decision filter. Asking which photo better tells that story trims your file load by half. This habit keeps the final product focused.

Photo: cottonbro studio via Pexels
Prepare High-Resolution Images
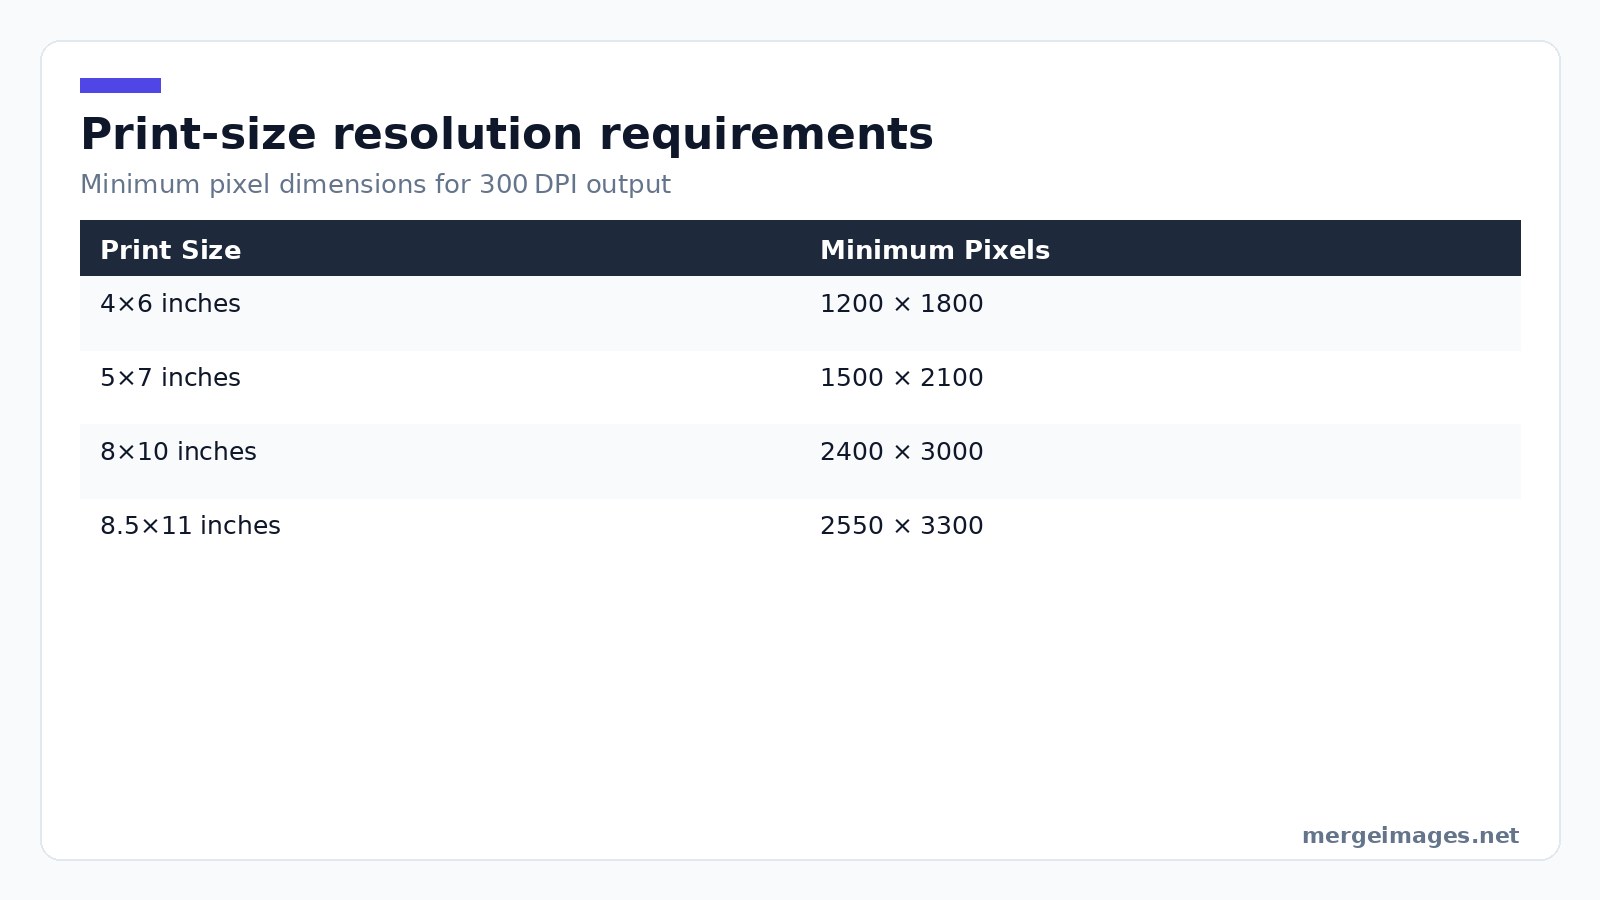
Print quality collapses under low-resolution sources. A 4x6 inch spread needs at least 1200x1800px. Larger formats demand more. Gather every image from your cloud albums and export them at the original resolution to a desktop folder. Once the files sit locally, run each through Enhance Photo. This one-click auto-enhance lifts contrast and sharpness without the guesswork of manual sliders. Check the dimensions next. Resizing a 4000x3000 portrait to 1800x1350 using Image Resizer drops the file to 1.2MB while retaining crisp edges. Perfect for a 6x4 layout.
If a picture falls short of the 300DPI target, the AI upscaler can rescue it. Keep that as a last resort. Every upscale adds a subtle softness. Replacing the shot with a higher-quality original is always better whenever possible. In practice you’ll notice that a photo taken with a phone in low light often fails the 300DPI test even after upscaling; the grain becomes visible in the printed page. In those cases consider swapping the image for a later-day shot or a different angle rather than forcing a poor file.
Use Free Browser Tools for Quick Edits
Do the heavy lifting in the browser. No download required. Image Resizer lets you set exact pixel dimensions or a percentage scale. I often shrink bulk-shot panoramas to 250% of their original size to fit a spread without losing detail. Enhance Photo adds a subtle pop that makes skin tones look natural and skies richer. Ideal for travel books where lighting varies day to day. When a page calls for a themed layout, Photo Collage Maker builds a grid with custom spacing in seconds. Drag the ready-made collage into your book builder as a single image. You just saved minutes of manual alignment.
Organize Files for Easy Upload
A tidy folder tree mirrors the book's narrative flow. Build a 01 cover folder for the hero image that will sit on the spine. Follow it with 02 opening spread for 1 to 3 standout photos. Then use 03 chapter one for related shots in the first section, and 04 chapter two to continue the sequence. Most online book platforms let you drop entire folders into the project canvas. Pre-sorting means you avoid hunting for the right file mid-design. You can batch-upload a whole chapter with a single click. If you forget to name a folder consistently, the platform may reorder pages unexpectedly, so a naming convention that includes a numeric prefix is a safety net.
Design Spreads With Intent
Think in two-page spreads. Not isolated pages. The left-right relationship guides the viewer's eye across the gutter. I rely on three repeatable patterns:
- Hero plus support, a large image on the left, two smaller companions on the right.
- Sequence, 3 to 4 chronological shots that flow across both pages.
- Full bleed, one image that spans the spread, used sparingly for impact.
White space is a design ally. Not wasted real estate. Adding a half-inch margin around each photo makes the layout breathe and signals quality. Override templates that force tighter spacing manually. The extra blank area pays off when the book is opened on a coffee table. Beware of cramming too many images into a single spread; the eye loses focus and the printer may compress colors, resulting in a dull final page.
Build Collages and Multi-Photo Layouts
When a single spread needs more than three pictures, pre-compose the layout with Photo Collage Maker. Choose a grid template. Drop the images. Adjust the gap. Export at 300DPI. For side-by-side comparisons like a renovation before and after, the horizontal merge tool stitches two images into one wide file that fits a landscape spread perfectly. Vertical merges work for timelines. Stack months of baby photos into a tall column and crop it to the page size. These composites become single JPEGs that you upload like any other photo. The book builder sees a ready-made layout. You avoid fiddling with built-in frames that often limit resolution.
Choose Paper, Binding, and Print Service
Paper type shapes the mood. Matte delivers a soft, glare-free look ideal for family portraits. Gloss pushes color saturation for children’s books. Lustre offers a subtle sheen that sharpens detail for travel scenes. Binding matters for spreads that cross the gutter. Lay-flat binding eliminates the middle-fold gap, letting a full-bleed image appear uninterrupted. Worth the extra cost for a premium feel. Service selection hinges on price, paper quality, and turnaround. For a heirloom-grade book, a provider known for thick matte stock and lay-flat binding is the safe bet. For a casual yearly recap, a budget service with frequent discounts keeps the project affordable. Always order a single proof copy before committing to a larger run. A misplaced typo or mis-aligned image is costly to fix after printing. In practice, proof copies also reveal subtle color shifts that only appear when ink meets paper; adjust your PDF accordingly before the final order.
Final Review and Ordering Tips
Before you hit “order,” run a checklist:
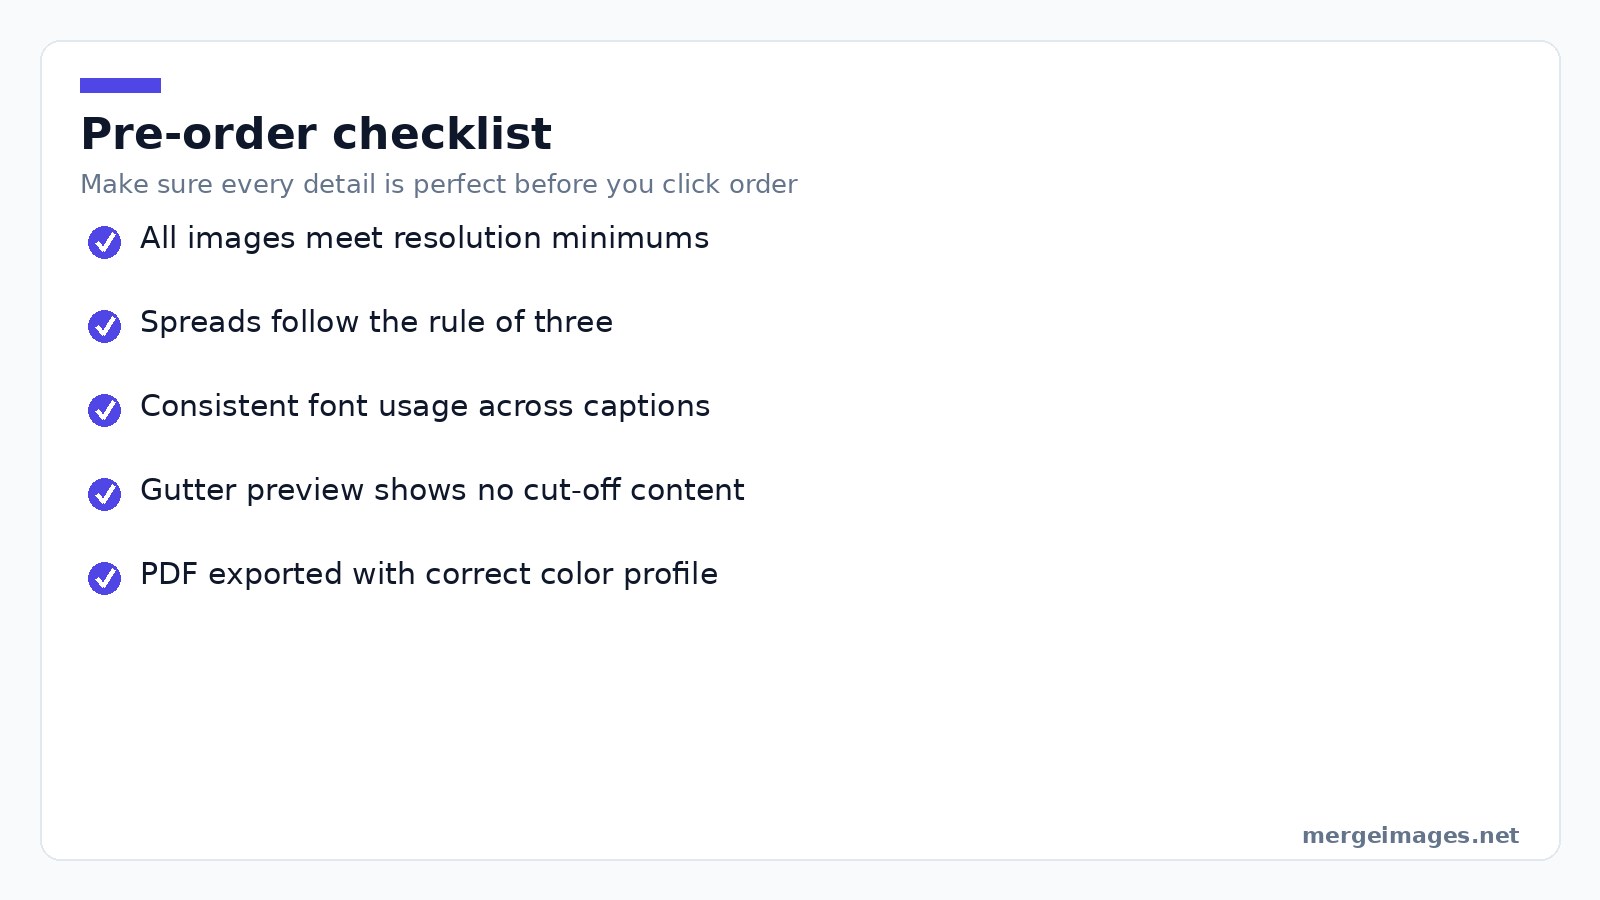
- Verify every image meets the minimum resolution for its printed size.
- Confirm that each spread follows the golden rule of three: no more than three photos per spread unless you’re using a collage.
- Check that captions, if any, use the same font family throughout.
- Preview the gutter on lay-flat spreads to ensure no important detail is lost.
- Export the final PDF at the printer’s recommended color profile (usually sRGB for online services).
Once the PDF is ready, upload it. Select your paper and binding. Choose a view-only link to share digitally with friends and family. That link lets others enjoy the book without printing extra copies.
Frequently Asked Questions
How many photos should a photo book contain?
A 20-page 8×10 book comfortably holds 40 to 80 images. A “best of year” collection works well with 50 to 70 photos. A wedding album often spans 100 to 150 across 40 to 60 pages.
What's the difference between a photo book and a photo album?
A photo book is a single-run printed volume where pages are designed together. A traditional album uses pockets or adhesive pages for loose prints. This offers flexibility but often lower print quality.
Can Instagram pictures be used in a photo book?
Yes, but Instagram limits images to 1080×1080px. This prints cleanly only up to about 3.6×3.6 inches at 300DPI. Larger prints need an upscale step with an AI tool before they're upload-ready.
How long will a photo book last?
When stored away from direct sunlight and humidity, a well-bound book from a quality service can last 25 to 75 years. Acid-free paper extends that lifespan significantly.
Do I need special software to design spreads?
You can create most layouts with the free browser tools listed above. Complex typographic work may require a dedicated design app. For the majority of photo books, the Collage Maker, Image Resizer, and Enhance Photo provide everything needed. Pro tip: After ordering, keep the original high-resolution folder for future re-prints or digital sharing. It’s the safest way to preserve your memories for the next generation.

Bello builds useful software and writes thoughtful content to make sense of it all. He tests the tools himself and checks the facts before any of it goes in a guide.
Essayez Nos Outils d'Image Gratuits
Prêt à Essayer ?
Mettez ces conseils en pratique avec notre outil de fusion d'images en ligne gratuit. Sans inscription.
Enhance your photos, free


